开发环境搭建
MySQL下载安装
成功如下: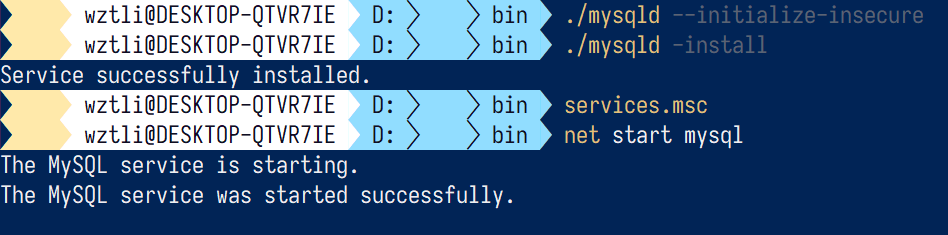
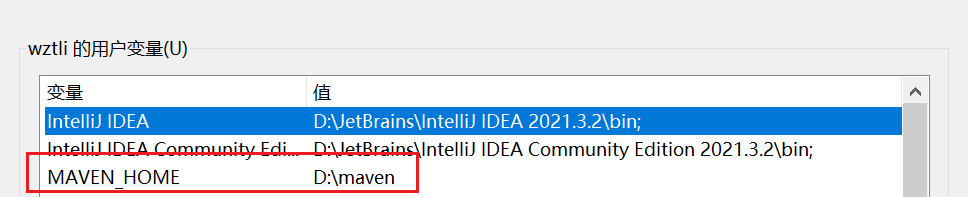
再配置环境变量(和java环境变量配置一样)
IDEA下载安装
IDEA下载:https://www.jetbrains.com.cn/idea/download/#section=windows
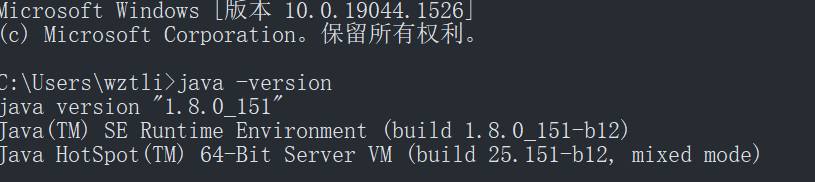
java下载安装
Maven下载安装


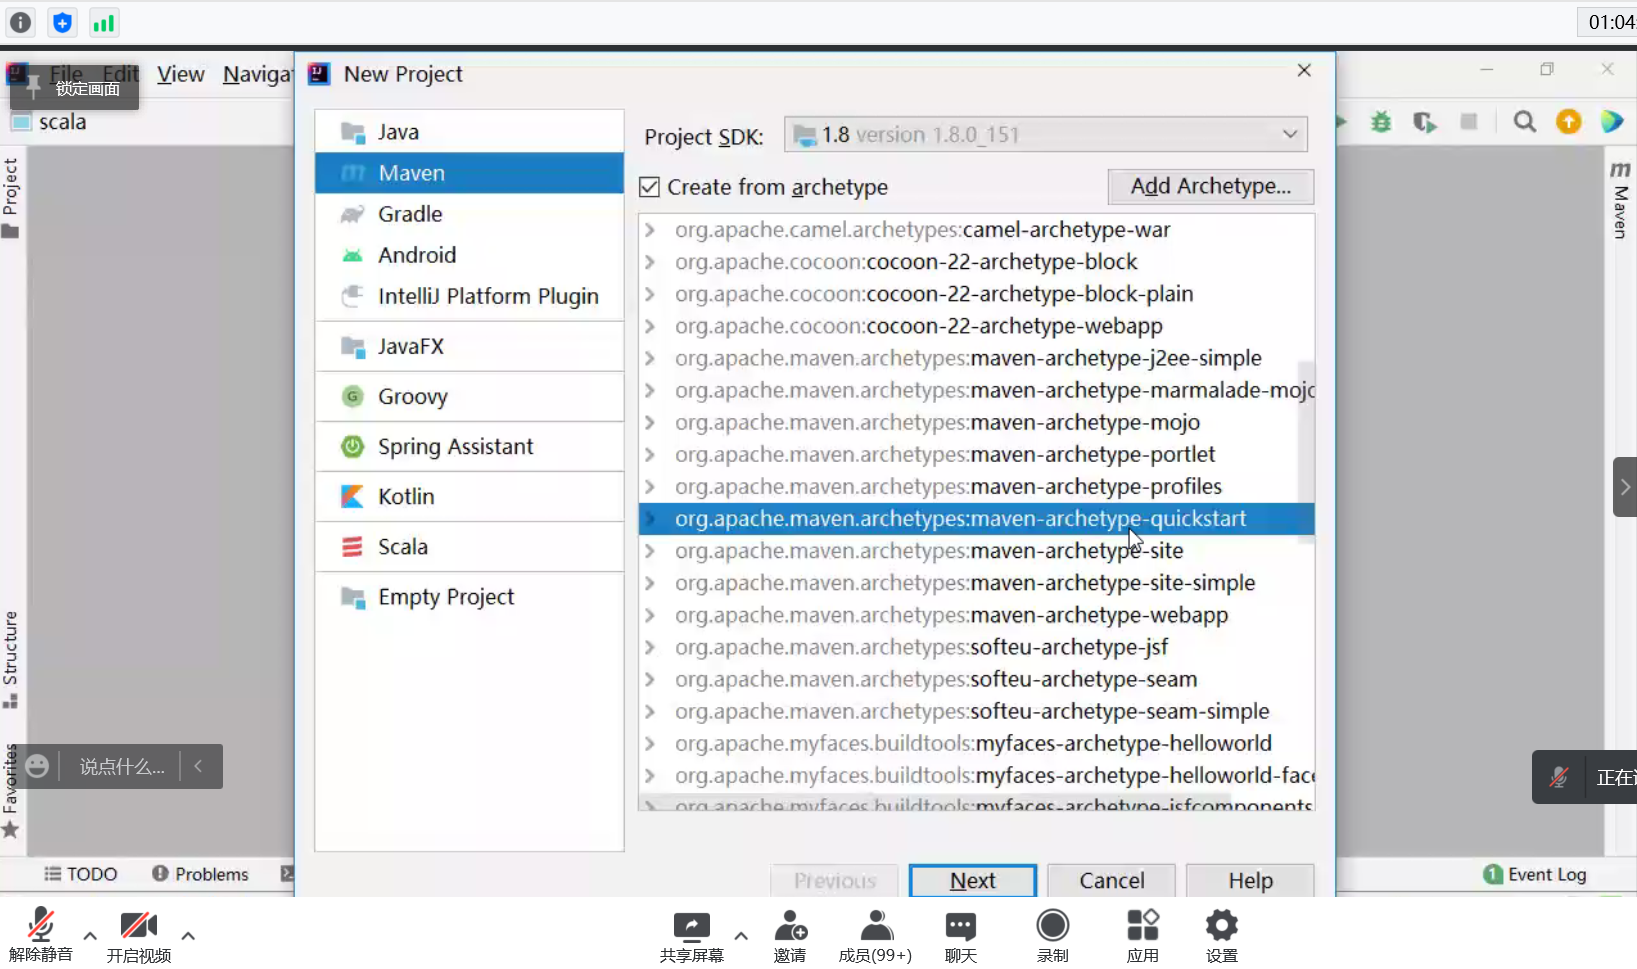
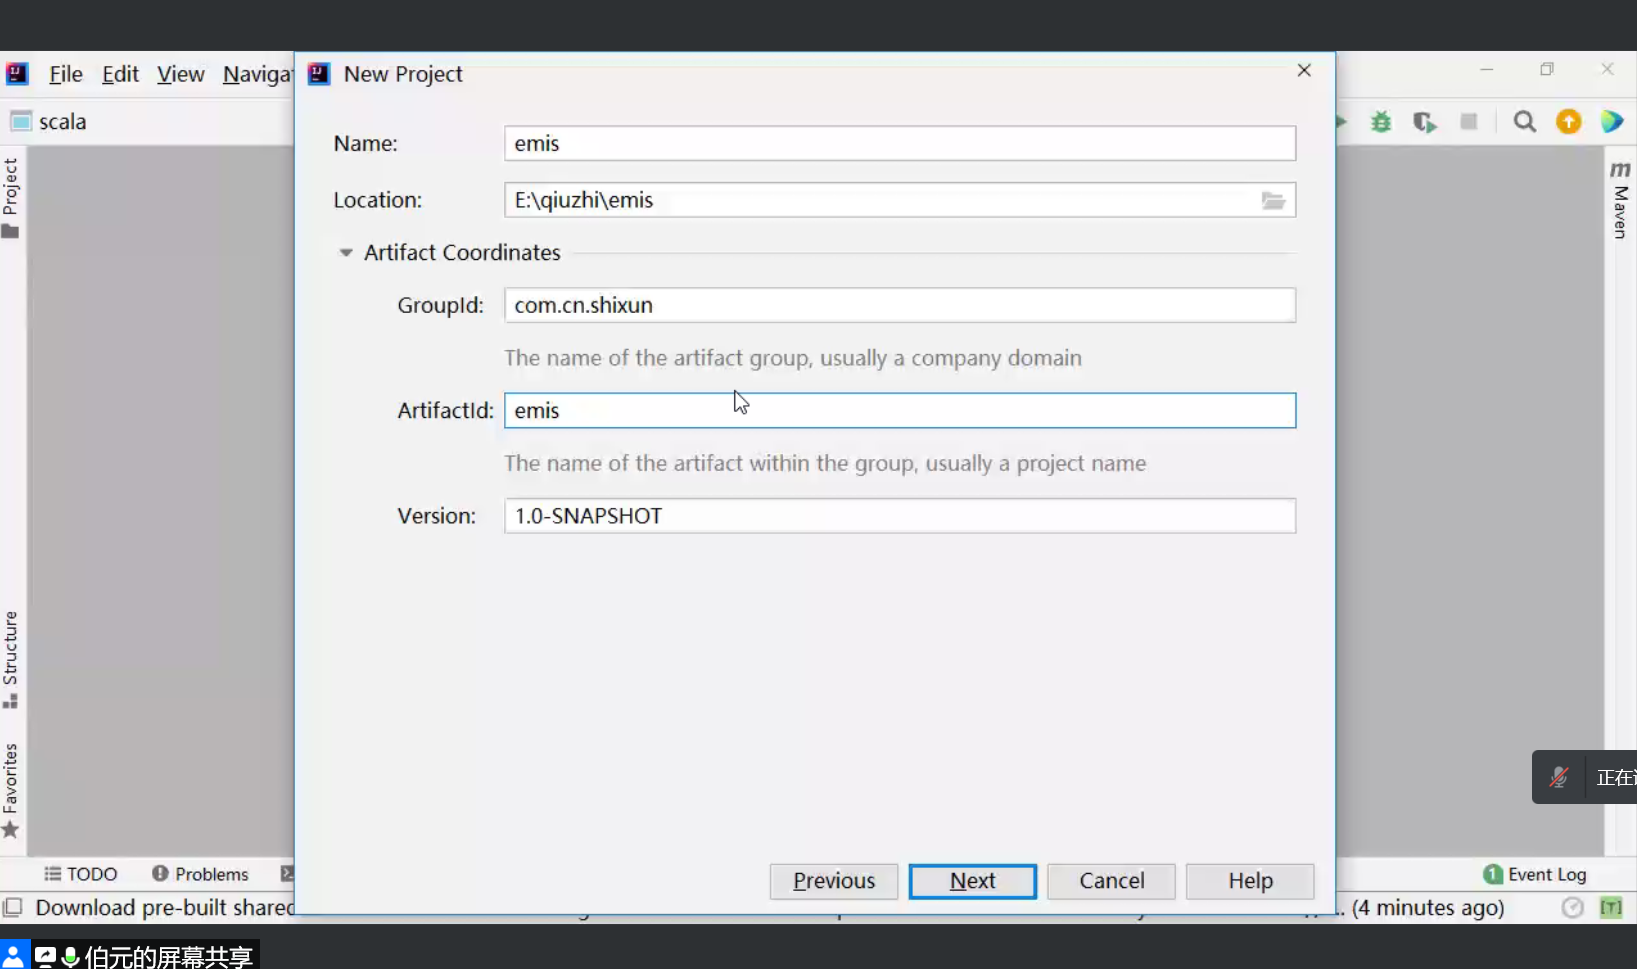
创建springboot应用程序
Maven模板快速创建项目
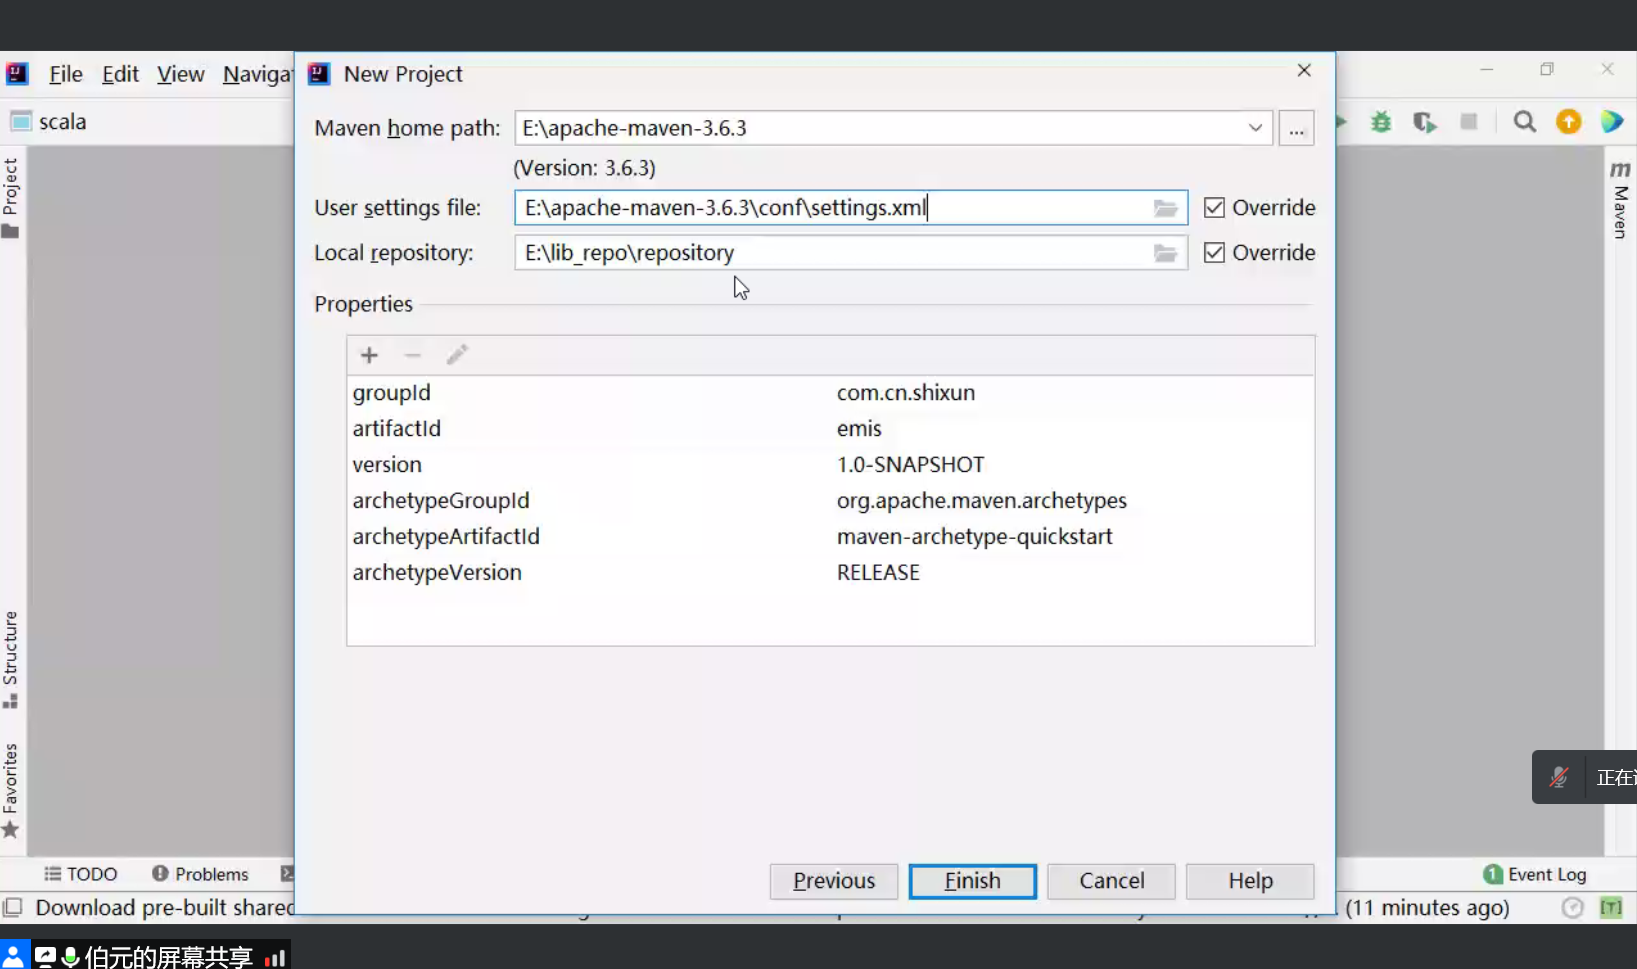
配置Maven的settings文件
关于cong文件夹中的settings.xml文件(D:\maven\conf):
- maven用来构建项目
- java需要外部的jar包,外网的中央仓库,下载本地仓库
setting.xml文件里面的盘符注意
<localRepository>D:/lib_repo/repository</localRepository>
用阿里的源站下载
<mirrors><!-- 这里使用的是阿里的远程maven镜像,目前国内大多数都使用它 --><mirror><id>alimaven</id><name>aliyun maven</name><url>http://maven.aliyun.com/nexus/content/groups/public/</url><mirrorOf>central</mirrorOf></mirror></mirrors>
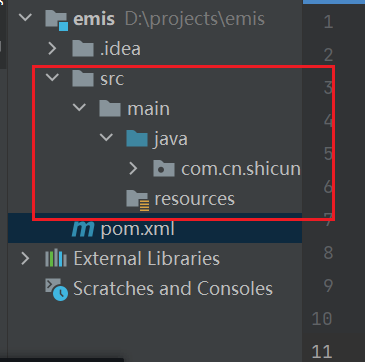
添加src/main/java目录
pom.xml添加项目依赖jar包
打开pom.xml文件,改配置文件,添加依赖项,具体修改为如下:
<?xml version="1.0" encoding="UTF-8"?><project xmlns="http://maven.apache.org/POM/4.0.0"xmlns:xsi="http://www.w3.org/2001/XMLSchema-instance"xsi:schemaLocation="http://maven.apache.org/POM/4.0.0 http://maven.apache.org/xsd/maven-4.0.0.xsd"><modelVersion>4.0.0</modelVersion><parent><groupId>org.springframework.boot</groupId><artifactId>spring-boot-starter-parent</artifactId><version>2.6.2</version><relativePath/> <!-- lookup parent from repository --></parent><groupId>com.cn.shicun</groupId><artifactId>emis</artifactId><version>1.0-SNAPSHOT</version><name>emis</name><properties><project.build.sourceEncoding>UTF-8</project.build.sourceEncoding><maven.compiler.source>1.8</maven.compiler.source><maven.compiler.target>1.8</maven.compiler.target></properties><dependencies><dependency><groupId>org.springframework.boot</groupId><artifactId>spring-boot-starter-web</artifactId></dependency></dependencies><build></build></project>
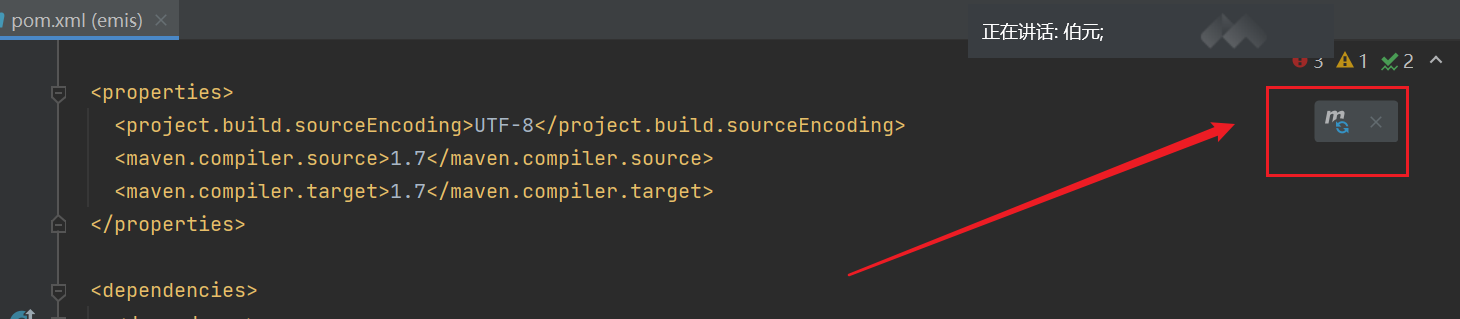
点击右上角蓝色更新按钮
然后idea会自动下载这些jar包(Maven优势之一,就是会自动下载jar包)
下载成功如下所示: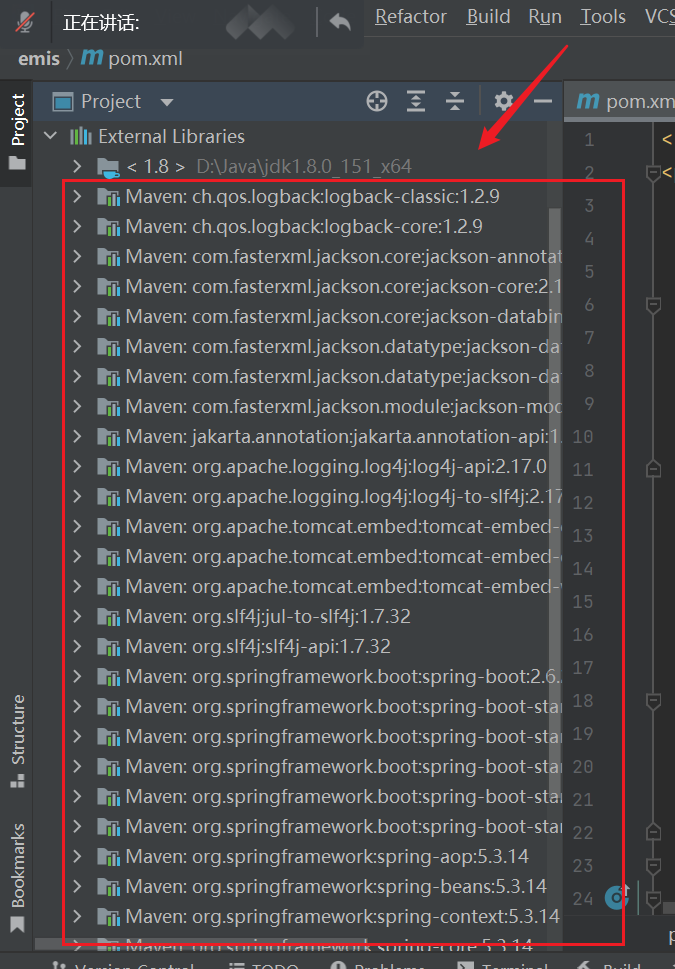
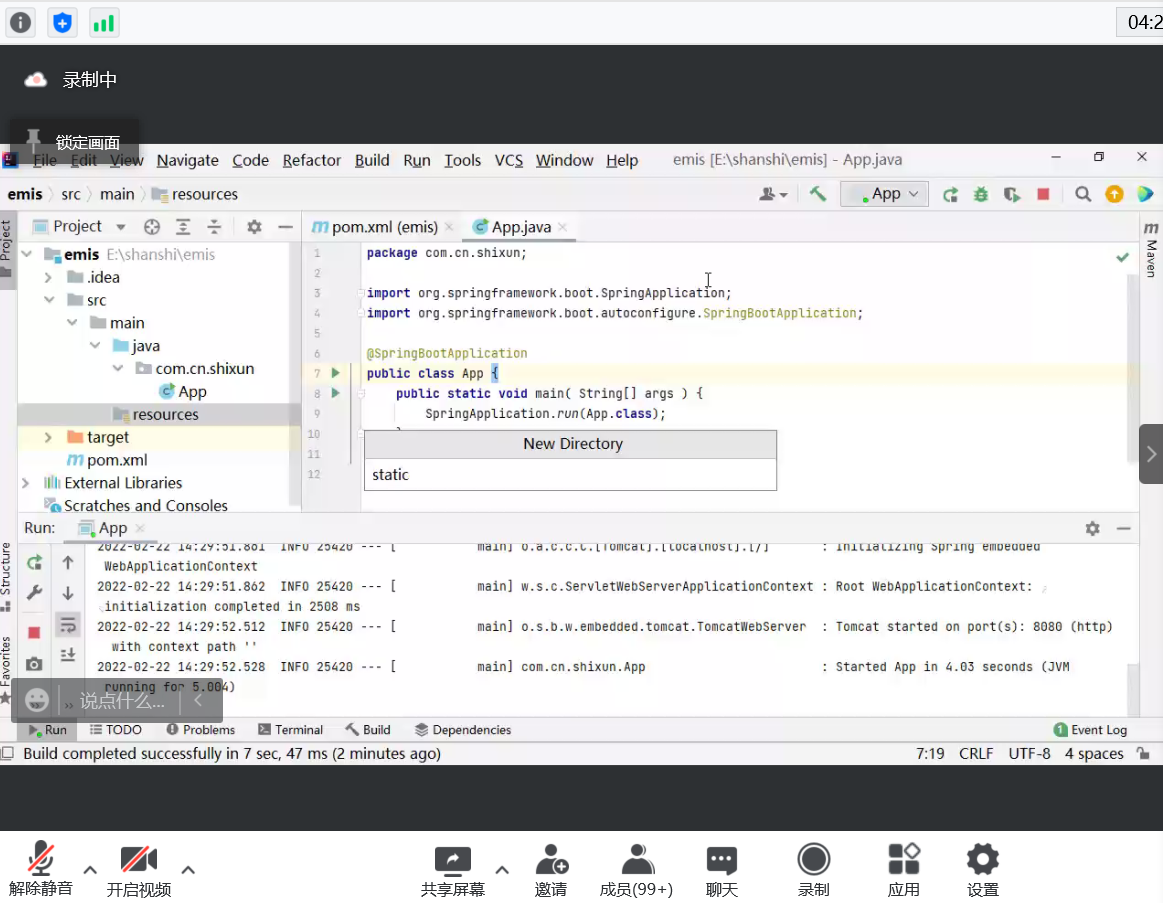
运行springboot应用程序
测试代码
如下位置写入如下代码:
 ```java
package com.cn.shixun;
```java
package com.cn.shixun;
import org.springframework.boot.SpringApplication; import org.springframework.boot.autoconfigure.SpringBootApplication;
@SpringBootApplication public class App { public static void main( String[] args ) { SpringApplication.run(App.class); } }
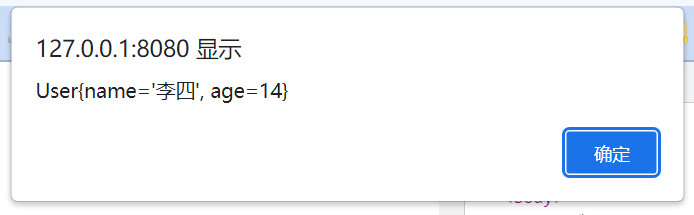
<a name="fzUO5"></a>### 静态资源然后在resources新建文件夹static,在其中写入index.html文件,然后运行App代码<br />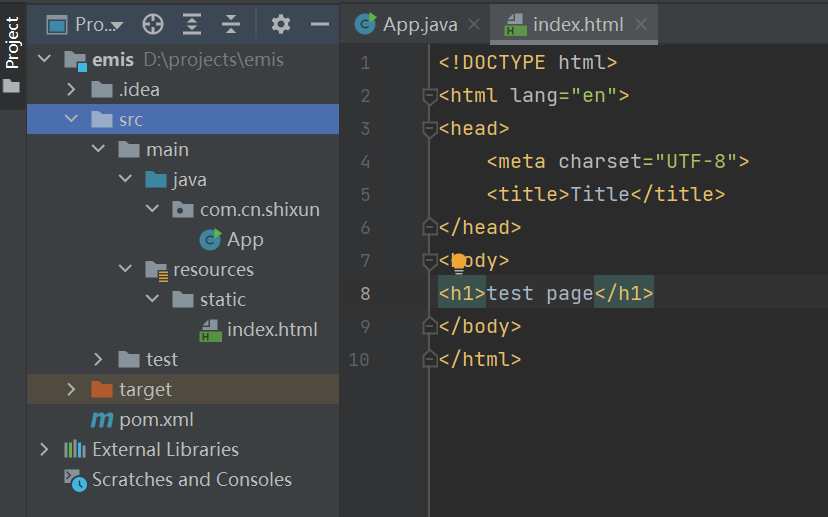<br />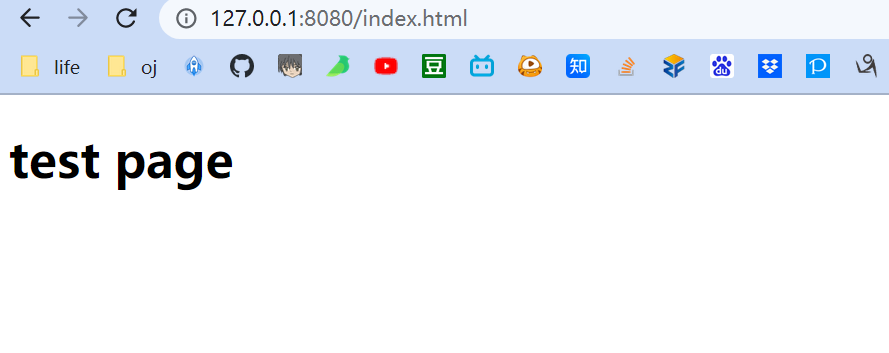<a name="R4FjW"></a>### idea实时刷新前端代码设置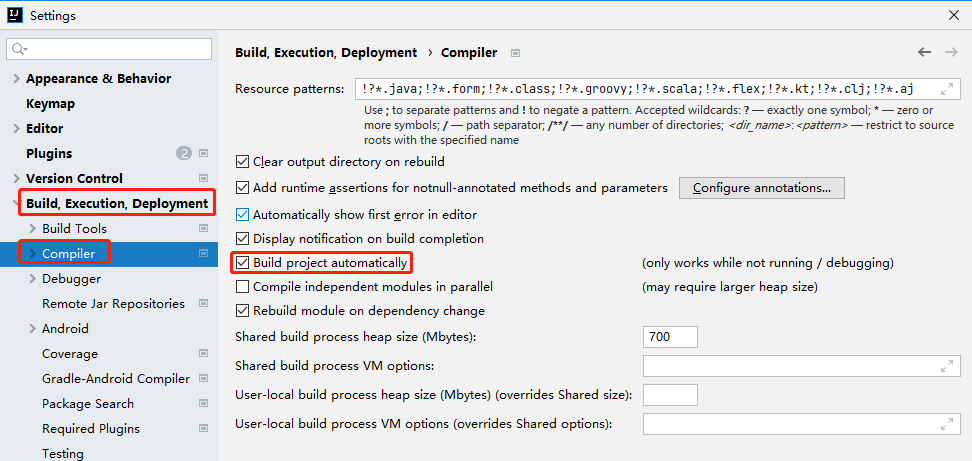<br />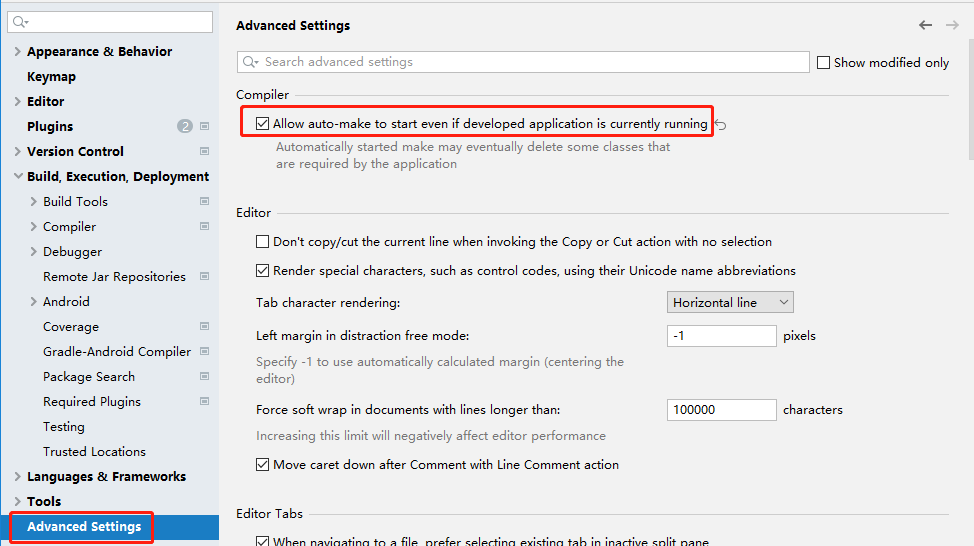<a name="b0Yyp"></a>## 前后端架构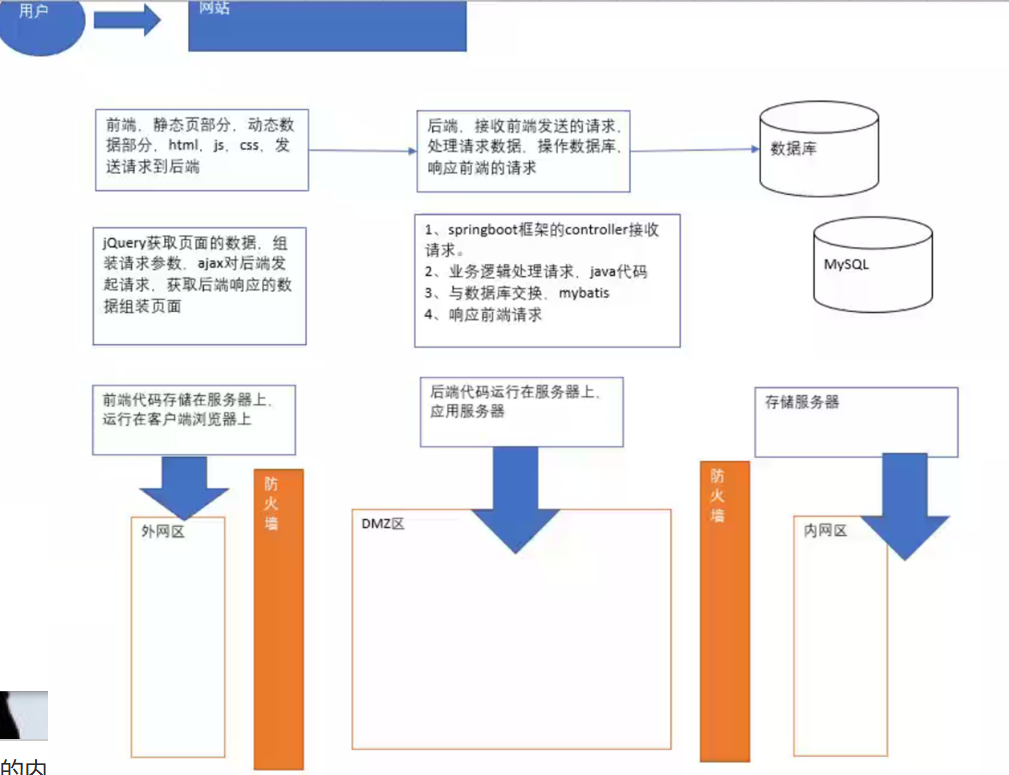<a name="UzUhw"></a>## 前端<a name="LL54d"></a>### jQuery的Ajax的使用jQuery其他相关笔记之前已经学过,不做赘述,此文只做Ajax相关的笔记<br />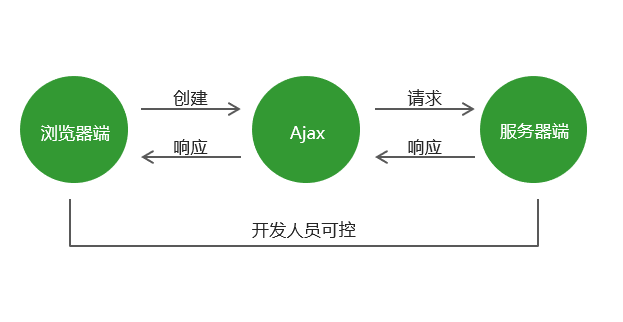```javascript// Ajax ===============================================================let ajaxDemo = function(){$.ajax({type : "post",url : "https://127.0.0.1:8080/test/demo2",data : {"name" : "李四","age" : 14},// dataType : "json",success : function(data) {// 后端的返回值alert(data);}});}
<input type="button" value="ajax点击按钮" onclick="ajaxDemo();">
原生JavaScript的Ajax使用
function ajax (options) {// 默认值var defaults = {type: 'get',url: '',data: {},header: {'Content-Type': 'application/x-www-form-urlencoded'},success: function () {},error: function () {}}// 使用用户传递的参数替换默认值参数Object.assign(defaults, options);// 创建ajax对象var xhr = new XMLHttpRequest();// 参数拼接变量var params = '';// 循环参数for (var attr in defaults.data) {// 参数拼接params += attr + '=' + defaults.data[attr] + '&';// 去掉参数中最后一个¶ms = params.substr(0, params.length-1)}// 如果请求方式为getif (defaults.type == 'get') {// 将参数拼接在url地址的后面defaults.url += '?' + params;}// 配置ajax请求xhr.open(defaults.type, defaults.url);// 如果请求方式为postif (defaults.type == 'post') {// 设置请求头xhr.setRequestHeader('Content-Type', defaults.header['Content-Type']);// 如果想服务器端传递的参数类型为jsonif (defaults.header['Content-Type'] == 'application/json') {// 将json对象转换为json字符串xhr.send(JSON.stringify(defaults.data))}else {// 发送请求xhr.send(params);}} else {xhr.send();}// 请求加载完成xhr.onload = function () {// 获取服务器端返回数据的类型var contentType = xhr.getResponseHeader('content-type');// 获取服务器端返回的响应数据var responseText = xhr.responseText;// 如果服务器端返回的数据是json数据类型if (contentType.includes('application/json')) {// 将json字符串转换为json对象responseText = JSON.parse(responseText);}// 如果请求成功if (xhr.status == 200) {// 调用成功回调函数, 并且将服务器端返回的结果传递给成功回调函数defaults.success(responseText, xhr);} else {// 调用失败回调函数并且将xhr对象传递给回调函数defaults.error(responseText, xhr);}}// 当网络中断时xhr.onerror = function () {// 调用失败回调函数并且将xhr对象传递给回调函数defaults.error(xhr);}}
AdminLTE框架
文档:https://adminlte.io/
下载adminlte及其依赖放到静态文件夹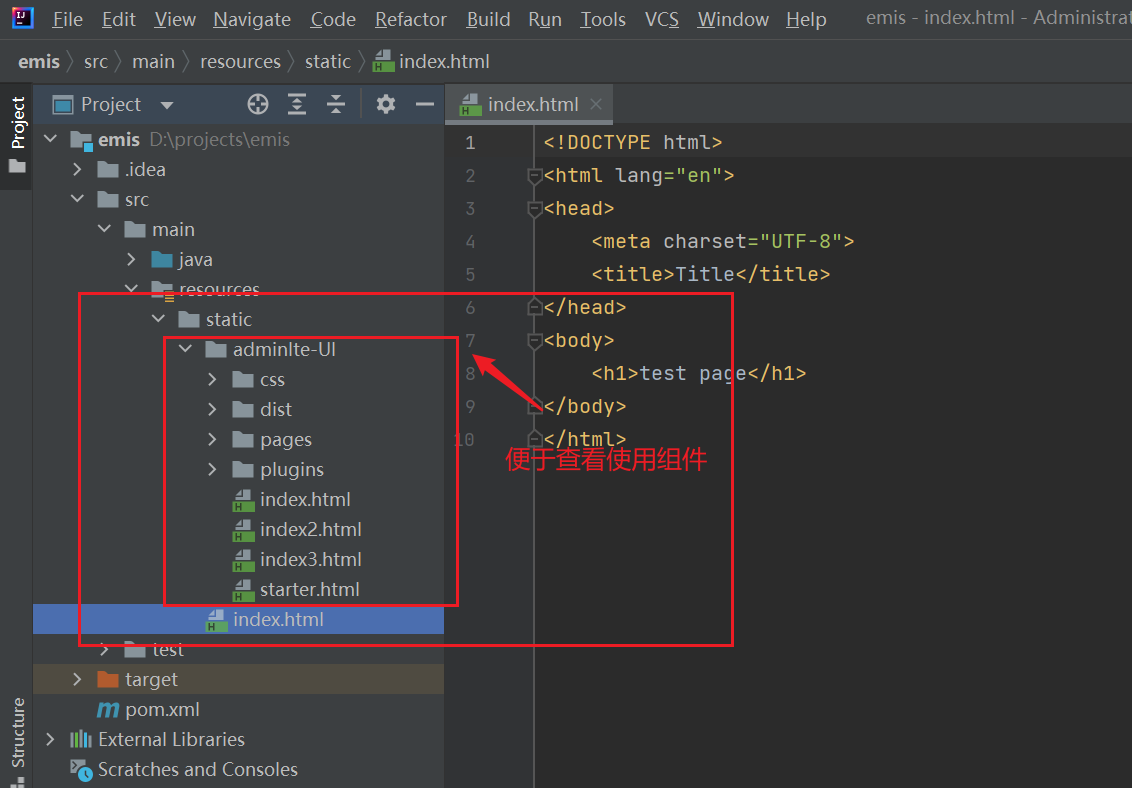
使用jsDelivr外链来构建
https://cdn.jsdelivr.net/npm/admin-lte@3.2/dist/css/adminlte.min.css
https://cdn.jsdelivr.net/npm/admin-lte@3.2/plugins/fontawesome-free/css/all.min.css
构建管理类系统的静态页模板
利用AdminLTE UI模板搭建出项目所需的目的页面(在static里面写出想要的各种效果)
管理类系统的页面类型大概有以下几类:
- 登录页(大多数的管理类系统都没有注册页,需要通过用户管理模块增加用户)。
http://127.0.0.1:8080/pages/login.html
- 欢迎页,登录成功后进入的首页。
http://127.0.0.1:8080/pages/index.html
- 列表页,展示数据集合的表格,一般带分页和查询功能,展示的每行数据的最后会有可以点击的“修改”和“删除”功能。
- 新增/修改页,一个form表单,同一个的功能模块的新增/修改页的表单元素是一致的,只是修改页需要回填数据。
- 其他特殊页,例如在线答题页、数据统计页、文件上传页等等,这些在管理类系统中的占比很小。
后端:Springboot 学习
记录一下框架的API使用参考资料
vscode运行springboot项目
SpringBoot编写接口
@SpringBootApplication
主要方法是通过调用run来委托Spring Boot的SpringApplication类。
SpringApplication引导我们的应用程序,从Spring开始,然后启动自动配置的Tomcat Web服务器。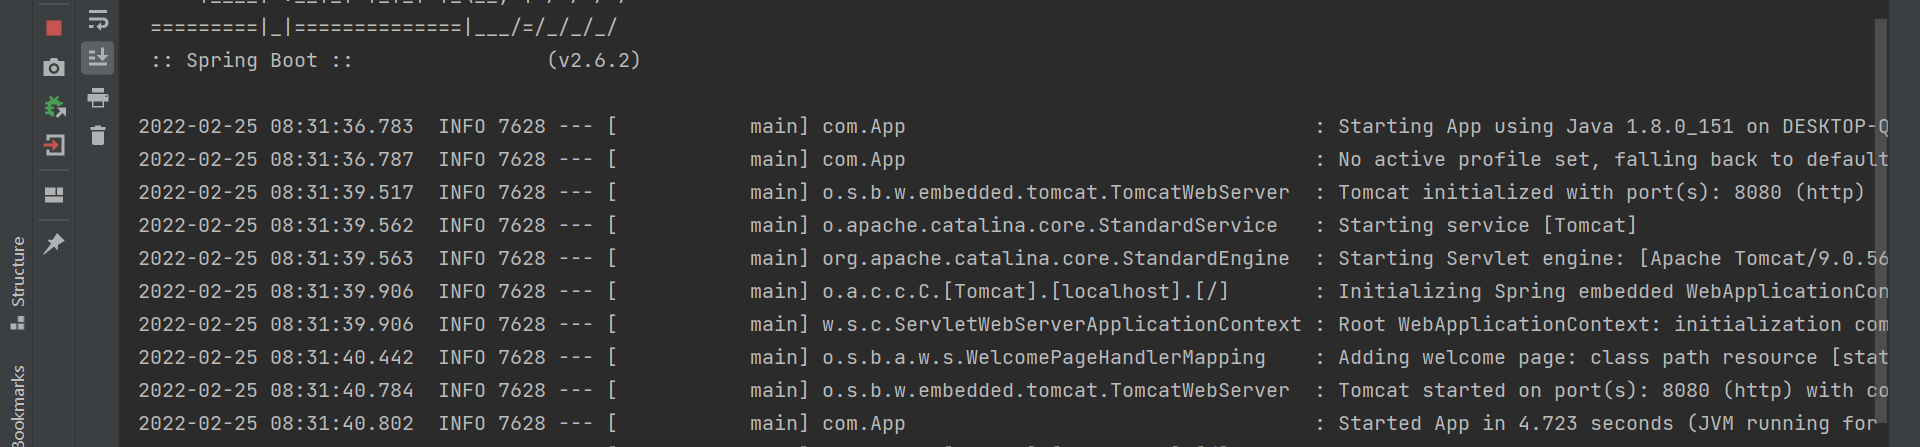
我们需要将Example.class作为参数传递给run方法,以告诉SpringApplication哪个是主要的Spring组件。
还会传递args数组以公开任何命令行参数。
springboot的启动类是有作用范围的
@Controller
所创建的类是一个web @Controller,所以Spring在处理传入的Web请求时会考虑它。
@RequestMapping(“test”)
@RequestMapping注释提供“路由”信息。它告诉Spring任何带有/test路径的HTTP请求都应该映射到所写的test方法。
@responseBody
@responseBody注解的作用是将controller的方法返回的对象通过适当的转换器转换为指定的格式之后,写入到response对象的body区,通常用来返回JSON数据回格式是text/json(或者是XML)数据,需要注意的呢,在使用此注解之后不会再走试图处理器,而是直接将数据写入到输入流中,他的效果等同于通过response对象输出指定格式的数据。
@RestController
类上写上注解 @RestController,那么此Controller返回格式就都是text/json
后端:数据库学习
表关系
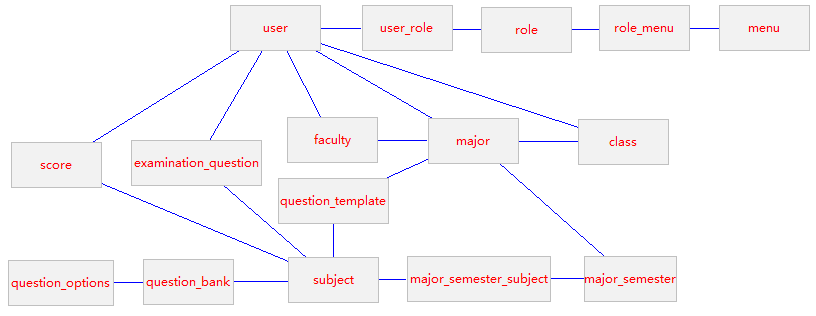
权限控制:
RBAC,role based access control,基于角色的访问控制
用户,角色,功能(项目的粒度到二级菜单即可)
user,userrole,role,role_menu,menu
用户角色组,角色则,角色组_角色
数据表的初始化
连接本地数据库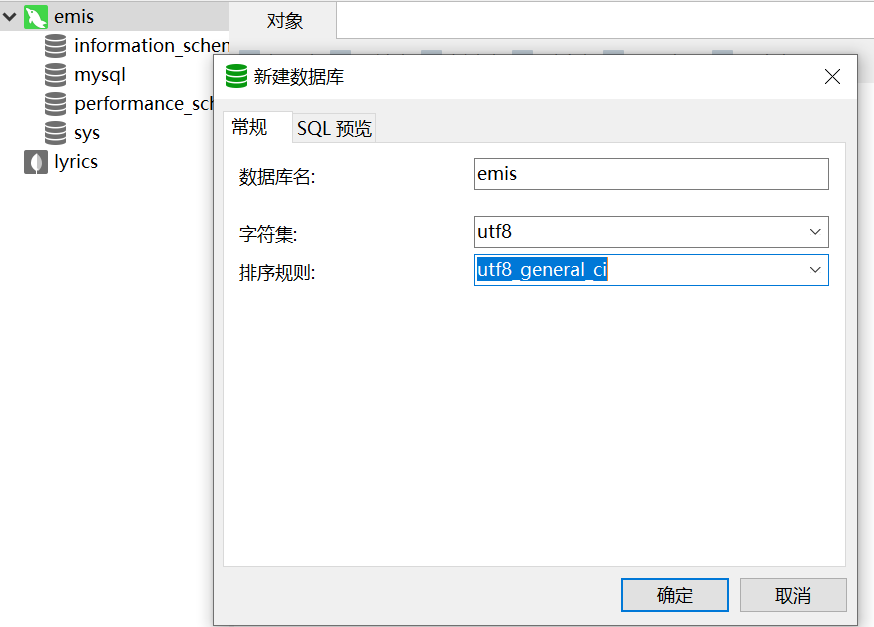
按照教程初始化各个数据库
构建实体类—-如果手动构建,需要单独给每个表生成Getter Setter,所以使用下面讲的mybits逆向工程构建。
MyBatis逆向工程
添加数据库账户及授权
参考:navicat创建用户以及设置权限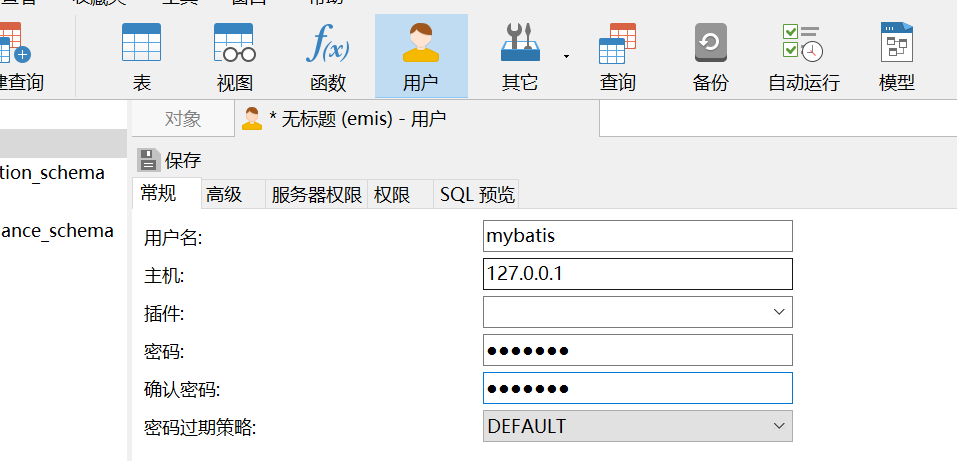
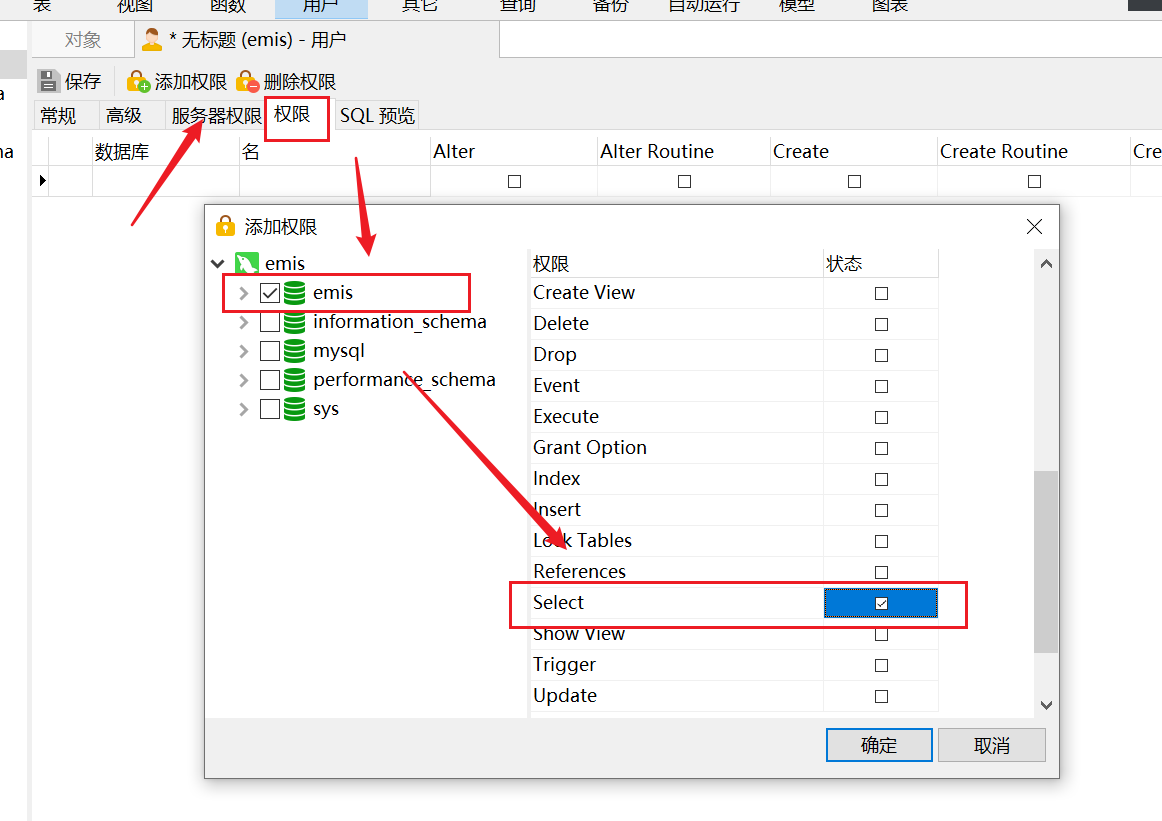
账号密码都是:mybatis
创建成功后如下: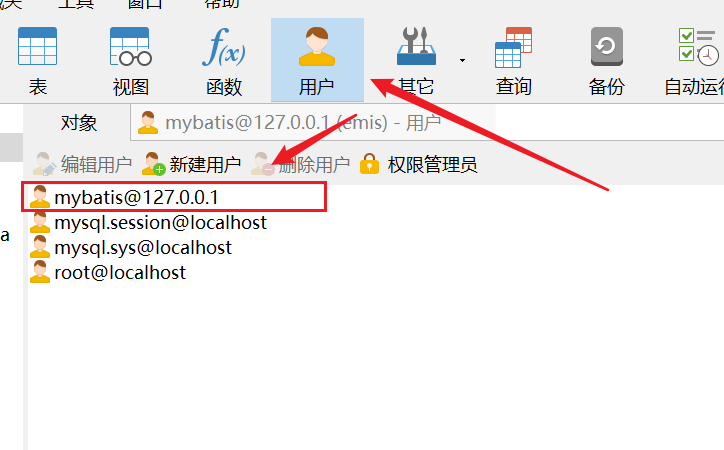
pom.xml添加依赖
<dependency><groupId>org.mybatis.spring.boot</groupId><artifactId>mybatis-spring-boot-starter</artifactId><version>2.2.1</version></dependency><dependency><groupId>mysql</groupId><artifactId>mysql-connector-java</artifactId><scope>runtime</scope><!--1、如果你的数据库是mysql8,这段<version>5.1.32</version>不用管2、如果你的数据库是mysql5.x,放开<version>5.1.32</version>这段注释--><version>5.1.32</version></dependency><dependency><groupId>org.mybatis.generator</groupId><artifactId>mybatis-generator-core</artifactId><version>1.4.0</version></dependency>
编写逆向工程的配置文件generatorConfig.xml和Generator.java
运行Generator类的main方法生成实体类、mapper接口和mapper的xml文件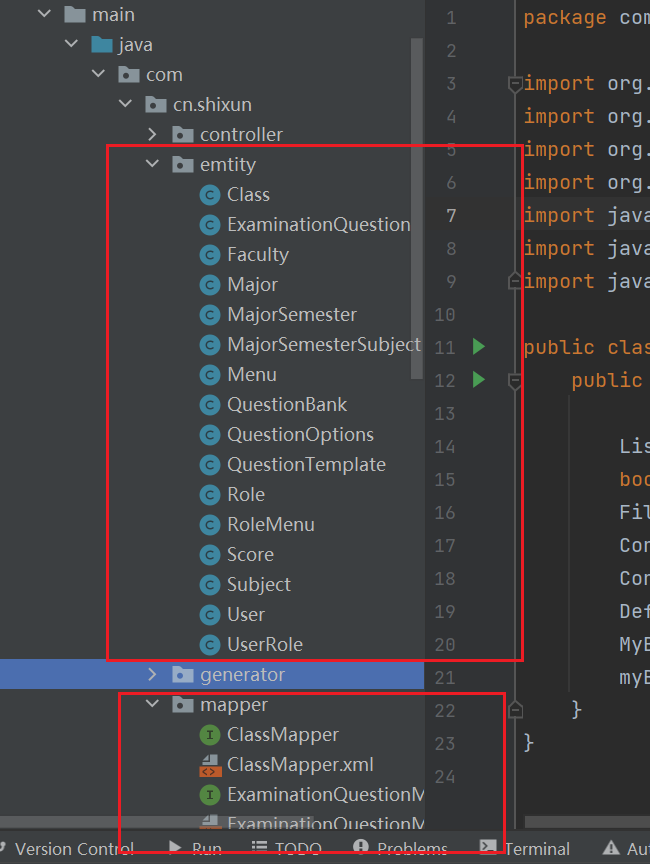
每次生成逆向工程之前,要把之前生成的文件全部删除。
<dependency><groupId>com.alibaba</groupId><artifactId>fastjson</artifactId><version>1.2.73</version></dependency>
报错
SpringBoot启动报错Failed to configure a DataSource: ‘url’ attribute is not specified and no embedded datasource could be configured
Error starting ApplicationContext. To display the conditions report re-run your application with 'debug' enabled.2022-02-27 20:30:12.439 ERROR 12672 --- [ main] o.s.b.d.LoggingFailureAnalysisReporter :***************************APPLICATION FAILED TO START***************************Description:Failed to configure a DataSource: 'url' attribute is not specified and no embedded datasource could be configured.Reason: Failed to determine a suitable driver classAction:Consider the following:If you want an embedded database (H2, HSQL or Derby), please put it on the classpath.If you have database settings to be loaded from a particular profile you may need to activate it (no profiles are currently active).Process finished with exit code 1
启动类添加如下:
@SpringBootApplication(exclude = {DataSourceAutoConfiguration.class})
参考:https://www.panziye.com/java/1873.html
Consider defining a bean of type ‘com.cn.shixun.mapper.UserMapper’ in your configuration.

参考:https://blog.csdn.net/zzldm/article/details/116534419
nio-8080-exec-1
属于正常情况
. ____ _ __ _ _/\\ / ___'_ __ _ _(_)_ __ __ _ \ \ \ \( ( )\___ | '_ | '_| | '_ \/ _` | \ \ \ \\\/ ___)| |_)| | | | | || (_| | ) ) ) )' |____| .__|_| |_|_| |_\__, | / / / /=========|_|==============|___/=/_/_/_/:: Spring Boot :: (v2.6.2)2022-02-27 20:46:14.796 INFO 9608 --- [ main] com.App : Starting App using Java 1.8.0_151 on DESKTOP-QTVR7IE with PID 9608 (D:\projects\emis\target\classes started by wztli in D:\projects\emis)2022-02-27 20:46:14.799 INFO 9608 --- [ main] com.App : No active profile set, falling back to default profiles: default2022-02-27 20:46:16.451 INFO 9608 --- [ main] o.s.b.w.embedded.tomcat.TomcatWebServer : Tomcat initialized with port(s): 8080 (http)2022-02-27 20:46:16.464 INFO 9608 --- [ main] o.apache.catalina.core.StandardService : Starting service [Tomcat]2022-02-27 20:46:16.464 INFO 9608 --- [ main] org.apache.catalina.core.StandardEngine : Starting Servlet engine: [Apache Tomcat/9.0.56]2022-02-27 20:46:16.582 INFO 9608 --- [ main] o.a.c.c.C.[Tomcat].[localhost].[/] : Initializing Spring embedded WebApplicationContext2022-02-27 20:46:16.582 INFO 9608 --- [ main] w.s.c.ServletWebServerApplicationContext : Root WebApplicationContext: initialization completed in 1721 ms2022-02-27 20:46:16.996 INFO 9608 --- [ main] o.s.b.w.embedded.tomcat.TomcatWebServer : Tomcat started on port(s): 8080 (http) with context path ''2022-02-27 20:46:17.010 INFO 9608 --- [ main] com.App : Started App in 2.708 seconds (JVM running for 3.193)2022-02-27 20:46:17.075 INFO 9608 --- [nio-8080-exec-1] o.a.c.c.C.[Tomcat].[localhost].[/] : Initializing Spring DispatcherServlet 'dispatcherServlet'2022-02-27 20:46:17.075 INFO 9608 --- [nio-8080-exec-1] o.s.web.servlet.DispatcherServlet : Initializing Servlet 'dispatcherServlet'2022-02-27 20:46:17.076 INFO 9608 --- [nio-8080-exec-1] o.s.web.servlet.DispatcherServlet : Completed initialization in 1 ms

若有收获,就点个赞吧
0 人点赞
