使用whistle和switchyomega工具
whistle的使用
基于Node实现的跨平台web调试代理工具,可以使用npm全局安装npm install -g whistle
关于代理的使用
启动默认代理
w2 start --init
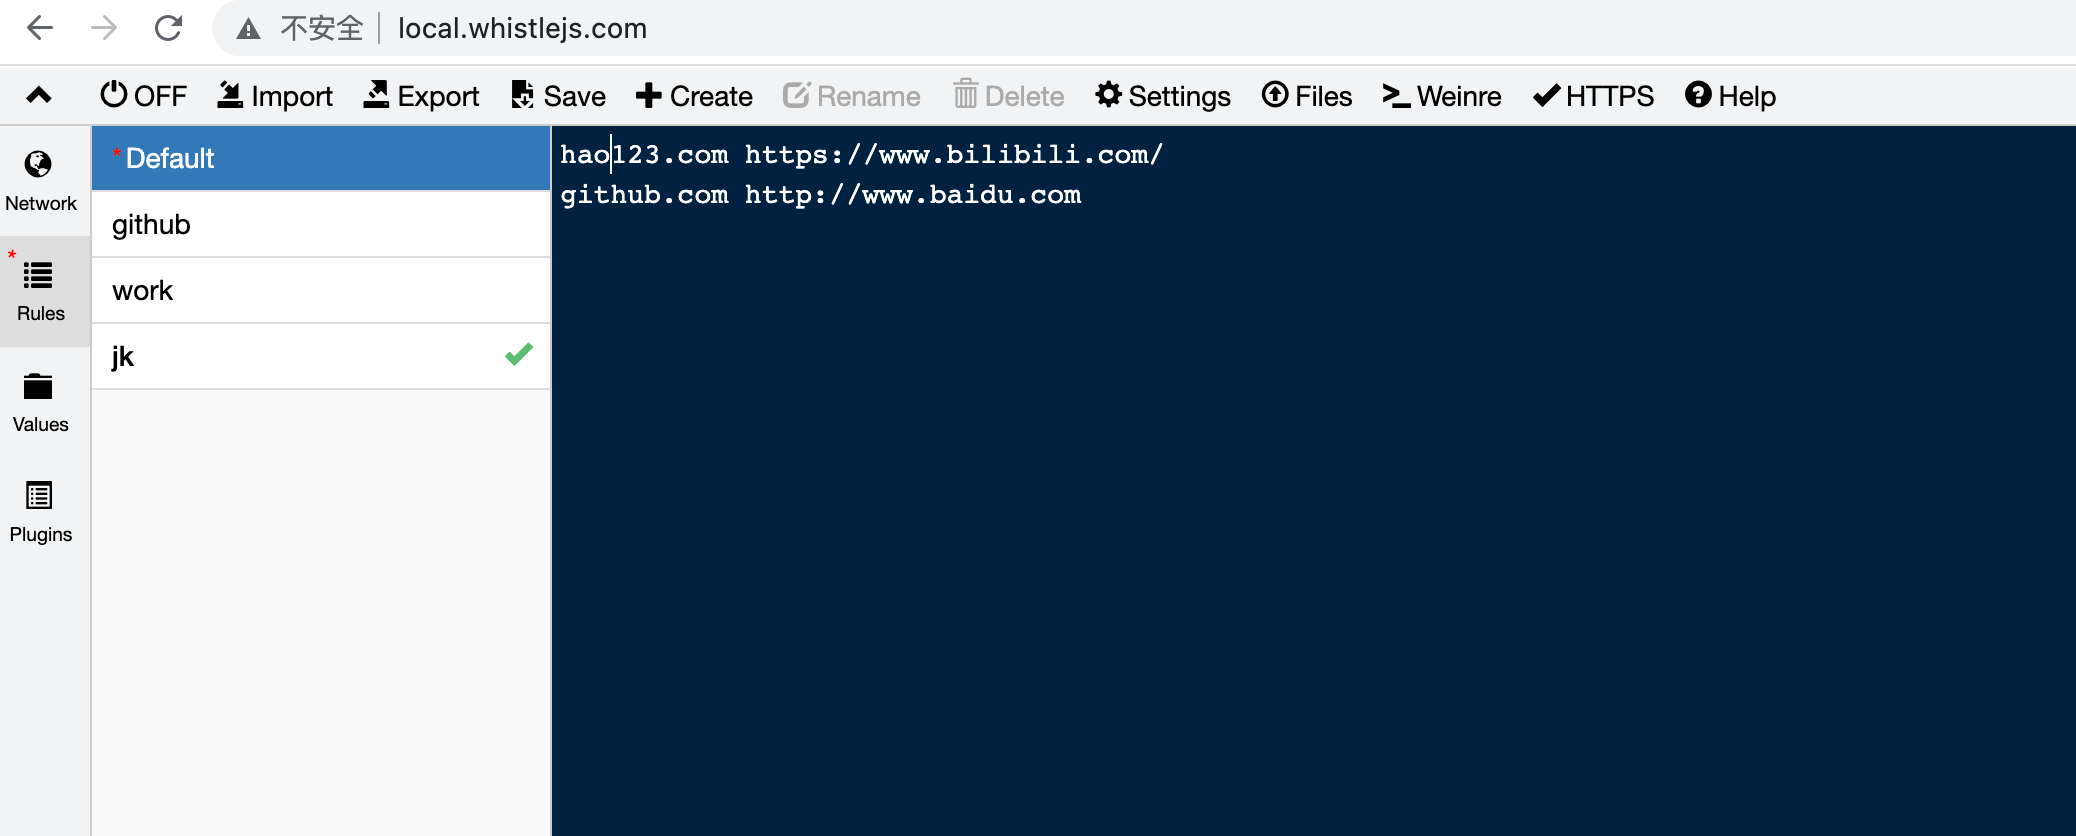
启动的默认代理端口是8899,成功后就可以在 http://local.whistlejs.com 地址中打开whistle的配置。
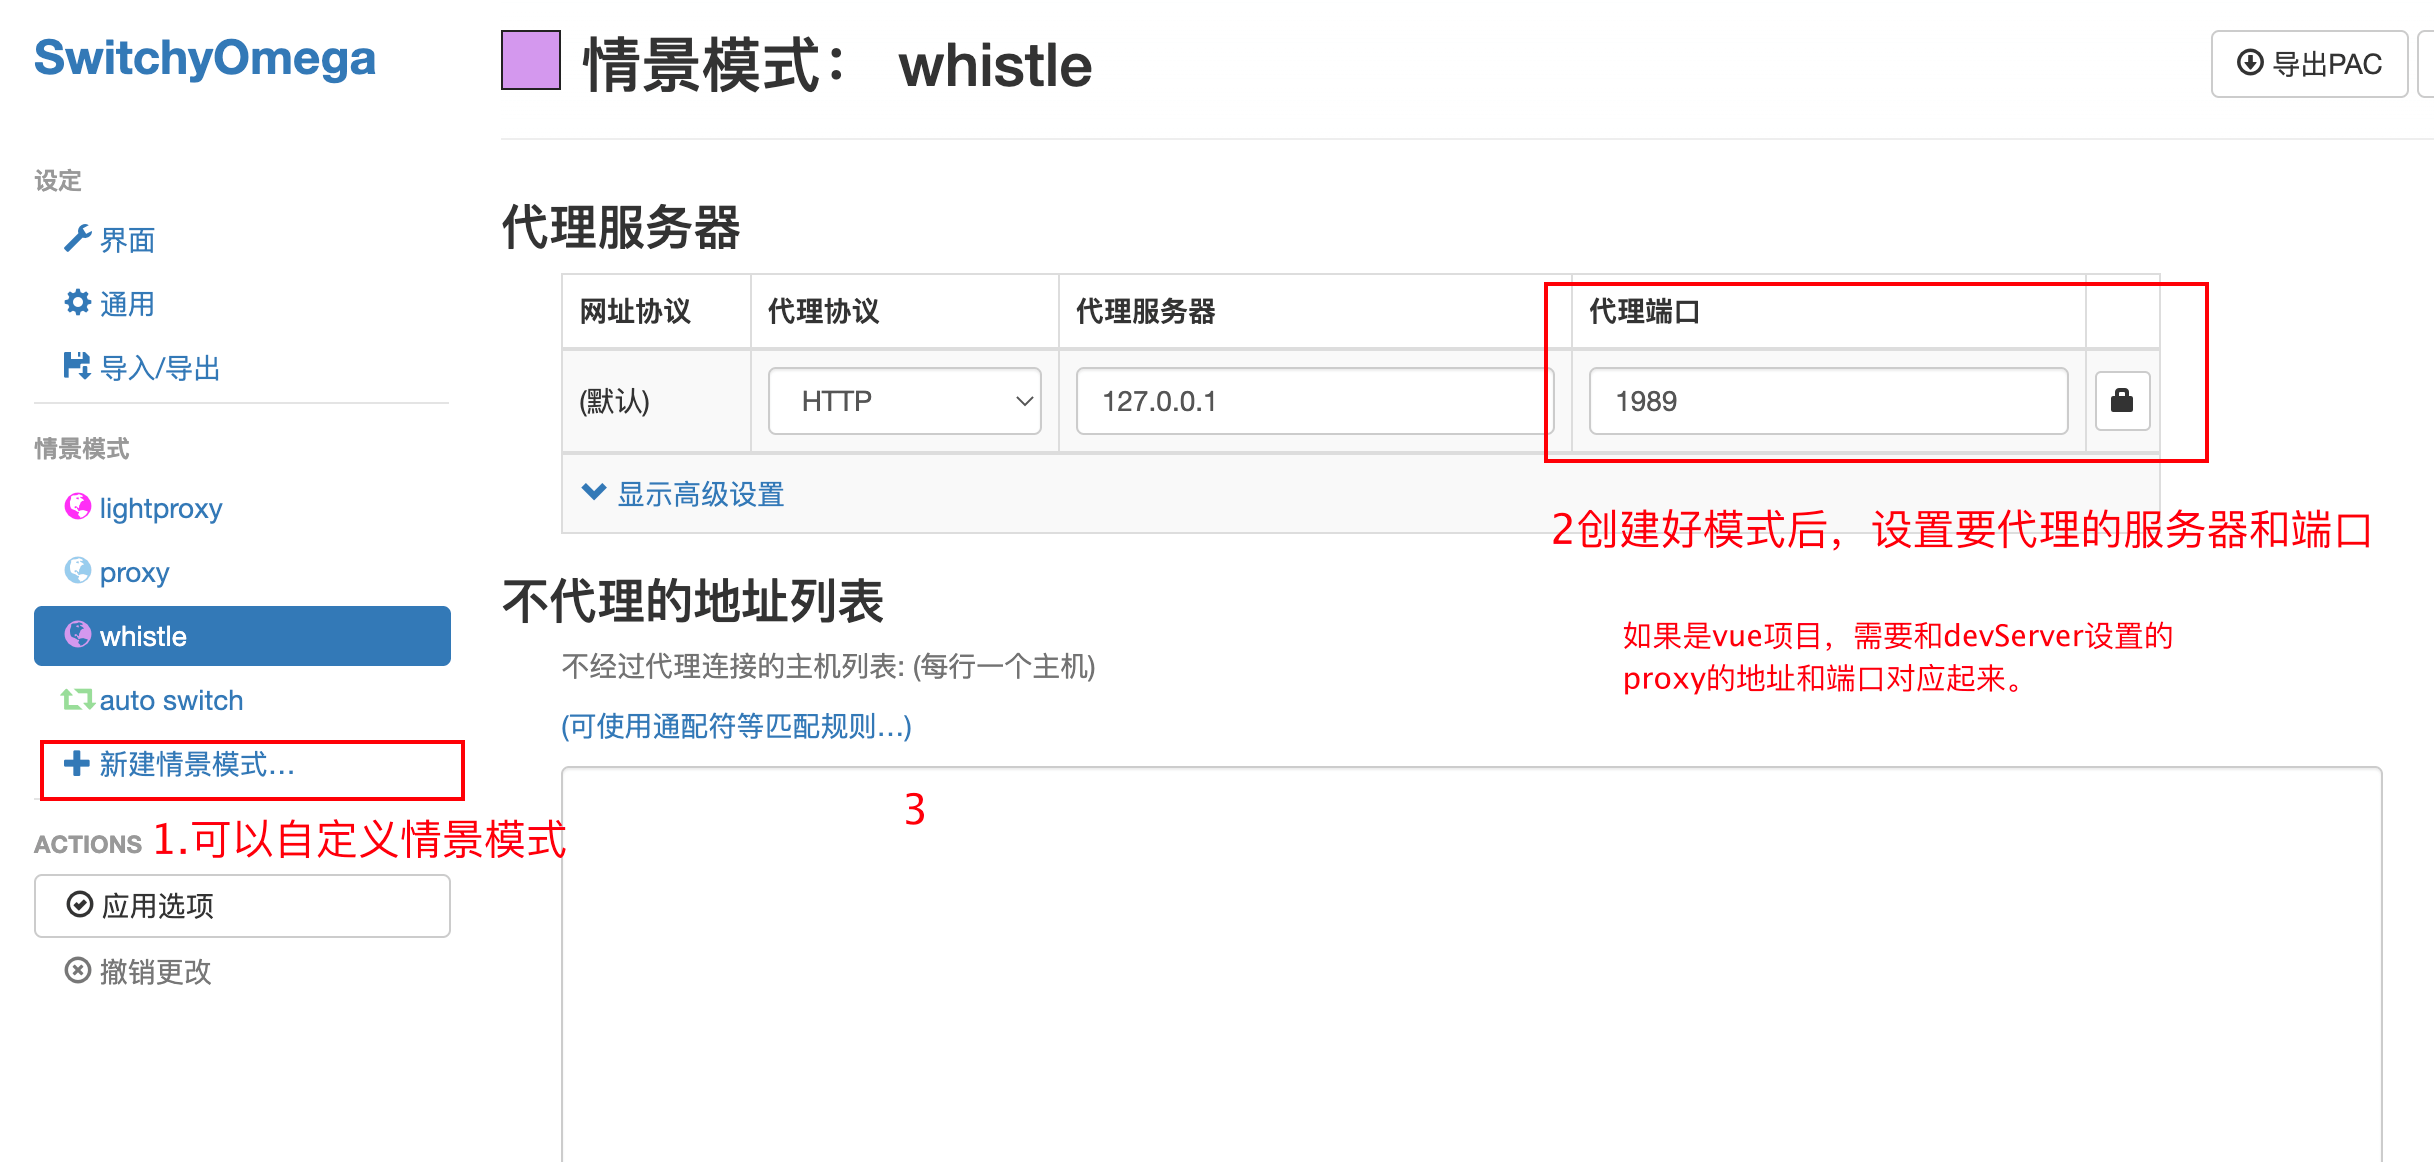
在rules设置代理的匹配规则
通过改变端口启动项目
改变端口w2 start -p 1989
设置全局代理 w2 proxy
注意:通过默认start —init启动,可以直接代理全局。但是如果想改变端口启动,一定要执行w2 proxy设置全局代理。
switchyomega的使用
Proxy SwitchyOmega 是一款非常优秀的浏览器插件.
下载插件
Proxy SwitchyOmega 下载安装非常简单,除了通过 Chrome 应用商店安装之外,还可以直接访问官方网站下载相应的版本,网址为:https://proxy-switchyomega.com/download/,下载完成后,插件会被自动安装到浏览器扩展程序中
安装完成后,将管理工具固定在浏览器地址栏的右侧,以方便后续使用。如下图所示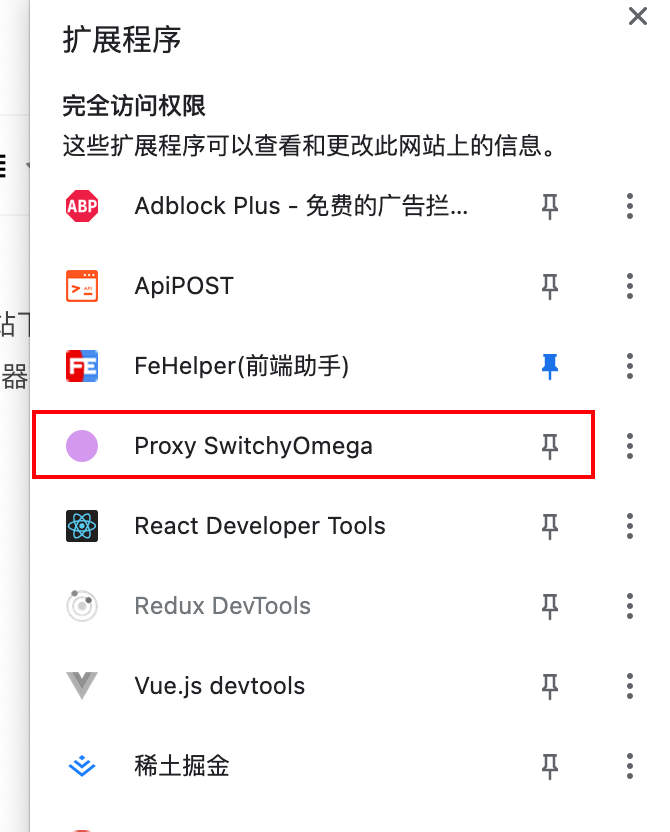
安装完成后设置代理模式
工作原理
默认不使用switchyomega的情况下,浏览器把接口请求直接发送到互联网中
通过添加switchyomega,可以到达转发效果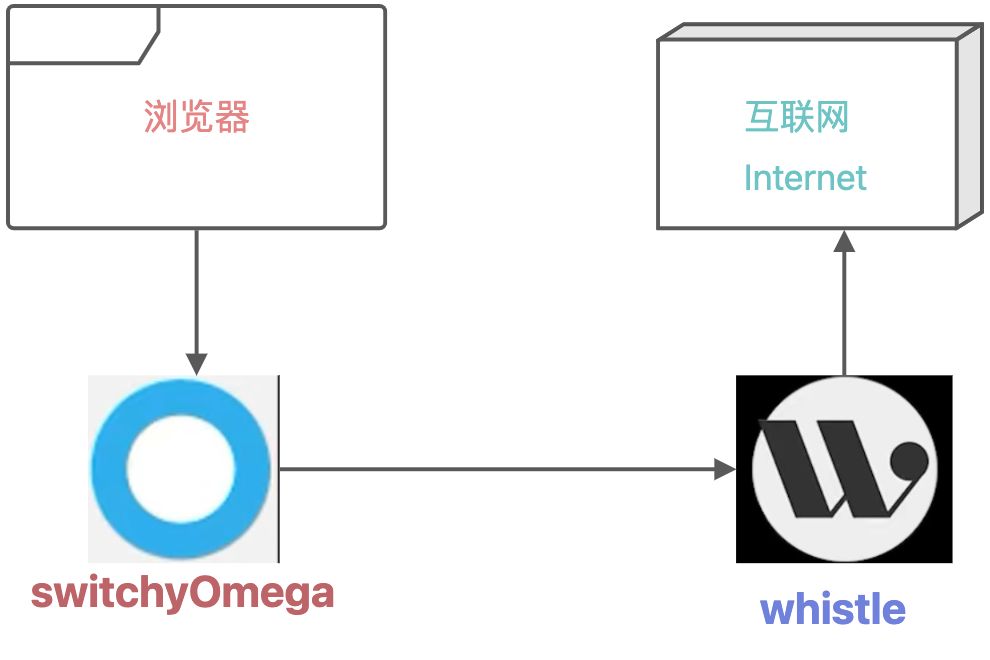
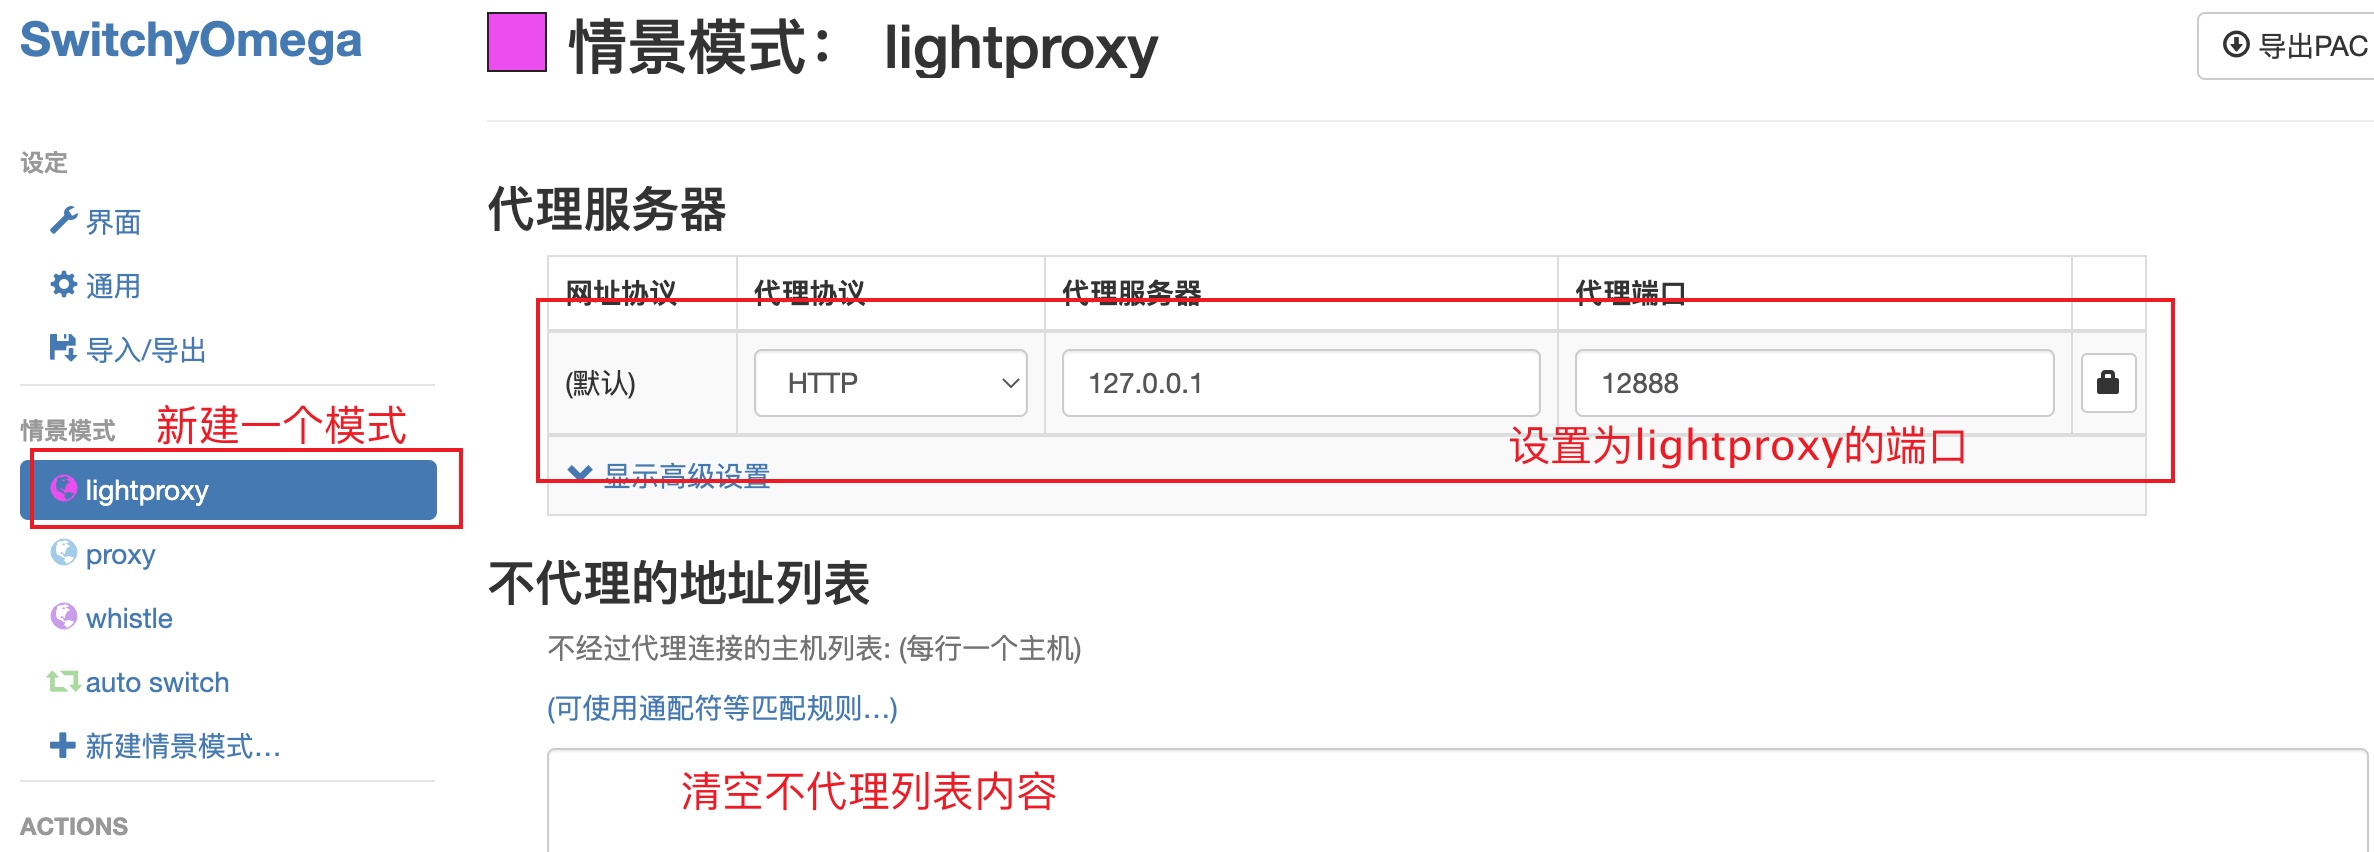
使用lightproxy替代whistle
由于lightproxy的默认端口是12888,需要设置switchyomega的转发
在vue项目中的vue.config.js需要设置对应的代理
'/api': {target: process.env.VUE_APP_APIPROXY || 'http://localhost:12888/',pathRewrite: { '^/api': '/api' },changeOrigin: true, // target是域名的话,需要这个参数,secure: true, // 设置支持https协议的代理},
在lightproxy中设置rules
# 定义域名代理# http://test.testbook.com http://www.baidu.com# 代理接口返回特定文件,返回的是js文件,可以使用node语法进行文件读取设置*/api/shenshuai/info scriptfile://`var fs = require("fs")exports.handleRequest = async (ctx, next) => {var data = fs.readFileSync('/Users/shuai/Desktop/code/use2version/vue2temp/src/assets/text.json');ctx.body = data.toString();}`# ^^聚合API^^^ 使用127.0.0.1:12888, 把api替换掉# */toutiao/index http://v.juhe.cn# http://192.168.0.101:8080 http://v.juhe.cn
返回js文件是,node读取文件
github.com/alibaba/lightproxy scriptfile://`exports.handleRequest = async (ctx, next) => {// do sth// ctx.fullUrl 可以获取请求url// ctx.headers 可以获取请求头// ctx.options 里面包含一些特殊的请求头字段,分别可以获取一些额外信息,如请设置的规则等// ctx.method 获取和设置请求方法// const reqBody = await ctx.getReqBody(); 获取请求 body 的 Buffer 数据,如果没有数据返回 null// const reqText = await ctx.getReqText(); 获取请求 body 的文本,如果没有返回''// const formData = await ctx.getReqForm(); 获取表单对象,如果不是表单,返回空对象{}// ctx.req.body = String| Buffer | Stream | null,修改请求的内容// next 方法可以设置 next({ host, port });// 只有执行next方法后才可以把正常的请求发送出去const { statusCode, headers } = await next();// do sth// const resBody = yield ctx.getResBody();// const resText = yield ctx.getResText();// const path = JSON.parse(reqBody).path// 根据path的值可以设置不同的返回值// ctx.status = 404; 修改响应状态码// ctx.set(headers); 批量修改响应头// ctx.set('x-test', 'abc'); 修改响应头// ctx.body = String| Buffer | Stream | null; 修改响应内容ctx.body = 'test';};`
通过nginx,配置nginx.conf
server {listen 3333;server_name localhost;index index.html index.htm;#charset koi8-r;#access_log logs/host.access.log main;#server/config.local.jsonlocation / {#proxy_intercept_errors on;# root /usr/local/opt/nginx/html;# proxy_pass http://localhost:3330;# proxy_pass http://101.35.111.19:8888/test/;proxy_pass http://192.168.10.10:10004/api/;# history 模式重点就是这里# try_files $uri $uri/ /index.html;}

若有收获,就点个赞吧
0 人点赞
