原文: https://javatutorial.net/implementing-spring-mvc-controllers
本教程描述了实现 Spring MVC 控制器的不同方法,并提供了示例。
在我以前的教程,使用 STS 创建简单的 Spring Web App 中,我向您展示了如何构建引入控制器的 Spring Boot App。 本教程是对上一个教程的扩展。
在开始实现之前,让我们快速概述一下控制器如何参与 MVC 工作流程。
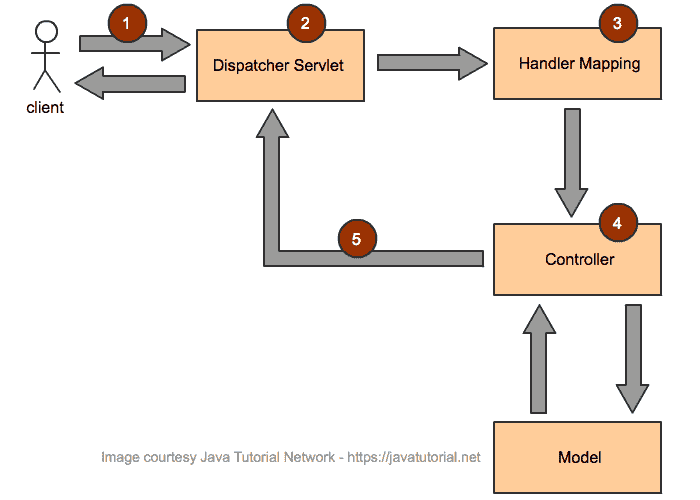
Spring MVC 架构工作流程
- 来自客户端的传入请求由调度器 Servlet 解释
- 调度器 Servlet 通过解析请求属性并使对象对处理程序可用来进行初始处理。
- 确定并调用适当的处理程序以进一步处理请求。 确定适当控制器上的适当方法
- 控制器处理请求并返回
ModelAndView的实例 - 调度器 Servlet 进一步处理
ModelAndView的实例,以将响应发送给客户端
在 Spring Boot 应用程序中启用 JSP
如果要启用 JSP,则必须执行以下操作:
在pom.xml文件中添加以下依赖项:
<dependency><groupId>org.apache.tomcat.embed</groupId><artifactId>tomcat-embed-jasper</artifactId></dependency><dependency><groupId>javax.servlet</groupId><artifactId>jstl</artifactId></dependency>
在src/main/resources/application.properties中添加这两行
spring.mvc.view.prefix=/WEB-INF/jsp/spring.mvc.view.suffix=.jsp
创建文件夹src/main/resources/META-INF/resources/WEB-INF/jsp/并将 JSP 文件放入其中
实现 Spring 控制器返回 JSP 页面
以下示例演示如何在 Spring Controller方法中返回 JSP 页面。 请注意@Controller注释和@RequestMapping注释的用法。 如果我们想返回一个 JSP 页面,我们将不使用@ResponseBody注释(如第二个示例所示)。
package net.javatutorial.tutorials;import org.springframework.boot.SpringApplication;import org.springframework.boot.autoconfigure.SpringBootApplication;import org.springframework.stereotype.Controller;import org.springframework.web.bind.annotation.RequestMapping;@Controller@SpringBootApplicationpublic class ControllerExampleJSP {@RequestMapping("/hellojsp")String helloJSP() {return("index");}public static void main(String[] args) {SpringApplication.run(ControllerExampleJSP.class, args);}}
@RequestMapping注释将网址http://localhost:8080/hellojsp插入到控制器的方法helloJSP()中。 此方法返回index.jsp的解析内容
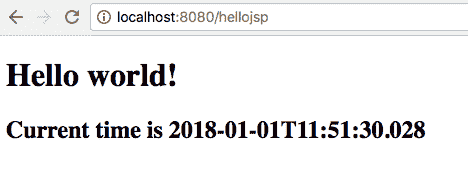
使用 Spring 控制器渲染 JSP 页面
用ResponseBody实现控制器
与前面的示例不同,此示例将返回由方法而不是 JSP 页面生成的String。 我们唯一需要更改的就是将@ResponseBody注解添加到我们的控制器方法中
package net.javatutorial.tutorials;import org.springframework.boot.SpringApplication;import org.springframework.boot.autoconfigure.SpringBootApplication;import org.springframework.stereotype.Controller;import org.springframework.web.bind.annotation.RequestMapping;import org.springframework.web.bind.annotation.ResponseBody;@Controller@SpringBootApplicationpublic class ControllerResponseBodyExample {@RequestMapping("/helloresponsebody")@ResponseBodyString helloResponseBody() {return("Hello World. This is produced by a method annotated with ResponseBody");}public static void main(String[] args) {SpringApplication.run(ControllerResponseBodyExample.class, args);}}
在浏览器中调用http://localhost:8080/helloresponsebody将产生以下输出:
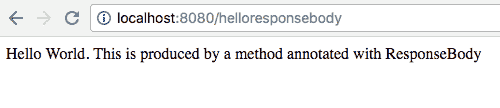
使用 Spring Controller和ResponseBody进行输出
实现 Spring RestController
@RestController注释用作方便注释,以表示诸如@Controller和@ResponseBody之类的注释。 在类级别使用时,控制器可以处理 REST API 请求。
package net.javatutorial.tutorials;import org.springframework.boot.SpringApplication;import org.springframework.boot.autoconfigure.SpringBootApplication;import org.springframework.web.bind.annotation.RequestMapping;import org.springframework.web.bind.annotation.RestController;@RestController@SpringBootApplicationpublic class RestControllerExample {@RequestMapping("/hellorest")String helloRest() {return("Hello World. This is produced by the rest conntroller method");}public static void main(String[] args) {SpringApplication.run(RestControllerExample.class, args);}}
在浏览器中调用http://localhost:8080/hellorest将产生以下输出:
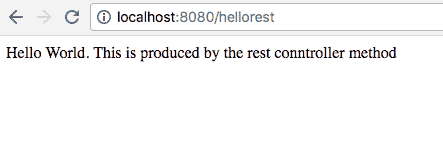
使用 Spring RestController输出
在方法和类级别使用@RequestMapping注释
Spring 4.3 引入了诸如@GetMapping,@PostMapping和@PutMapping等注解,以指定常见 HTTP 方法类型(如 GET,POST 和 PUT)的映射。 这些注释增强了代码的可读性。
以下示例演示了如何在方法和类级别上使用映射注释。
package net.javatutorial.tutorials;import org.springframework.boot.SpringApplication;import org.springframework.boot.autoconfigure.SpringBootApplication;import org.springframework.web.bind.annotation.GetMapping;import org.springframework.web.bind.annotation.RequestMapping;import org.springframework.web.bind.annotation.RestController;@RestController@RequestMapping("/user/*")@SpringBootApplicationpublic class MethodAndClassLevelAnnotations {@RequestMappingString login() {return("Login method called");}@GetMapping("/logout")String logout() {return("Logout method called");}public static void main(String[] args) {SpringApplication.run(MethodAndClassLevelAnnotations.class, args);}}
向以下网址http://localhost:8080/user/发出请求,将调用login()方法。 注意,注释login()方法的@RequestMapping没有参数。
在类级别使用的@RequestMapping("/user/*")注释用作兜底方法,以使用/*表示的不同路径来处理所有请求。
请求http://localhost:8080/user/logout将调用logout()方法。 @GetMapping注释是一个组合的注释,用作@RequestMapping(method = RequestMethod.GET)
您可以在我们的 GitHub 存储库中找到本教程中的代码示例。

若有收获,就点个赞吧
0 人点赞
