一、简述
QGraphicsItem 类是 QGraphicsScene 中所有 item 的基类。
它提供了一个轻量级的基础,用于编写自定义 item。其中包括:定义 item 的几何形状、碰撞检测、绘制实现、通过其事件处理程序进行 item 的交互。QGraphicsItem 是 Qt之图形视图框架的一部分。
二、常见的 QGraphicsItem
为方便起见,Qt为最常见的形状提供了一组典型的标准item。它们是:
QGraphicsSimpleTextItem:提供了一个简单的文本标签项QGraphicsTextItem:提供了一个格式化的文本项QGraphicsLineItem:提供了一个直线项QGraphicsPixmapItem:提供了一个图像项QGraphicsRectItem:提供了一个矩形项QGraphicsEllipseItem:提供了一个椭圆项QGraphicsPathItem:提供了一个路径项QGraphicsPolygonItem:提供了一个多边形项三、QGraphicsSimpleTextItem
3.1 详细描述
QGraphicsSimpleTextItem提供了一个简单的文本标签项,可以添加到QGraphicsScene中。
要设置 item 的文本,可以传递 QString 到 QGraphicsSimpleTextItem 的构造函数,或在之后调用 setText() 来更改文本。要设置文本填充色,调用 setBrush()。
QGraphicsSimpleTextItem 可以具有填充和轮廓,setBrush() 用于设置文本填充(即文本色),setPen() 用于设置绘制文本轮廓的画笔(后者可能很慢,特别是对于复杂的画笔,以及具有长文本内容的 item)。
如果只想绘制一行简单的文本,只需要调用 setBrush(),不需要设置画笔。QGraphicsSimpleTextItem 的画笔默认是Qt::NoPen。
QGraphicsSimpleTextItem 使用文本的格式化大小和相关联的字体,为 boundingRect()、shape() 和 contains() 提供了一个合理的实现。可以通过调用 setFont() 设置字体。
QGraphicsSimpleText 不显示富文本,相反,可以使用 QGraphicsTextItem,它提供全文控制功能。

3.2 示例
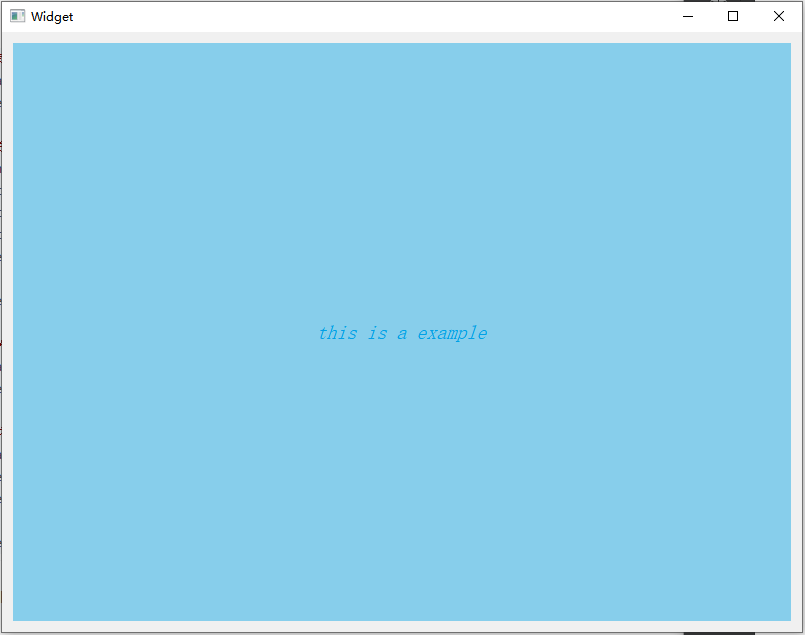
#include <QFont>#include <QGraphicsScene>#include <QGraphicsSimpleTextItem>#include <QGraphicsView>#include <QLayout>#include <QString>Widget::Widget(QWidget* parent): QWidget(parent), ui(new Ui::Widget){ui->setupUi(this);QGraphicsSimpleTextItem* pItem = new QGraphicsSimpleTextItem();pItem->setText(tr("this is a example"));// 字体QFont font = pItem->font();font.setPixelSize(20); //像素大小font.setItalic(true); // 斜体// 设置item的字体和颜色pItem->setFont(font);pItem->setBrush(QBrush(QColor(0, 160, 230)));// 将Item添加到场景中QGraphicsScene* pScene = new QGraphicsScene();pScene->addItem(pItem);// 为视图设置场景QGraphicsView* pView = new QGraphicsView();pView->setScene(pScene);pView->setStyleSheet("border:none; background:skyblue");QVBoxLayout* layout = new QVBoxLayout(this);layout->addWidget(pView);}
要将QGraphicsSimpleTextItem添加至场景中,有两种方式:
- 构造
QGraphicsSimpleTextItem,然后通过QGraphicsScene::addItem()添加 - 使用
QGraphicsScene::addSimpleText()创建并添加一个QGraphicsSimpleTextItem,并返回 item 的指针
四、QGraphicsTextItem
4.1 详细描述
QGraphicsTextItem 类提供了一个格式化的文本项,可以添加到 QGraphicsScene 中。
要设置 item 的文本,可以传递 QString 到 QGraphicsTextItem 的构造函数,或调用 setHtml() / setPlainText()。
QGraphicsTextItem 使用文本的格式化大小和相关联的字体,为 boundingRect()、shape() 和 contains() 提供了一个合理的实现。可以通过调用 setFont() 设置字体。
可以通过使用 setTextInteractionFlags() 设置 Qt::TextEditorInteraction 标志来使 item 可编辑。
item 的首选文本宽度可以使用 setTextWidth() 设置,并使用 textWidth() 获取。
注意:为了在中心对齐 HTML 文本,必须设置 item 的文本宽度。否则,可以在设置 item 的文本后调用 adjustSize()。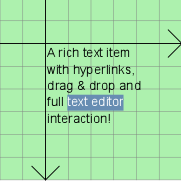
注意:QGraphicsTextItem 默认接受 hover 事件,可以使用 setAcceptHoverEvents() 更改此值。
4.2 示例
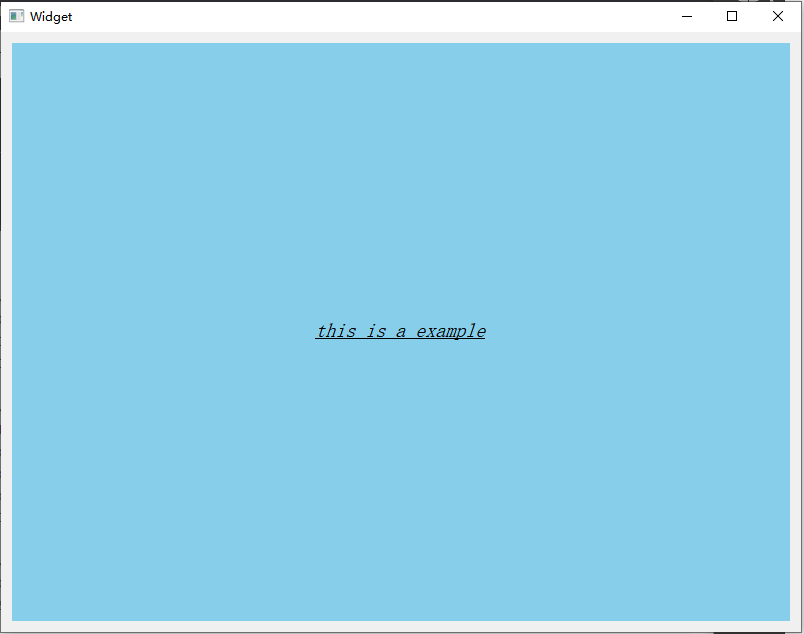
#include <QFont>#include <QGraphicsScene>#include <QGraphicsTextItem>#include <QGraphicsView>#include <QLayout>#include <QString>Widget::Widget(QWidget* parent): QWidget(parent), ui(new Ui::Widget){ui->setupUi(this);QGraphicsTextItem* pItem = new QGraphicsTextItem();pItem->setPlainText(tr("this is a example"));// 字体QFont font = pItem->font();font.setPixelSize(20); //像素大小font.setItalic(true); // 斜体font.setUnderline(true); // 下划线// 设置item的字体pItem->setFont(font);// 将Item添加到场景中QGraphicsScene* pScene = new QGraphicsScene();pScene->addItem(pItem);// 为视图设置场景QGraphicsView* pView = new QGraphicsView();pView->setScene(pScene);pView->setStyleSheet("border:none; background:skyblue");QVBoxLayout* layout = new QVBoxLayout(this);layout->addWidget(pView);}
要将QGraphicsTextItem添加至场景中,有两种方式:
- 构造
QGraphicsSimpleTextItem,然后通过QGraphicsScene::addItem()添加 - 使用
QGraphicsScene::addText()创建并添加一个QGraphicsTextItem,并返回 item 的指针4.3 富文本
暂略4.3 超链接
暂略4.3 编辑
暂略五、QGraphicsLineItem
5.1 详细描述
QGraphicsLineItem 类提供了一个直线项,可以添加到 QGraphicsScene 中。
要设置 item 的直线,可以传递 QLineF 到 QGraphicsLineItem 的构造函数,或调用 setLine() 函数。line() 返回当前直线。默认情况下,该直线为黑色,宽度为 0,可以通过调用 setPen() 进行更改。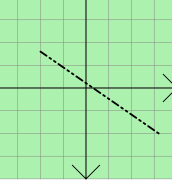
QGraphicsLineItem 使用直线和画笔的宽度,为 boundingRect()、shape() 和 contains() 提供了一个合理的实现。paint() 函数使用 item 关联的画笔绘制直线。
5.2 示例
#include <QGraphicsLineItem>#include <QGraphicsScene>#include <QGraphicsView>#include <QLayout>#include <QPen>#include <QString>Widget::Widget(QWidget* parent): QWidget(parent), ui(new Ui::Widget){ui->setupUi(this);QGraphicsLineItem* pItem = new QGraphicsLineItem();// 设置画笔QPen pen = pItem->pen();pen.setColor(QColor(0, 160, 230));pen.setWidth(3);// 设置item的字体pItem->setPen(pen);// 设置直线位于(x1, y1)和(x2, y2)之间pItem->setLine(QLineF(0, 0, 100, 100));// 将Item添加到场景中QGraphicsScene* pScene = new QGraphicsScene();pScene->addItem(pItem);// 为视图设置场景QGraphicsView* pView = new QGraphicsView();pView->setScene(pScene);pView->setStyleSheet("border:none; background:skyblue");QVBoxLayout* layout = new QVBoxLayout(this);layout->addWidget(pView);}
要将QGraphicsLineItem添加至场景中,有两种方式:
- 构造
QGraphicsLineItem,然后通过QGraphicsScene::addItem()添加 - 使用
QGraphicsScene::addLine()创建并添加一个QGraphicsLineItem,并返回 item 的指针六、QGraphicsPixmapItem
6.1 详细描述
QGraphicsPixmapItem 类提供了一个图像项,可以添加到 QGraphicsScene 中。
要设置 item 的图像,可以传递 QPixmap 到 QGraphicsPixmapItem 的构造函数,或调用 setPixmap() 函数,pixmap() 返回当前的图像。
QGraphicsPixmapItem 使用 pixmap 的可选 alpha 掩码,为 boundingRect()、shape() 和 contains() 提供了一个合理的实现。
图像在 item 的 (0, 0) 坐标处绘制,由 offset() 返回。可以通过调用 setOffset() 更改绘图偏移量。
可以通过调用 setTransformationMode() 设置图像的变换模式,默认情况下,使用 Qt::FastTransformation,它提供了快速、不平滑的缩放。Qt::SmoothTransformation 在 painter 上启用 QPainter::SmoothPixmapTransform,质量取决于平台和视口。结果通常不如调用 QPixmap::scale() 直接,调用 transformMode() 获取项目的当前转换模式。
6.2 示例

#include <QGraphicsPixmapItem>#include <QGraphicsScene>#include <QGraphicsView>#include <QLayout>#include <QPen>#include <QString>Widget::Widget(QWidget* parent): QWidget(parent), ui(new Ui::Widget){ui->setupUi(this);QGraphicsPixmapItem* pItem = new QGraphicsPixmapItem();QPixmap image("F:\\0.图片壁纸\\4k\\9_cage4_8k.jpg");pItem->setPixmap(image.scaled(600, 400));pItem->setTransformationMode(Qt::FastTransformation);// 将Item添加到场景中QGraphicsScene* pScene = new QGraphicsScene();pScene->addItem(pItem);// 为视图设置场景QGraphicsView* pView = new QGraphicsView();pView->setScene(pScene);// pView->setStyleSheet("border:none; background:skyblue");QVBoxLayout* layout = new QVBoxLayout(this);layout->addWidget(pView);}
要将QGraphicsPixmapItem添加至场景中,有两种方式:
- 构造
QGraphicsPixmapItem,然后通过QGraphicsScene::addItem()添加 - 使用
QGraphicsScene::addPixmap()创建并添加一个QGraphicsPixmapItem,并返回 item 的指针七、QGraphicsRectItem
7.1 详细说明
QGraphicsRectItem 类提供了一个矩形项,可以添加到 QGraphicsScene 中。
要设置 item 的矩形,可以传递一个 QRectF 到 QGraphicsRectItem 的构造函数,或调用 setRect() 函数。rect() 返回当前矩形。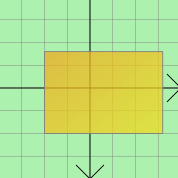
QGraphicsRectItem 使用矩形和画笔宽度,为 boundingRect()、shape() 和 contains() 提供了一个合理的实现。paint() 函数使用 item 关联的画笔和画刷绘制矩形,可以通过调用 setPen() 和 setBrush() 函数来设置。
注意:无效矩形(例如,宽度或高度为负)的呈现是未定义的。如果不能确定使用的是有效的矩形(例如,如果使用来自不可靠源的数据创建的矩形),那么应该使用 QRectF::normalized() 创建标准化的矩形,然后使用它们。
7.2 示例
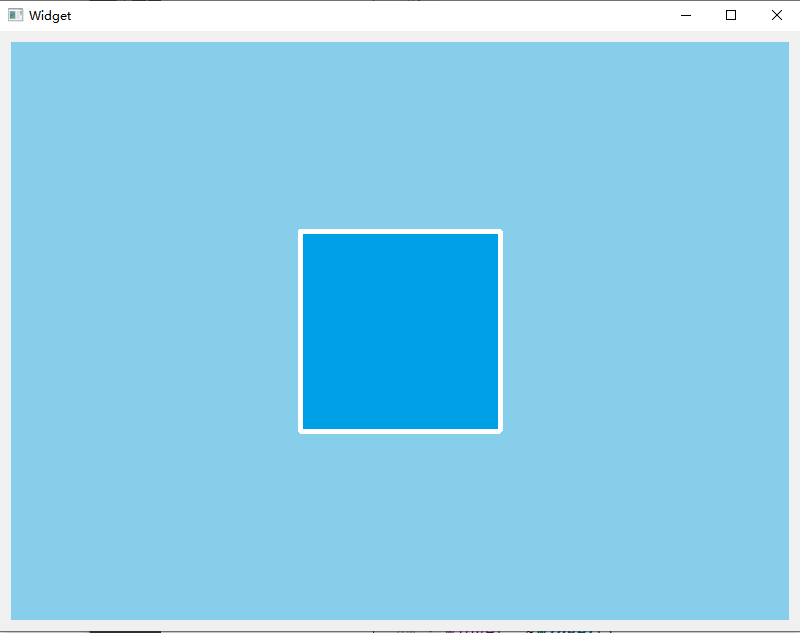
#include <QGraphicsRectItem>#include <QGraphicsScene>#include <QGraphicsView>#include <QLayout>#include <QPen>#include <QString>Widget::Widget(QWidget* parent): QWidget(parent), ui(new Ui::Widget){ui->setupUi(this);QGraphicsRectItem* pItem = new QGraphicsRectItem();// 设置画笔、画刷QPen pen = pItem->pen();pen.setWidth(5);pen.setColor(Qt::white);pItem->setPen(pen);pItem->setBrush(QBrush(QColor(0, 160, 230)));// 矩形区域 起点:(100,100) 宽高 200pItem->setRect(QRectF(100, 100, 200, 200));// 将Item添加到场景中QGraphicsScene* pScene = new QGraphicsScene();pScene->addItem(pItem);// 为视图设置场景QGraphicsView* pView = new QGraphicsView();pView->setScene(pScene);pView->setStyleSheet("border:none; background:skyblue");QVBoxLayout* layout = new QVBoxLayout(this);layout->addWidget(pView);}
要将QGraphicsRectItem添加至场景中,有两种方式:
- 构造
QGraphicsRectItem,然后通过QGraphicsScene::addItem()添加 - 使用
QGraphicsScene::addRect()创建并添加一个QGraphicsRectItem,并返回 item 的指针八、QGraphicsEllipseItem
8.1 详细说明
QGraphicsEllipseItem 类提供了一个椭圆项,可以添加到 QGraphicsScene 中。
QGraphicsEllipseItem 表示一个带有填充和轮廓的椭圆,也可以使用它的椭圆段(见 startAngle()、spanAngle())
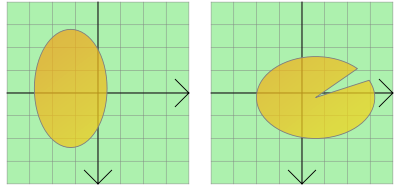
要设置 item 的椭圆,可以传递一个 QRectF 到 QGraphicsEllipseItem 的构造函数,或调用 setRect()。rect() 返回当前椭圆的几何形状。
QGraphicsEllipseItem 使用 rect 和画笔宽度,为 boundingRect()、shape() 和 contains() 提供了一个合理的实现。paint() 函数使用 item 关联的画笔和画刷来绘制椭圆,可以通过调用 setPen() 和 setBrush() 来设置。
8.2 示例
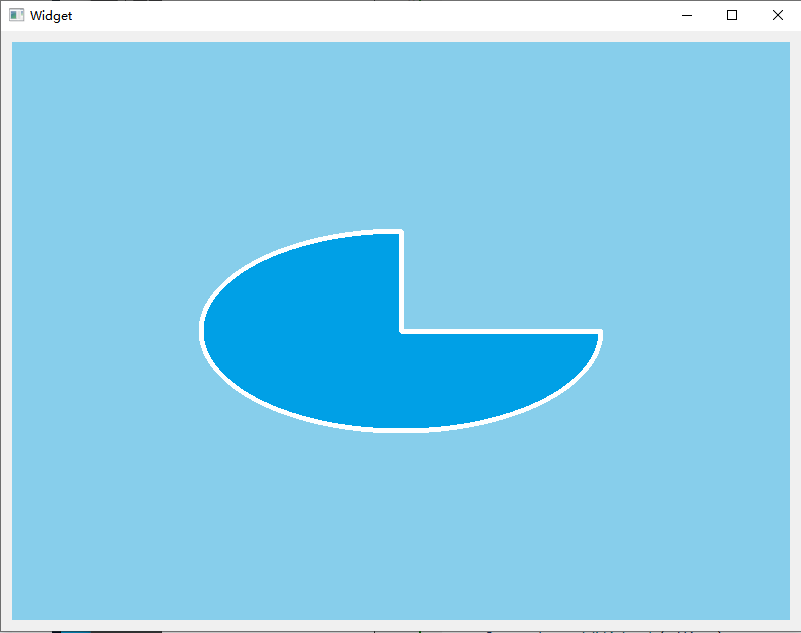
#include <QGraphicsEllipseItem>#include <QGraphicsScene>#include <QGraphicsView>#include <QLayout>#include <QPen>#include <QString>Widget::Widget(QWidget* parent): QWidget(parent), ui(new Ui::Widget){ui->setupUi(this);QGraphicsEllipseItem* pItem = new QGraphicsEllipseItem();// 设置画笔、画刷QPen pen = pItem->pen();pen.setWidth(5);pen.setColor(Qt::white);pItem->setPen(pen);pItem->setBrush(QBrush(QColor(0, 160, 230)));// 矩形区域 起点:(100,100) 宽400,高200pItem->setRect(QRectF(100, 100, 400, 200));pItem->setStartAngle(16 * 90); // 起始角度pItem->setSpanAngle(16 * 270); // 跨角// 默认情况下, 角度为5760(360*16 一个完整的椭圆)// 将Item添加到场景中QGraphicsScene* pScene = new QGraphicsScene();pScene->addItem(pItem);// 为视图设置场景QGraphicsView* pView = new QGraphicsView();pView->setScene(pScene);pView->setStyleSheet("border:none; background:skyblue");QVBoxLayout* layout = new QVBoxLayout(this);layout->addWidget(pView);}
要将QGraphicsEllipseItem添加至场景中,有两种方式:
- 构造
QGraphicsEllipseItem,然后通过QGraphicsScene::addItem()添加 - 使用
QGraphicsScene::addEllipse()创建并添加一个QGraphicsEllipseItem,并返回 item 的指针九、QGraphicsPathItem
9.1 详细描述
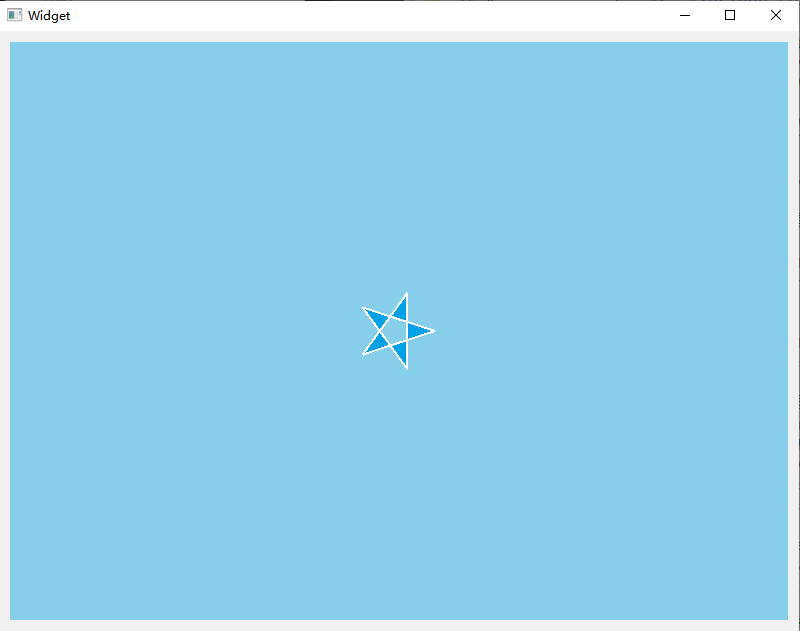
QGraphicsPathItem 类提供了一个路径项,可以添加到 QGraphicsScene 中。
要设置 item 的路径,可以传递 QPainterPath 到 QGraphicsPathItem 的构造函数,或调用 setPath() 函数,path() 返回当前路径。
QGraphicsPathItem 使用路径,为 boundingRect()、shape() 和 contains() 提供了一个合理的实现。paint() 函数使用 item 关联的画笔和画刷来绘制路径,可以通过调用 setPen() 和 setBrush() 函数来设置。9.2 示例
 ```cpp
include
include
include
include
include
include
Widget::Widget(QWidget* parent) : QWidget(parent) , ui(new Ui::Widget) { ui->setupUi(this); const float PI = 3.14159f;
QGraphicsPathItem* pItem = new QGraphicsPathItem();// 绘制星星QPainterPath starPath;starPath.moveTo(90, 50);for (int i = 0; i < 5; i++) {starPath.lineTo(50 + 40 * std::cos(0.8 * i * PI), 50 + 40 * std::sin(0.8 * i * PI));}starPath.closeSubpath();pItem->setPath(starPath);// 设置画笔、画刷QPen pen = pItem->pen();pen.setWidth(2);pen.setColor(Qt::white);pItem->setPen(pen);pItem->setBrush(QBrush(QColor(0, 160, 230)));// 将Item添加到场景中QGraphicsScene* pScene = new QGraphicsScene();pScene->addItem(pItem);// 为视图设置场景QGraphicsView* pView = new QGraphicsView();pView->setScene(pScene);pView->setStyleSheet("border:none; background:skyblue");QVBoxLayout* layout = new QVBoxLayout(this);layout->addWidget(pView);
}
要将`QGraphicsPathItem`添加至场景中,有两种方式:- 构造`QGraphicsPathItem`,然后通过`QGraphicsScene::addItem()`添加- 使用`QGraphicsScene::addEllipse()`创建并添加一个`QGraphicsPathItem`,并返回 item 的指针<a name="vGAdD"></a># 十、QGraphicsPolygonItem<a name="COluD"></a>## 10.1 详细描述QGraphicsPolygonItem 类提供了一个多边形项,可以添加到 QGraphicsScene 中。<br /><br />要设置 item 的多边形,传递 QPolygonF 到 QGraphicsPolygonItem 的构造函数,或调用 setPolygon() 函数。polygon() 返回当前的多边形。<br />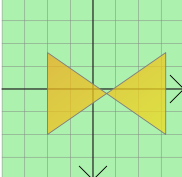<br />QGraphicsPolygonItem 使用多边形和画笔宽度,为 boundingRect()、shape() 和 contains() 提供了一个合理的实现。paint() 函数使用 item 关联的画笔和画刷绘制多边形,可以通过调用 setPen() 和 setBrush() 函数进行设置。<a name="rkNEn"></a>## 10.2 示例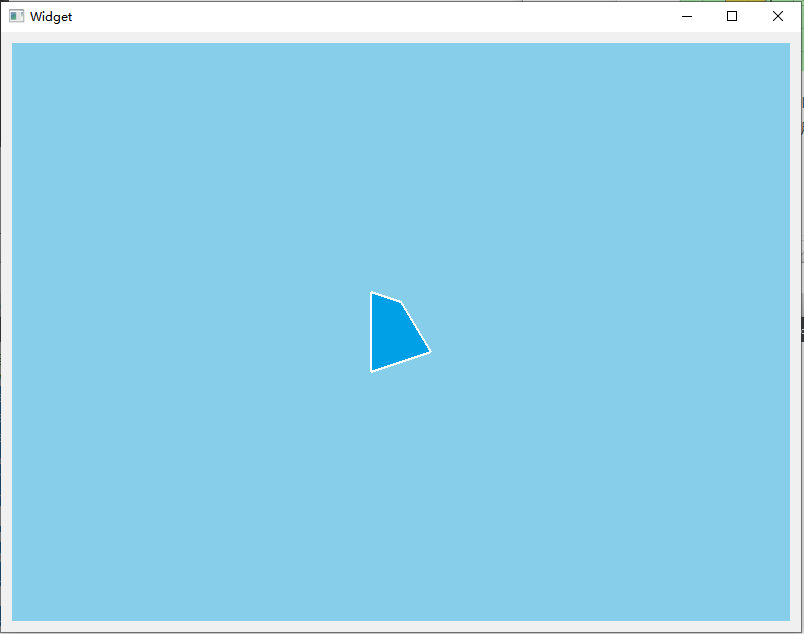```cpp#include <QGraphicsPolygonItem>#include <QGraphicsScene>#include <QGraphicsView>#include <QLayout>#include <QPen>#include <QString>Widget::Widget(QWidget* parent): QWidget(parent), ui(new Ui::Widget){ui->setupUi(this);QGraphicsPolygonItem* pItem = new QGraphicsPolygonItem();// 绘制多边形QPolygonF polygon;polygon << QPointF(200.0, 120.0) << QPointF(230.0, 130.0)<< QPointF(260.0, 180.0) << QPointF(200.0, 200.0);pItem->setPolygon(polygon);// 设置画笔、画刷QPen pen = pItem->pen();pen.setWidth(2);pen.setColor(Qt::white);pItem->setPen(pen);pItem->setBrush(QBrush(QColor(0, 160, 230)));// 将Item添加到场景中QGraphicsScene* pScene = new QGraphicsScene();pScene->addItem(pItem);// 为视图设置场景QGraphicsView* pView = new QGraphicsView();pView->setScene(pScene);pView->setStyleSheet("border:none; background:skyblue");QVBoxLayout* layout = new QVBoxLayout(this);layout->addWidget(pView);}
要将QGraphicsPolygonItem添加至场景中,有两种方式:
- 构造
QGraphicsPathItem,然后通过QGraphicsScene::addItem()添加 - 使用
QGraphicsScene::addPolygon()创建并添加一个QGraphicsPolygonItem,并返回 item 的指针
参考链接 https://waleon.blog.csdn.net/article/details/53065293 https://www.cnblogs.com/aiguona/p/10002255.html

若有收获,就点个赞吧
0 人点赞
