1 引言
- 配置文件分散在不同的项目中,不方便维护。
- 配置文件的安全问题。
- 修改完配置文件,无法立即生效。
2 搭建Config-Server
创建Maven工程,修改为SpringBoot
导入依赖
<dependency><groupId>org.springframework.cloud</groupId><artifactId>spring-cloud-config-server</artifactId></dependency><dependency><groupId>org.springframework.cloud</groupId><artifactId>spring-cloud-starter-netflix-eureka-client</artifactId></dependency>
添加注解
@EnableConfigServer
编写配置文件(Git的操作)
spring:cloud:config:server:git:basedir: D:\basedir # 本地仓库的地址username: zjw_2301211@126.com # 远程仓库用户名password: z123123 # 远程仓库密码uri: https://gitee.com/zhengdaxian/config-resp.git # 远程仓库地址
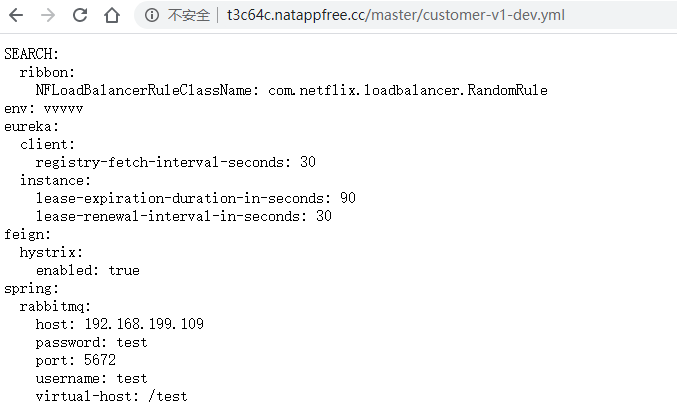
http://localhost:8099/master/bootstrap-xxs.yml
测试(http://localhost:port/{label}/{application}-{profile}.yml)
label 就是你远程仓库分支名称
application 文件名称
“-“ 中横线 必须有
profile 必须有:如果没有profile后缀 也必须随便写一个,如果有就拉取你自己的profile(dev、test、pre、pro)
3 搭建Config-Client
<dependency><groupId>org.springframework.cloud</groupId><artifactId>spring-cloud-config-client</artifactId></dependency>
编写配置文件
# 指定Eureka服务地址eureka:client:service-url:defaultZone: http://root:root@localhost:8761/eureka,http://root:root@localhost:8762/eureka#指定服务的名称spring:application:name: CUSTOMER-${version}cloud:config:discovery:enabled: trueservice-id: CONFIGprofile: devversion: v1# CONFIG -> CUSTOMER-v1-dev.yml
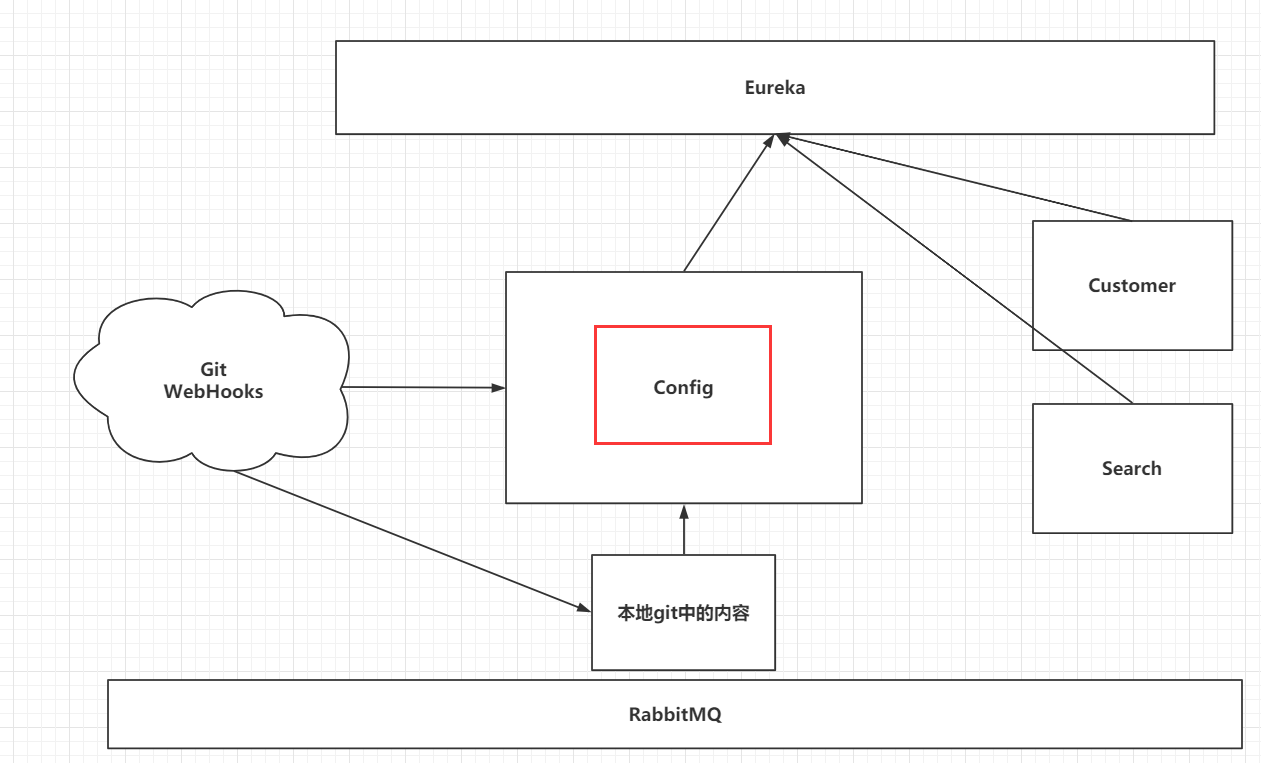
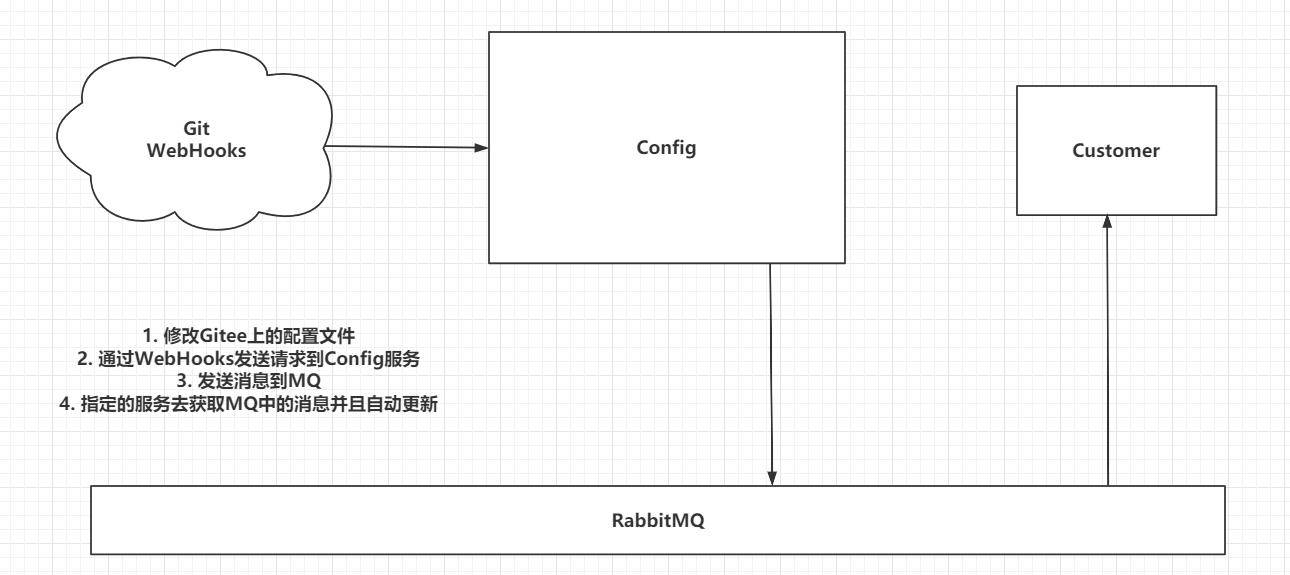
4 实现动态配置
4.1 实现原理
4.2 服务连接RabbitMQ
导入依赖
<dependency><groupId>org.springframework.cloud</groupId><artifactId>spring-cloud-starter-bus-amqp</artifactId></dependency>
编写配置文件连接RabbitMQ信息
spring:rabbitmq:host: 192.168.199.109port: 5672username: testpassword: testvirtual-host: /test
4.3 实现手动刷新
导入依赖
<dependency><groupId>org.springframework.boot</groupId><artifactId>spring-boot-starter-actuator</artifactId></dependency>
编写配置文件
management:endpoints:web:exposure:include: "*"
为customer添加一个controller
@RestController@RefreshScope //刷新public class CustomerController {@Value("${env}")private String env;@GetMapping("/env")public String env(){return env;}}
测试
1. CONFIG在Gitee修改之后,自动拉取最新的配置信息。2. 其他模块需要更新的话,手动发送一个请求http://ip:port/actuator/bus-refresh,不重启项目,即可获取最新的配置信息
4.4 内网穿透
内网穿透的官网https://natapp.cn/
注册登录
购买一个免费的隧道。
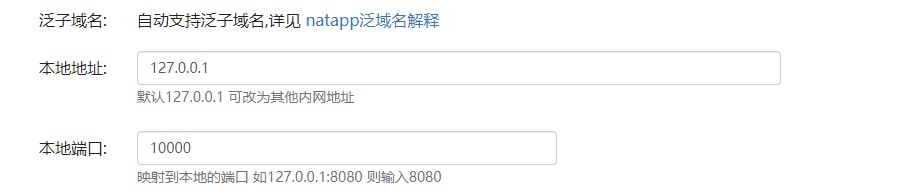
下载客户端,并复制config.ini文件,在文件中指定authtoken

启动exe文件,并测试使用域名访问config接口
4.5 实现自动刷新
配置Gitee中的WebHooks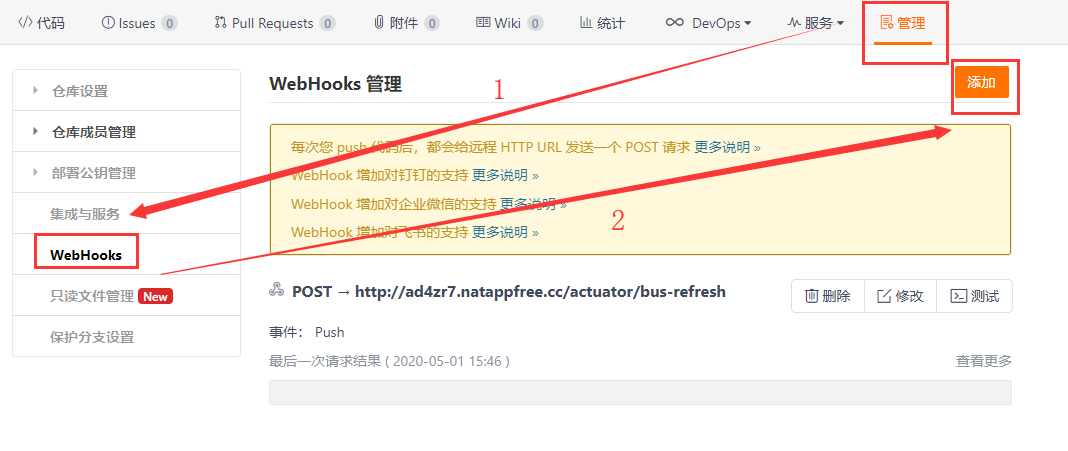
给Config添加一个过滤器
直接去代码中找到Filter

若有收获,就点个赞吧
0 人点赞
