异步加载基本使用
{tip} Since
v1.7.0异步加载功能支持静态资源按需加载的特性,目前内置的所有组件都支持使用异步渲染功能,并且支持在页面的任意位置中使用
通过异步加载功能可以让页面中的整体或局部组件使用ajax异步渲染,从而提高页面加载效率(例如弹窗异步加载表单)。
基本用法
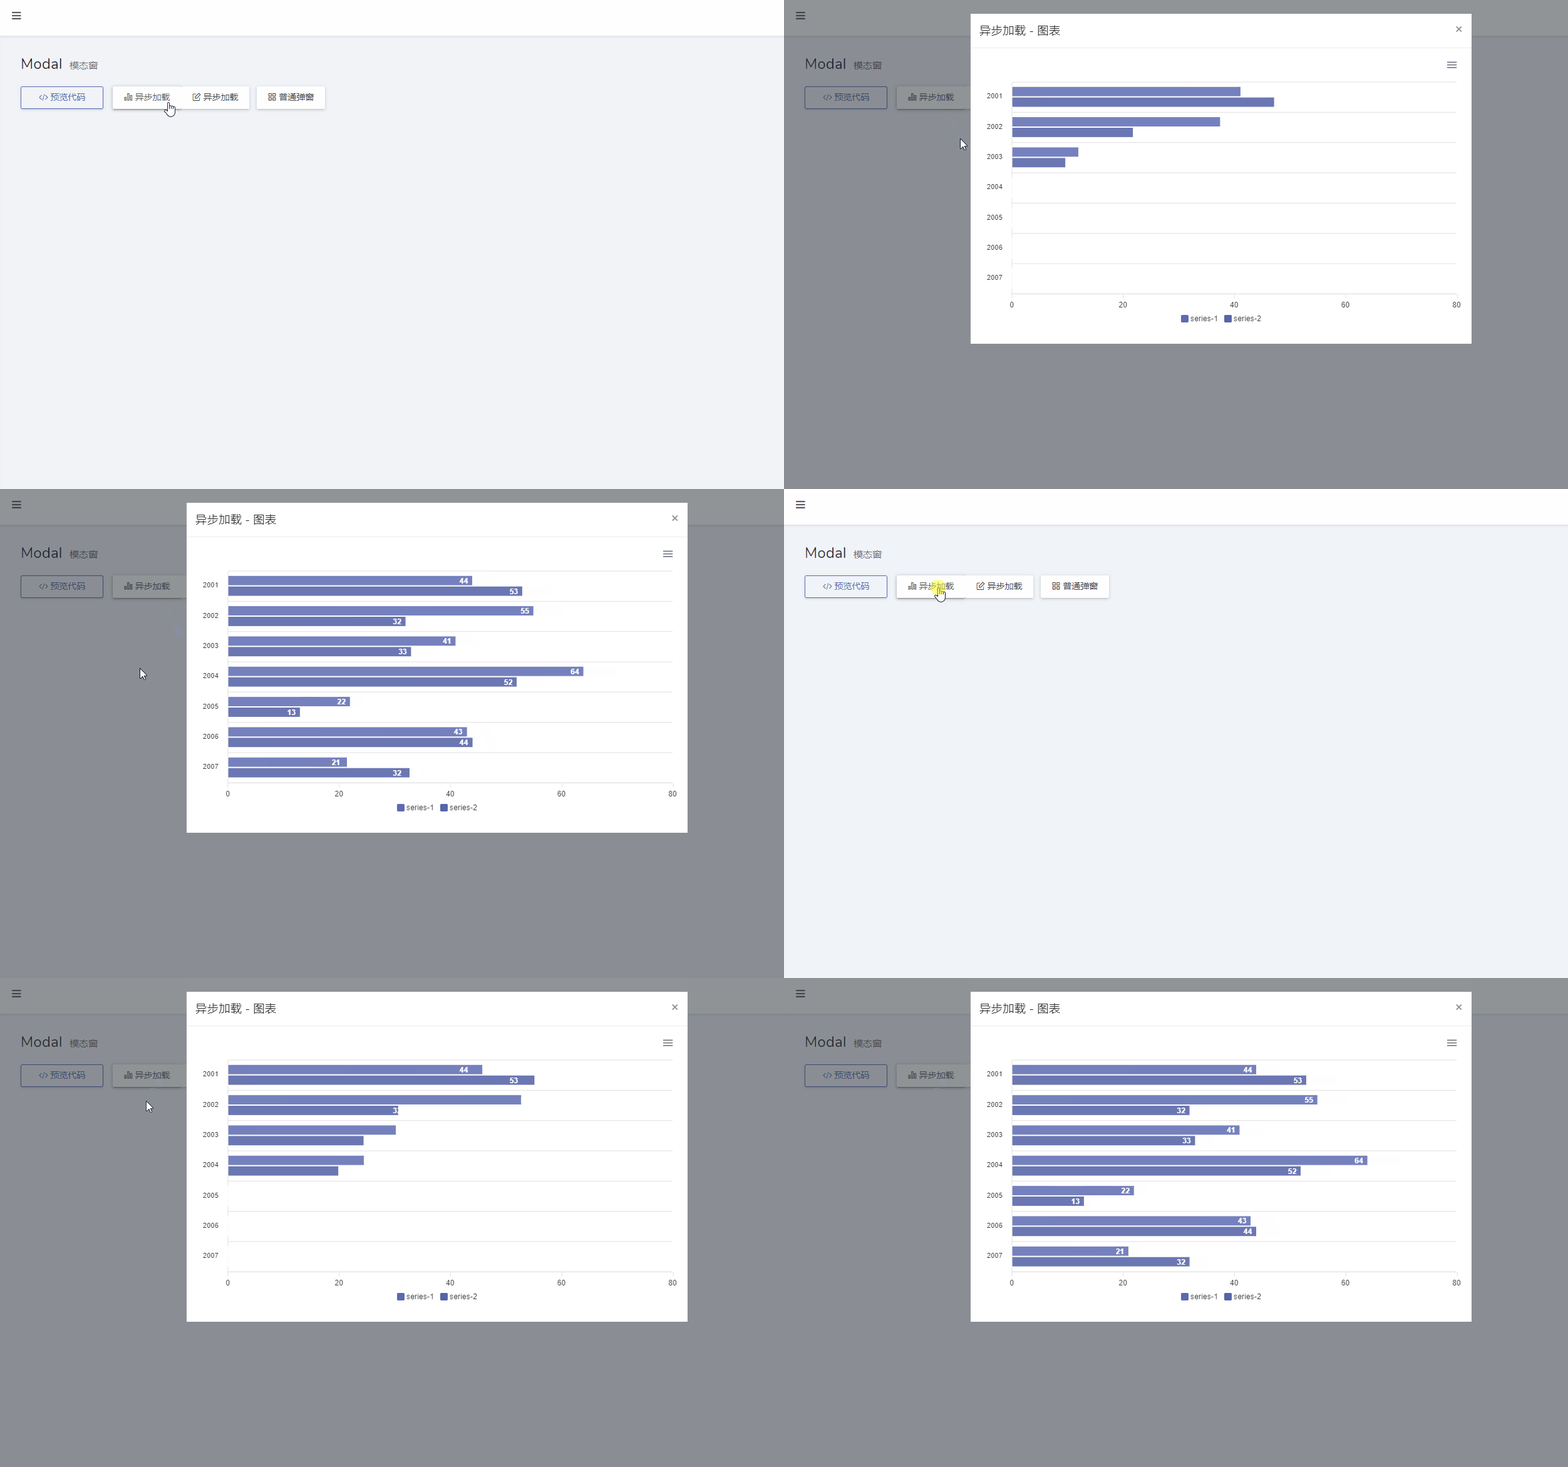
下面通过一个简单的示例来演示异步加载功能的用法
先定义一个异步渲染类,继承Dcat\Admin\Support\LazyRenderable
<?phpnamespace App\Admin\Renderable;use App\Admin\Widgets\Charts\Bar;use Dcat\Admin\Support\LazyRenderable;class PostChart extends LazyRenderable{public function render(){// 获取外部传递的参数$id = $this->id;// 查询数据逻辑$data = [...];// 这里可以返回内置组件,也可以返回视图文件或HTML字符串return Bar::make($data);}}
然后需要把渲染类实例传入Dcat\Admin\Widgets\Lazy对象中,才能最终实现异步渲染的效果
use App\Admin\Renderable\PostChart;use Dcat\Admin\Widgets\Lazy;use Dcat\Admin\Layout\Content;public function index(Content $content){// 实例化异步渲染类并传递自定义参数$chart = PostChart::make(['id' => ...]);return $content->body(Lazy::make($chart));}
也可以放在内置组件中
{tip} 如果是
Dcat\Admin\Widgets\Card、Dcat\Admin\Widgets\Box、Dcat\Admin\Widgets\Modal、Dcat\Admin\Widgets\Tab等组件,则可以略过Dcat\Admin\Widgets\Lazy组件,直接传递渲染类实例
use App\Admin\Renderable\PostChart;use Dcat\Admin\Widgets\Card;use Dcat\Admin\Layout\Content;public function index(Content $content){$chart = PostChart::make(['id' => ...]);// Card 组件支持直接传递 LazyRenderable 实例,可以略过 Lazy 对象return $content->body(Card::make($chart));}// 如果是 Modal、Box 等等都可以直接略过 Lazyuse Dcat\Admin\Widgets\Modal;$chart = PostChart::make(['id' => ...]);$modal = Modal::make()->lg()->title('标题')->delay(300) // 如果是异步渲染图表则需要设置一个延迟时间,否则可能导致图表渲染异常->body($chart);
当然也可以防止在视图或者是HTML代码中
use App\Admin\Renderable\PostChart;use Dcat\Admin\Widgets\Lazy;use Dcat\Admin\Layout\Content;public function index(Content $content){$chart = Lazy::make(PostChart::make(['id' => ...]));return $content->body(view('admin.xxx', ['chart' => $chart]));}
效果
Dcat\Admin\Support\LazyRenderable
参数传递 (payload)
use App\Admin\Renderable\PostChart;PostChart::make(['key1' => '值', ...]);// 也可以通过 payload 方法传递PostChart::make()->payload(['key1' => '值', ...]);
获取参数
class PostChart extends LazyRenderable{protected $title = ['#', '标题', '内容'];public function render(){// 获取外部传递的参数$key1 = $this->key1;$key2 = $this->key2;...}}
载入JS和CSS
异步加载功能同样支持静态资源按需加载的特性,并且用法也很简单
<?phpnamespace App\Admin\Renderable;use Dcat\Admin\Support\LazyRenderable;use Dcat\Admin\Admin;class CustomView extends LazyRenderable{// 这里写入需要加载的js和css文件路径public static $js = ['xxx/xxx1.js','xxx/xxx2.js',];public static $css = ['xxx/xxx1.css','xxx/xxx2.css',];protected function addScript(){Admin::script(<<<JSconsole.log('JS脚本都加载完了~');JS);}public function render(){// 添加你的 JS 代码$this->addScript();return view('admin.custom', ['...']);}}
模板文件代码示例,注意不要包含body和html等标签
<div id="custom" class="custom"><h2>异步加载功能</h2></div><script>Dcat.ready(function () {// JS 代码也可以放在模板文件中console.log('模板文件执行js~');});</script>
Dcat\Admin\Widgets\Lazy
onLoad
通过此方法可以监听异步加载完成事件
use App\Admin\Renderable\PostChart;use Dcat\Admin\Widgets\Lazy;$chart = Lazy::make(PostChart::make())->onLoad(<<<JSconsole.log('组件渲染完成');JS);
load
此方法可以控制是否立即渲染异步组件,默认值是true
use App\Admin\Renderable\PostChart;use Dcat\Admin\Widgets\Lazy;use Dcat\Admin\Admin;$lazy = Lazy::make(PostChart::make())->load(false);Admin::script(<<<JSsetTimeout(function () {// 3秒后自动触发异步渲染事件{$lazy->getLoadScript()}}, 3000);JS);
JS事件
use App\Admin\Renderable\PostChart;use Dcat\Admin\Widgets\Lazy;use Dcat\Admin\Admin;$lazy = Lazy::make(PostChart::make());Admin::script(<<<JS// 手动触发异步渲染事件$('{$lazy->getElementSelector()}').trigger('lazy:load');// 监听渲染完成事件$('{$lazy->getElementSelector()}').on('lazy:loaded', function () {console.log('组件渲染完成了')});JS);
异步加载数据表格
如果需要异步异步加载数据表格,则定义渲染类时需要继承Dcat\Admin\Grid\LazyRenderable
<?phpnamespace App\Admin\Renderable;use Dcat\Admin\Grid;use Dcat\Admin\Grid\LazyRenderable;use Dcat\Admin\Models\Administrator;class UserTable extends LazyRenderable{public function grid(): Grid{return Grid::make(new Administrator(), function (Grid $grid) {$grid->column('id');$grid->column('username');$grid->column('name');$grid->column('created_at');$grid->column('updated_at');$grid->quickSearch(['id', 'username', 'name']);$grid->paginate(10);$grid->disableActions();$grid->filter(function (Grid\Filter $filter) {$filter->like('username')->width(4);$filter->like('name')->width(4);});});}}
使用
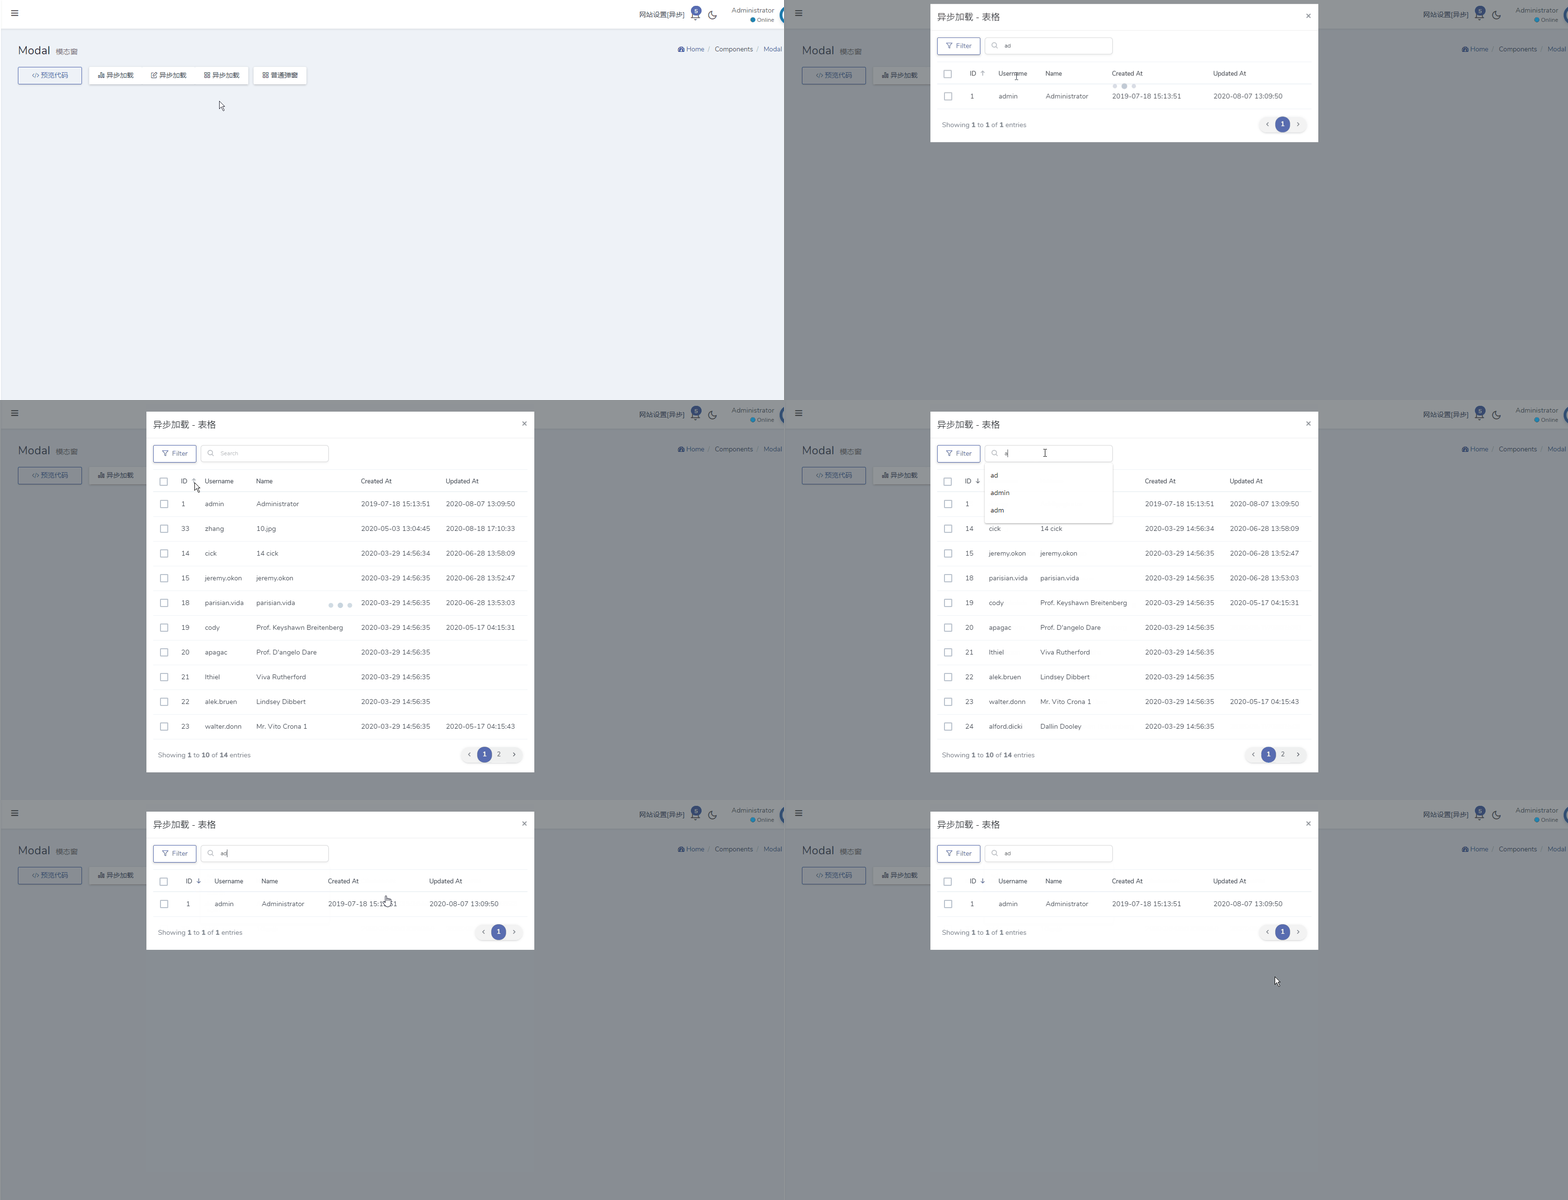
use App\Admin\Renderable\UserTable;use Dcat\Admin\Widgets\Modal;use Dcat\Admin\Layout\Content;public function index(Content $content){$modal = Modal::make()->lg()->title('异步加载 - 表格')->body(UserTable::make()) // Modal 组件支持直接传递 渲染类实例->button('打开表格');return $content->body($modal);}
效果
同样渲染类的实例也可以附加到 Dcat\Admin\Widgets\Card、Dcat\Admin\Widgets\Box、Dcat\Admin\Widgets\Tab等组件中
use App\Admin\Renderable\UserTable;use Dcat\Admin\Widgets\Card;$table = UserTable::make();$card = Card::make('标题', $table)->withHeaderBorder();
以上代码渲染UserTable实例时,其实是底层自动加上了Dcat\Admin\Widgets\LazyTable类实例,以上代码等同于
use App\Admin\Renderable\UserTable;use Dcat\Admin\Widgets\Card;use Dcat\Admin\Widgets\LazyTable;$table = LazyTable::make(UserTable::make()->simple());$card = Card::make('标题', $table)->withHeaderBorder();
Dcat\Admin\Grid\LazyRenderable
Dcat\Admin\Grid\LazyRenderable用于异步渲染数据表格,是Dcat\Admin\Support\LazyRenderable的子类
简化模式
此功能会去除简化一些数据表格默认开启的功能,默认不启用
use App\Admin\Renderable\UserTable;use Dcat\Admin\Widgets\LazyTable;use Dcat\Admin\Layout\Content;public function index(Content $content){$table = UserTable::make()->simple();return $content->body(LazyTable::make($table));}
注意,如果把渲染类实例直接注入到Dcat\Admin\Widgets\Card、Dcat\Admin\Widgets\Box、Dcat\Admin\Widgets\Tab和Dcat\Admin\Widgets\Modal等组件时,则会自动启用simple模式
use App\Admin\Renderable\UserTable;use Dcat\Admin\Widgets\Card;// 这里会自动启用 simple 模式$card = Card::make('标题', UserTable::make())->withHeaderBorder();
如果你不希望启用 simple 模式,可以传入 LazyTable 实例
use App\Admin\Renderable\UserTable;use Dcat\Admin\Widgets\Card;use Dcat\Admin\Widgets\LazyTable;$table = LazyTable::make(UserTable::make());$card = Card::make('标题', $table)->withHeaderBorder();
Dcat\Admin\Widgets\LazyTable
onLoad
通过此方法可以监听异步加载完成事件
use App\Admin\Renderable\PostChart;use Dcat\Admin\Widgets\Lazy;$chart = Lazy::make(PostChart::make())->onLoad(<<<JSconsole.log('组件渲染完成');JS);
load
此方法可以控制是否立即渲染异步组件,默认值是true
use App\Admin\Renderable\UserTable;use Dcat\Admin\Widgets\LazyTable;use Dcat\Admin\Admin;$lazy = LazyTable::make(UserTable::make())->load(false);Admin::script(<<<JSsetTimeout(function () {// 3秒后自动触发异步渲染事件{$lazy->getLoadScript()}}, 3000);JS);
JS事件
use App\Admin\Renderable\UserTable;use Dcat\Admin\Widgets\LazyTable;use Dcat\Admin\Admin;$lazy = LazyTable::make(UserTable::make());Admin::script(<<<JS// 手动触发异步渲染事件$('{$lazy->getElementSelector()}').trigger('table:load');// 监听渲染完成事件$('{$lazy->getElementSelector()}').on('table:loaded', function () {console.log('组件渲染完成了')});JS);
异步加载工具表单
定义工具表单类,实现Dcat\Admin\Contracts\LazyRenderable,并载入Dcat\Admin\Traits\LazyWidget这个trait
<?phpnamespace App\Admin\Forms;use Dcat\Admin\Contracts\LazyRenderable;use Dcat\Admin\Traits\LazyWidget;use Dcat\Admin\Widgets\Form;class UserProfile extends Form implements LazyRenderable{use LazyWidget;public function handle(array $input){return $this->success('保存成功');}public function form(){$this->text('name', trans('admin.name'))->required()->help('用户昵称');$this->image('avatar', trans('admin.avatar'))->autoUpload();$this->password('old_password', trans('admin.old_password'));$this->password('password', trans('admin.password'))->minLength(5)->maxLength(20)->customFormat(function ($v) {if ($v == $this->password) {return;}return $v;})->help('请输入5-20个字符');$this->password('password_confirmation', trans('admin.password_confirmation'))->same('password')->help('请输入确认密码');}}
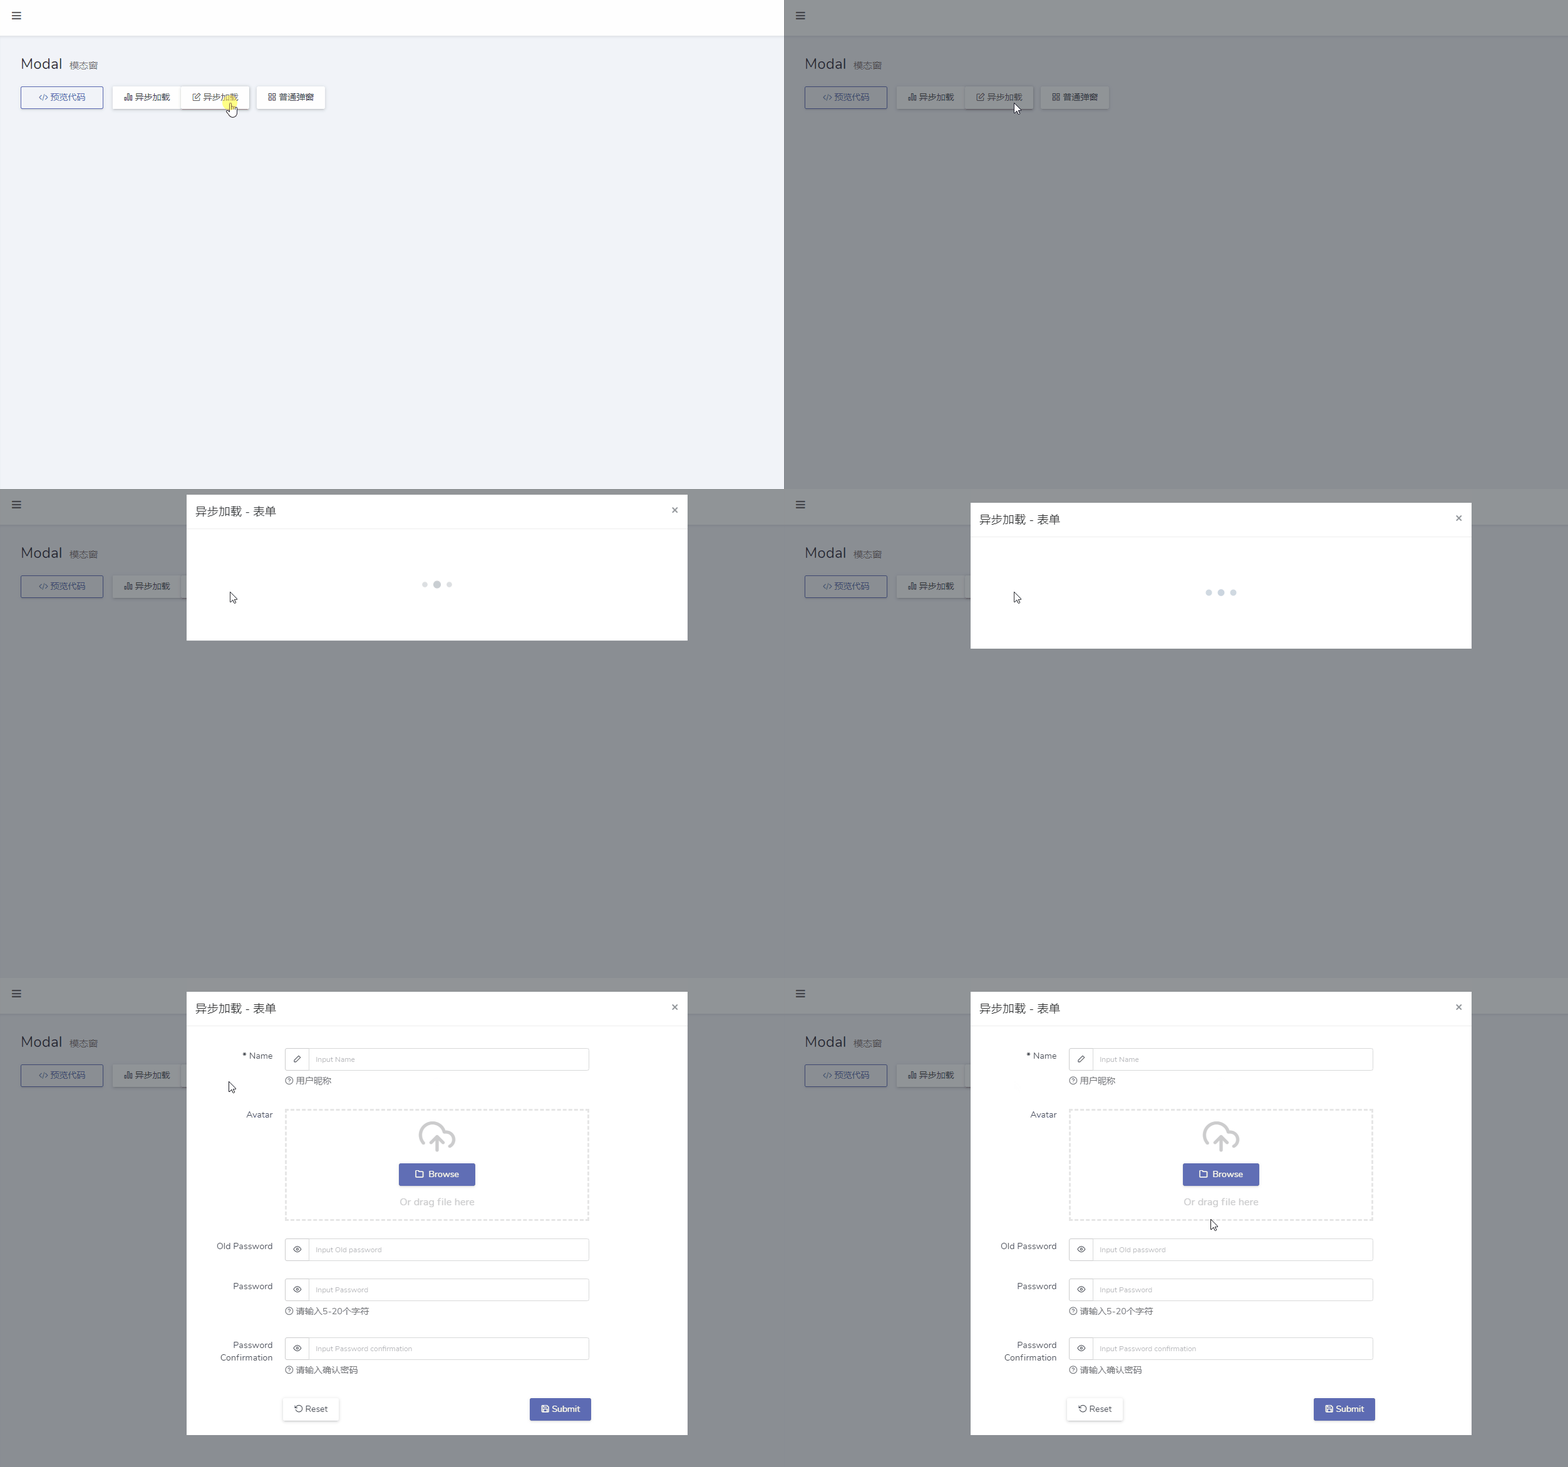
使用
use App\Admin\Forms\UserProfile;use Dcat\Admin\Widgets\Modal;use Dcat\Admin\Layout\Content;public function index(Content $content){$modal = Modal::make()->lg()->title('异步加载 - 表单')->body(UserProfile::make()) // Modal 组件支持直接传递渲染类实例->button('打开表单');return $content->body($modal);}
效果

当然异步表单实例,也可以在其他组件中使用
use App\Admin\Forms\UserProfile;use Dcat\Admin\Widgets\Lazy;use Dcat\Admin\Widgets\Card;$form = UserProfile::make();// 直接传递到 Card 组件中$card = Card::make($form);// 等同于$card = Card::make(Lazy::make($form));
传递自定义参数
给异步表单传递参数非常简单,修改上面表单类如下
<?phpnamespace App\Admin\Forms;use Dcat\Admin\Contracts\LazyRenderable;use Dcat\Admin\Traits\LazyWidget;use Dcat\Admin\Widgets\Form;class UserProfile extends Form implements LazyRenderable{use LazyWidget;public function handle(array $input){// 获取外部传递的参数$key1 = $this->payload['key1'] ?? null;$key2 = $this->payload['key1'] ?? null;return $this->success('保存成功');}public function form(){// 获取外部传递的参数$key1 = $this->payload['key1'] ?? null;$key2 = $this->payload['key1'] ?? null;$this->text('name', trans('admin.name'))->required()->help('用户昵称');$this->image('avatar', trans('admin.avatar'))->autoUpload();$this->password('old_password', trans('admin.old_password'));$this->password('password', trans('admin.password'))->minLength(5)->maxLength(20)->customFormat(function ($v) {if ($v == $this->password) {return;}return $v;})->help('请输入5-20个字符');$this->password('password_confirmation', trans('admin.password_confirmation'))->same('password')->help('请输入确认密码');}public function default(){// 获取外部传递的参数$key1 = $this->payload['key1'] ?? null;$key2 = $this->payload['key1'] ?? null;return ['name' => '...',];}}
传递参数代码如下
// 传递自定义参数$form = UserProfile::make()->payload(['key1' => '...', 'key2' => '...']);$modal = Modal::make()->lg()->title('异步加载 - 表单')->body($form)->button('打开表单');


