现在Nginx已经顺利安装完成了,之后的任务就是要学习配置和使用它了。
查看Nginx的安装目录
在使用yum安装完Nginx后,需要知道系统中多了那些文件,它们都安装到了那里。可以使用下面的命令进行查看:
rpm -ql nginx

rpm 是linux的rpm包管理工具,-q 代表询问模式,-l 代表返回列表,这样我们就可以找到nginx的所有安装位置了。
nginx.conf文件解读
nginx.conf 文件是Nginx总配置文件,在我们搭建服务器时经常调整的文件。
进入etc/nginx目录下,然后用vim进行打开
cd /etc/nginxvim nginx.conf
下面是文件的详细注释,我几乎把每一句都进行了注释,你可以根据你的需要来进行配置。
#运行用户,默认即是nginx,可以不进行设置user nginx;#Nginx进程,一般设置为和CPU核数一样worker_processes 1;#错误日志存放目录error_log /var/log/nginx/error.log warn;#进程pid存放位置pid /var/run/nginx.pid;events {worker_connections 1024; # 单个后台进程的最大并发数}http {include /etc/nginx/mime.types; #文件扩展名与类型映射表default_type application/octet-stream; #默认文件类型#设置日志模式log_format main '$remote_addr - $remote_user [$time_local] "$request" ''$status $body_bytes_sent "$http_referer" ''"$http_user_agent" "$http_x_forwarded_for"';access_log /var/log/nginx/access.log main; #nginx访问日志存放位置sendfile on; #开启高效传输模式#tcp_nopush on; #减少网络报文段的数量keepalive_timeout 65; #保持连接的时间,也叫超时时间#gzip on; #开启gzip压缩include /etc/nginx/conf.d/*.conf; #包含的子配置项位置和文件
default.conf 配置项讲解 我们看到最后有一个子文件的配置项,那我们打开这个include子文件配置项看一下里边都有些什么内容。
进入conf.d目录,然后使用vim default.conf进行查看。
server {listen 80; #配置监听端口server_name localhost; //配置域名#charset koi8-r;#access_log /var/log/nginx/host.access.log main;location / {root /usr/share/nginx/html; #服务默认启动目录index index.html index.htm; #默认访问文件}#error_page 404 /404.html; # 配置404页面# redirect server error pages to the static page /50x.html#error_page 500 502 503 504 /50x.html; #错误状态码的显示页面,配置后需要重启location = /50x.html {root /usr/share/nginx/html;}# proxy the PHP scripts to Apache listening on 127.0.0.1:80##location ~ \.php$ {# proxy_pass http://127.0.0.1;#}# pass the PHP scripts to FastCGI server listening on 127.0.0.1:9000##location ~ \.php$ {# root html;# fastcgi_pass 127.0.0.1:9000;# fastcgi_index index.php;# fastcgi_param SCRIPT_FILENAME /scripts$fastcgi_script_name;# include fastcgi_params;#}# deny access to .htaccess files, if Apache's document root# concurs with nginx's one##location ~ /\.ht {# deny all;#}}
明白了这些配置项,我们知道我们的服务目录放在了/usr/share/nginx/html下,可以使用命令进入看一下目录下的文件。
cd /usr/share/nginx/htmlls
可以看到目录下面有两个文件,50x.html 和 index.html。我们可以使用vim进行编辑。
学到这里,其实可以预想到,我们的nginx服务器已经可以为html提供服务器了。我们可以打开浏览器,访问ip地址试一试。
阿里云的安全组配置
如果你使用的是阿里云,记得到ECS实例一下打开端口。
步骤如下:
- 进入阿里云控制台,并找到ECS实例。
- 点击实例后边的“更多”
- 点击“网络和安全组” ,再点击“安全组配置”
- 右上角添加“安全组配置”
- 进行80端口的设置,具体设置如图就好。
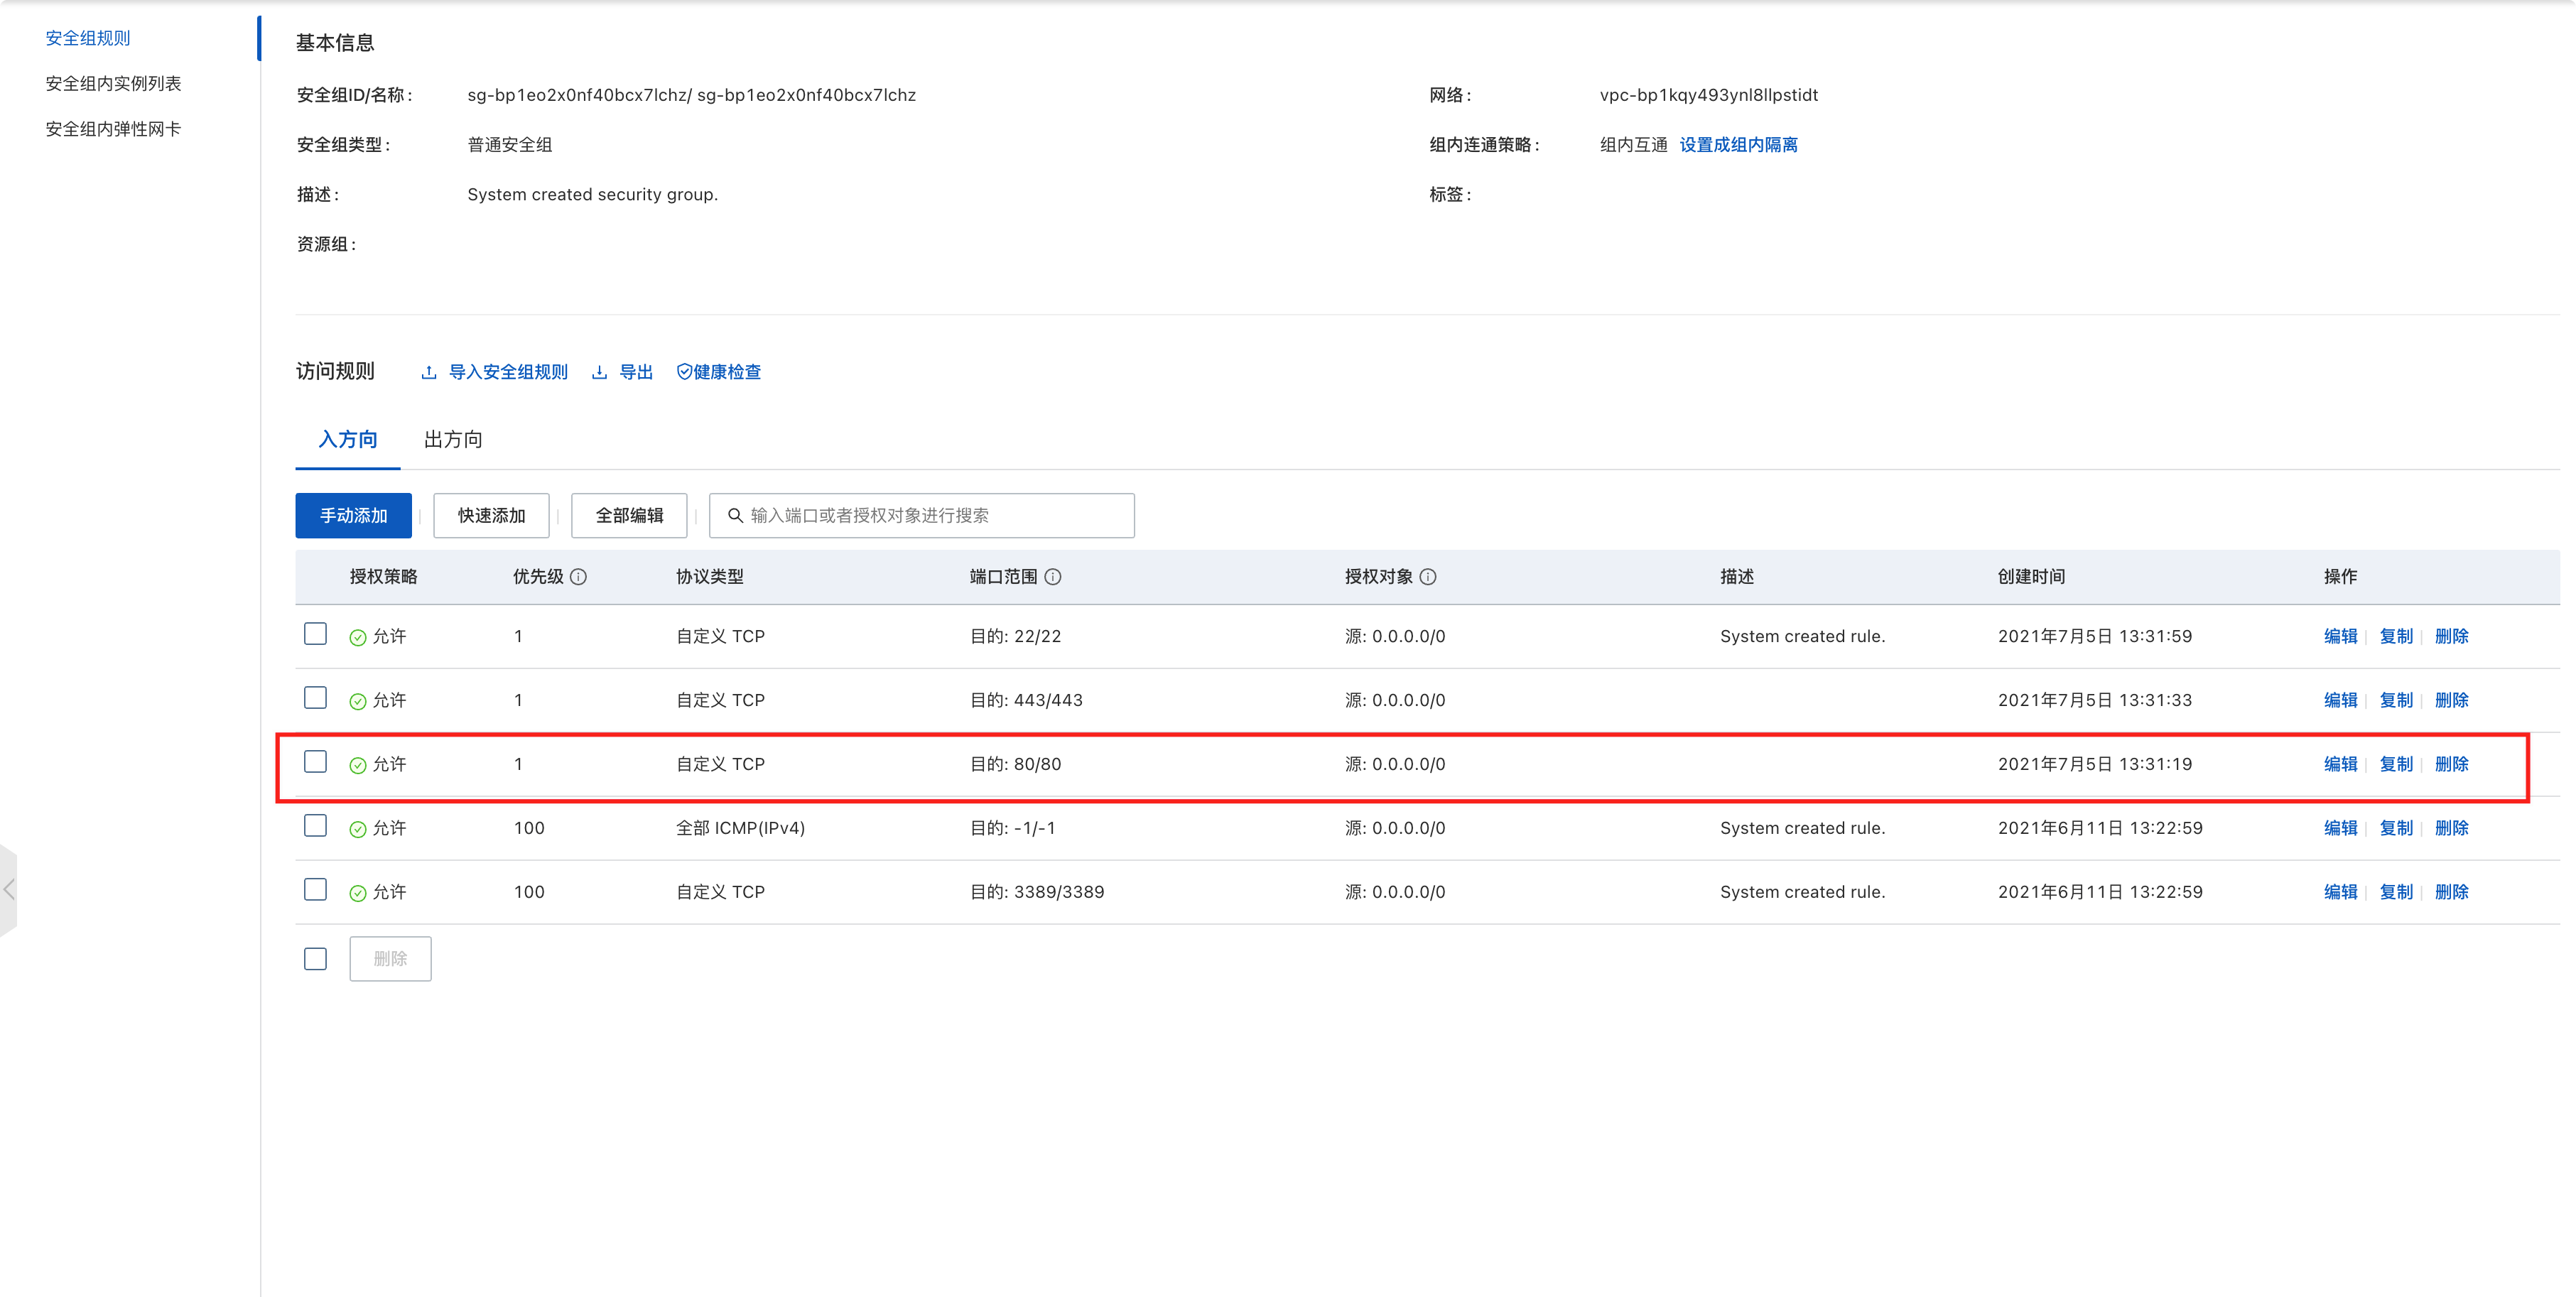
到这里我们就可以浏览到程序的页面了。本节就到这里,看到如下图片页面,说明你都配置成功了。

若有收获,就点个赞吧
0 人点赞
