1. brew 安装
brew install mysql

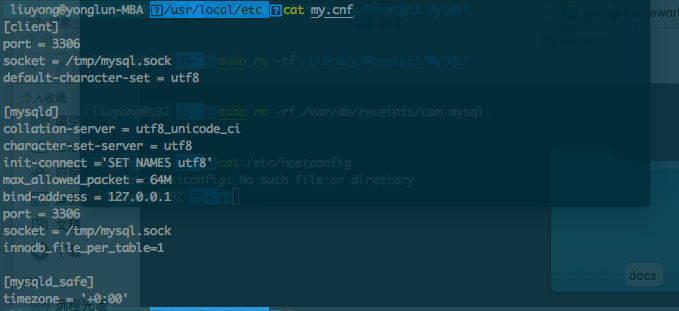
2. 修改 my.cnf
目录:/usr/local/etc/
[client]port = 3306socket = /tmp/mysql.sockdefault-character-set = utf8[mysqld]collation-server = utf8_unicode_cicharacter-set-server = utf8init-connect ='SET NAMES utf8'max_allowed_packet = 64Mbind-address = 127.0.0.1port = 3306socket = /tmp/mysql.sockinnodb_file_per_table=1[mysqld_safe]timezone = '+0:00'
3. 启动服务
mysql.server start
输出:
Starting MySQL.. SUCCESS!
4. 安装配置
mysql_secure_installation
按提示设置,涉及密码强度,密码,远程接入等配置。
5. 登录
mysql -u root -p
6. 建库
create database newlife;show databases;
7. 用户授权
-- 查询用户表命令select User,authentication_string,Host from user;-- 新增用户密码,%代表所有主机,也可以具体到你的主机ip地址CREATE USER 'newlife'@'%' identified BY 'newlife@pwd';-- 授权GRANT ALL ON newlife.* TO 'newlife'@'%';-- 刷新权限,消除缓存的影响FLUSH PRIVILEGES;
注意:Sequel Pro 连接会报错。
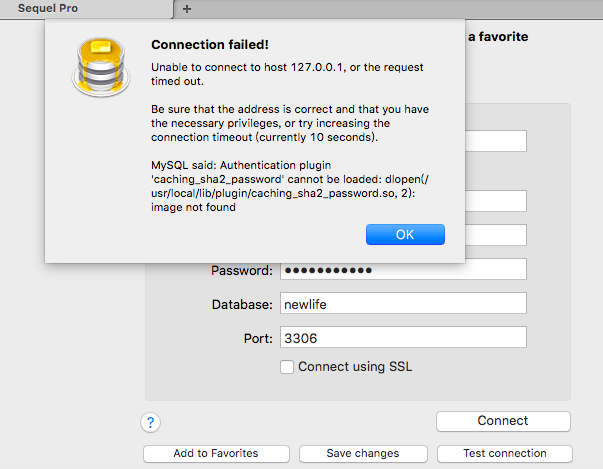
原因是该客户端不支持 caching_sha2_password 方式加密。
而 MySQL 默认采用了这种方式加密,可以通过以下方式确认。
select user, host, plugin, authentication_string from user;
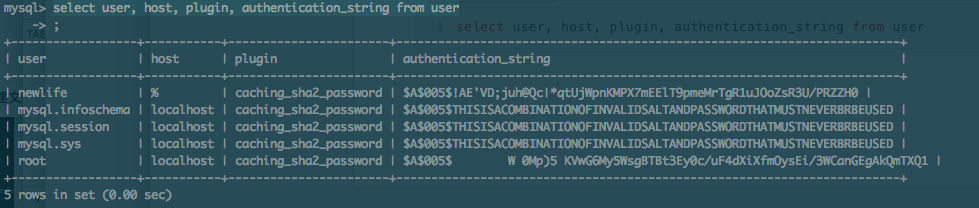
所以需要使用原生加密方式,我们换个用户试下。
CREATE USER 'newlifeuser'@'%' IDENTIFIED WITH mysql_native_password BY 'newlifeuser';GRANT ALL ON newlife.* TO 'newlifeuser'@'%';FLUSH PRIVILEGES;

若有收获,就点个赞吧
0 人点赞
