1、webpack简化源码剖析
webpack 在执行npx webpack进行打包后,都干了什么事情?
(function (modules) {var installedModules = {};function __webpack_require__(moduleId) {if (installedModules[moduleId]) {return installedModules[moduleId].exports;}var module = (installedModules[moduleId] = {i: moduleId,l: false,exports: {}}); modules[moduleId].call(module.exports, module, module.exports, __webpack_require__);module.l = true; return module.exports;}return __webpack_require__((__webpack_require__.s = "./index.js"));})({"./index.js": function (module, exports) {eval('// import a from "./a";\n\nconsole.log("hello word");\n\n\n//# sourceURL=webpack:///./index.js?')},"./a.js": function (module, exports) {eval('// import a from "./a";\n\nconsole.log("hello word");\n\n\n//#sourceURL = webpack:///./index.js?')},"./b.js": function (module, exports) {eval('// import a from "./a";\n\nconsole.log("hello word");\n\n\n//#sourceURL = webpack:///./index.js?');}});
使用webpack_require来实现内部的模块化,把代码都缓存在installedModules中,代码文件是以对象的形式传递进来,key是路径,value是包裹的代码字符串,并且代码内的require都被替换成了webpack_require
打包原理:
- 1、读取webpack的配置参数;
- 2、启动webpack,创建Compiler对象并开始解析项目;
- 3、从入口文件(entry)开始解析,并且找到其导入的依赖模块,递归遍历分析,形成依赖关系树;
- 4、对不同文件类型的依赖模块文件使用对应的Loader进行编译,最终转为Javascript文件;
- 5、整个过程中webpack会通过发布订阅模式,向外抛出一些hooks,而webpack的插件即可通过监听这些关键的事件节点,执行插件任务进而达到干预输出结果的目的。
2、webpack打包原理
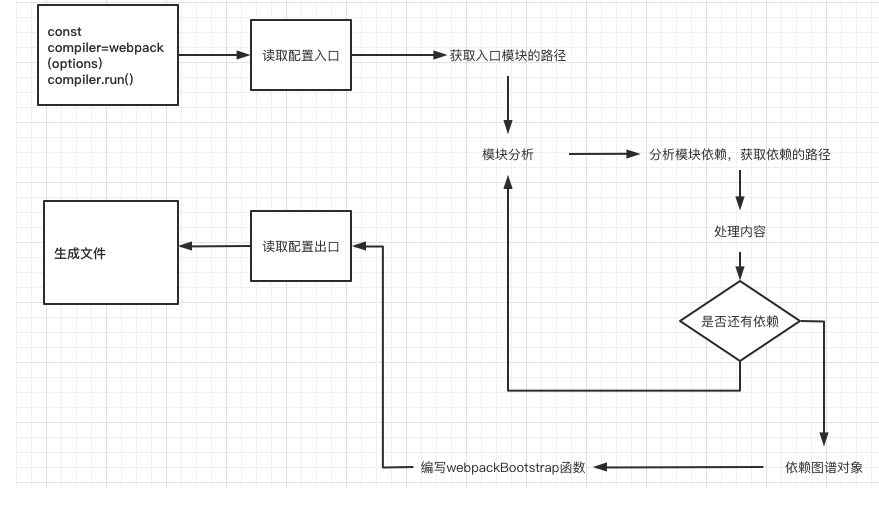
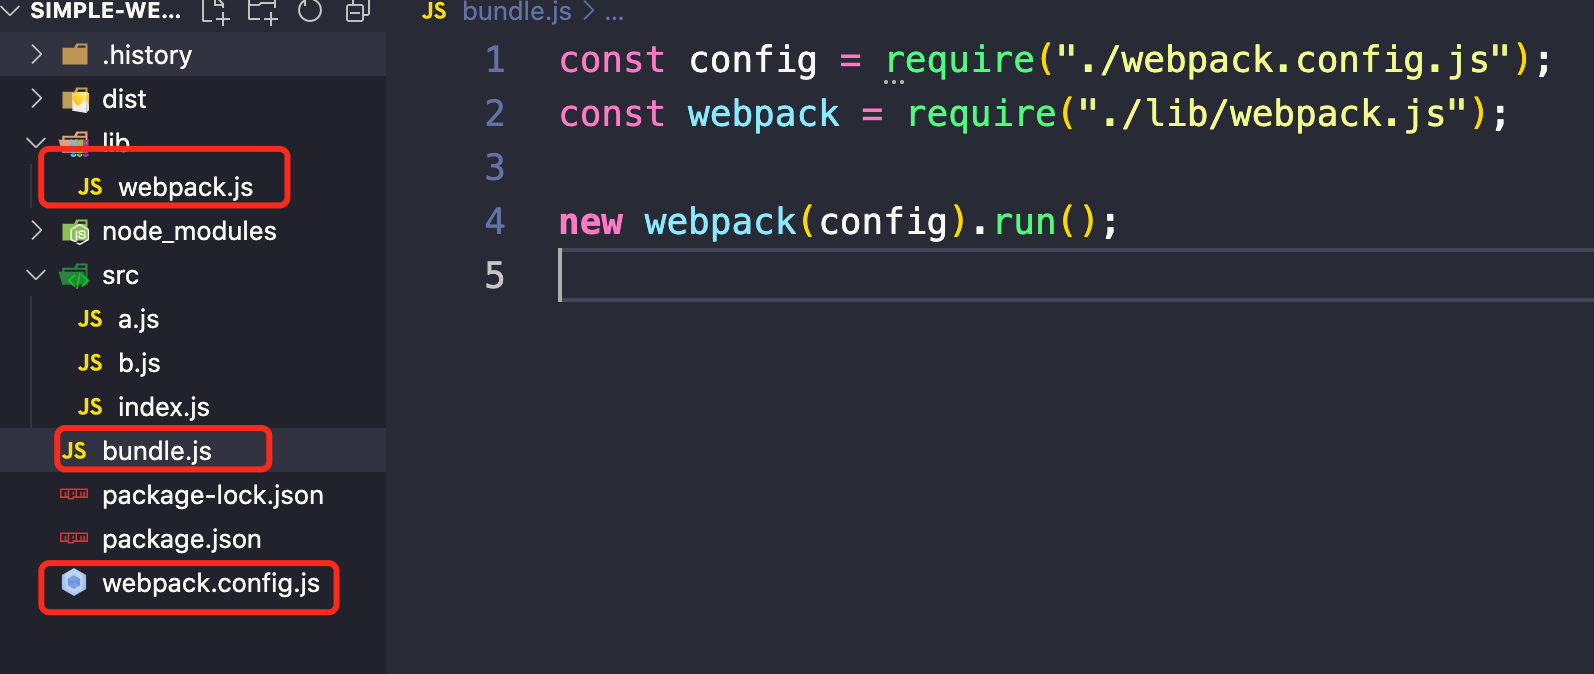
const compier = webpack(options)
compier.run()
创建一个webpack
- 接收一份配置(webpack.config.js)
- 分析出入口模块位置
- 读取入口模块的内容,分析内容
- 哪些是依赖
- 哪些是源码
- es6,jsx,处理需要编译浏览器能够执行
- 分析其他模块
- 拿到对象数据结构
- 模块路径
- 处理好的内容
- 创建bundle.js
3.1 准备
目标是将依赖的ES6Module打包为一个可以在浏览器中运行的一个JS文件(bundle.js)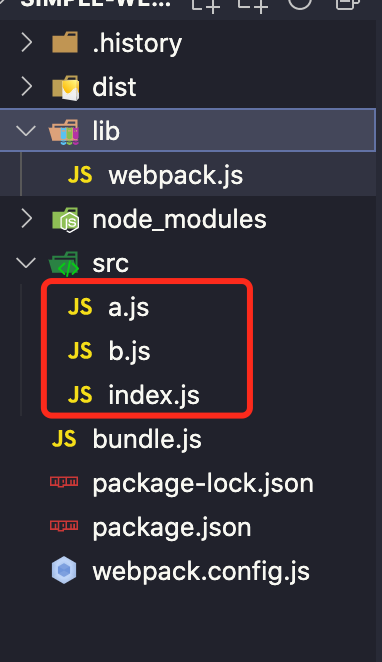
// index.jsimport { str } from "./a.js";import { str2 } from "./b.js";console.log(`${str2} hello ${str}`);// a.jsexport const str = "a";// b.jsexport const str = "b";
3.2 实现步骤
3.2.1 模块分析
读取入口文件,分析代码
const fs = require("fs");const parse= entry => {const content = fs.readFileSync(entry, "utf-8");console.log(content);};// 入口文件parse("./index.js");
模块的分析相当于对读取的文件代码字符串进行解析。这一步其实和高级语言的编译过程一致。需要将模块解析为抽象语法树AST。我们借助babel/parser来完成。
添加依赖:
yarn add @babel/parseryarn add @babel/traverseyarn add @babel/coreyarn add @babel/preset-env
转化成ast语法树
const ast = parser.parse(content, {sourceType: "module",});
收集依赖
// 依赖traverse(ast, {ImportDeclaration({ node }) {path.dirname(entryFile); //./src/index.jsconst newPathName = "./" + path.join(path.dirname(entryFile), node.source.value);dependencies[node.source.value] = newPathName;},});
<br />es6转es5
const { code } = transformFromAst(ast, null, {presets: ["@babel/preset-env"],});
完整代码:
parse(entryFile) {// 如何读取模块的内容const content = fs.readFileSync(entryFile, "utf-8");const ast = parser.parse(content, {sourceType: "module",});const dependencies = {};traverse(ast, {ImportDeclaration({ node }) {path.dirname(entryFile); //./src/index.js// 处理路径const newPathName ="./" + path.join(path.dirname(entryFile), node.source.value);dependencies[node.source.value] = newPathName;},});const { code } = transformFromAst(ast, null, {presets: ["@babel/preset-env"],});const res = {entryFile,dependencies,code,};console.log(res)}parse("./src/index.js")
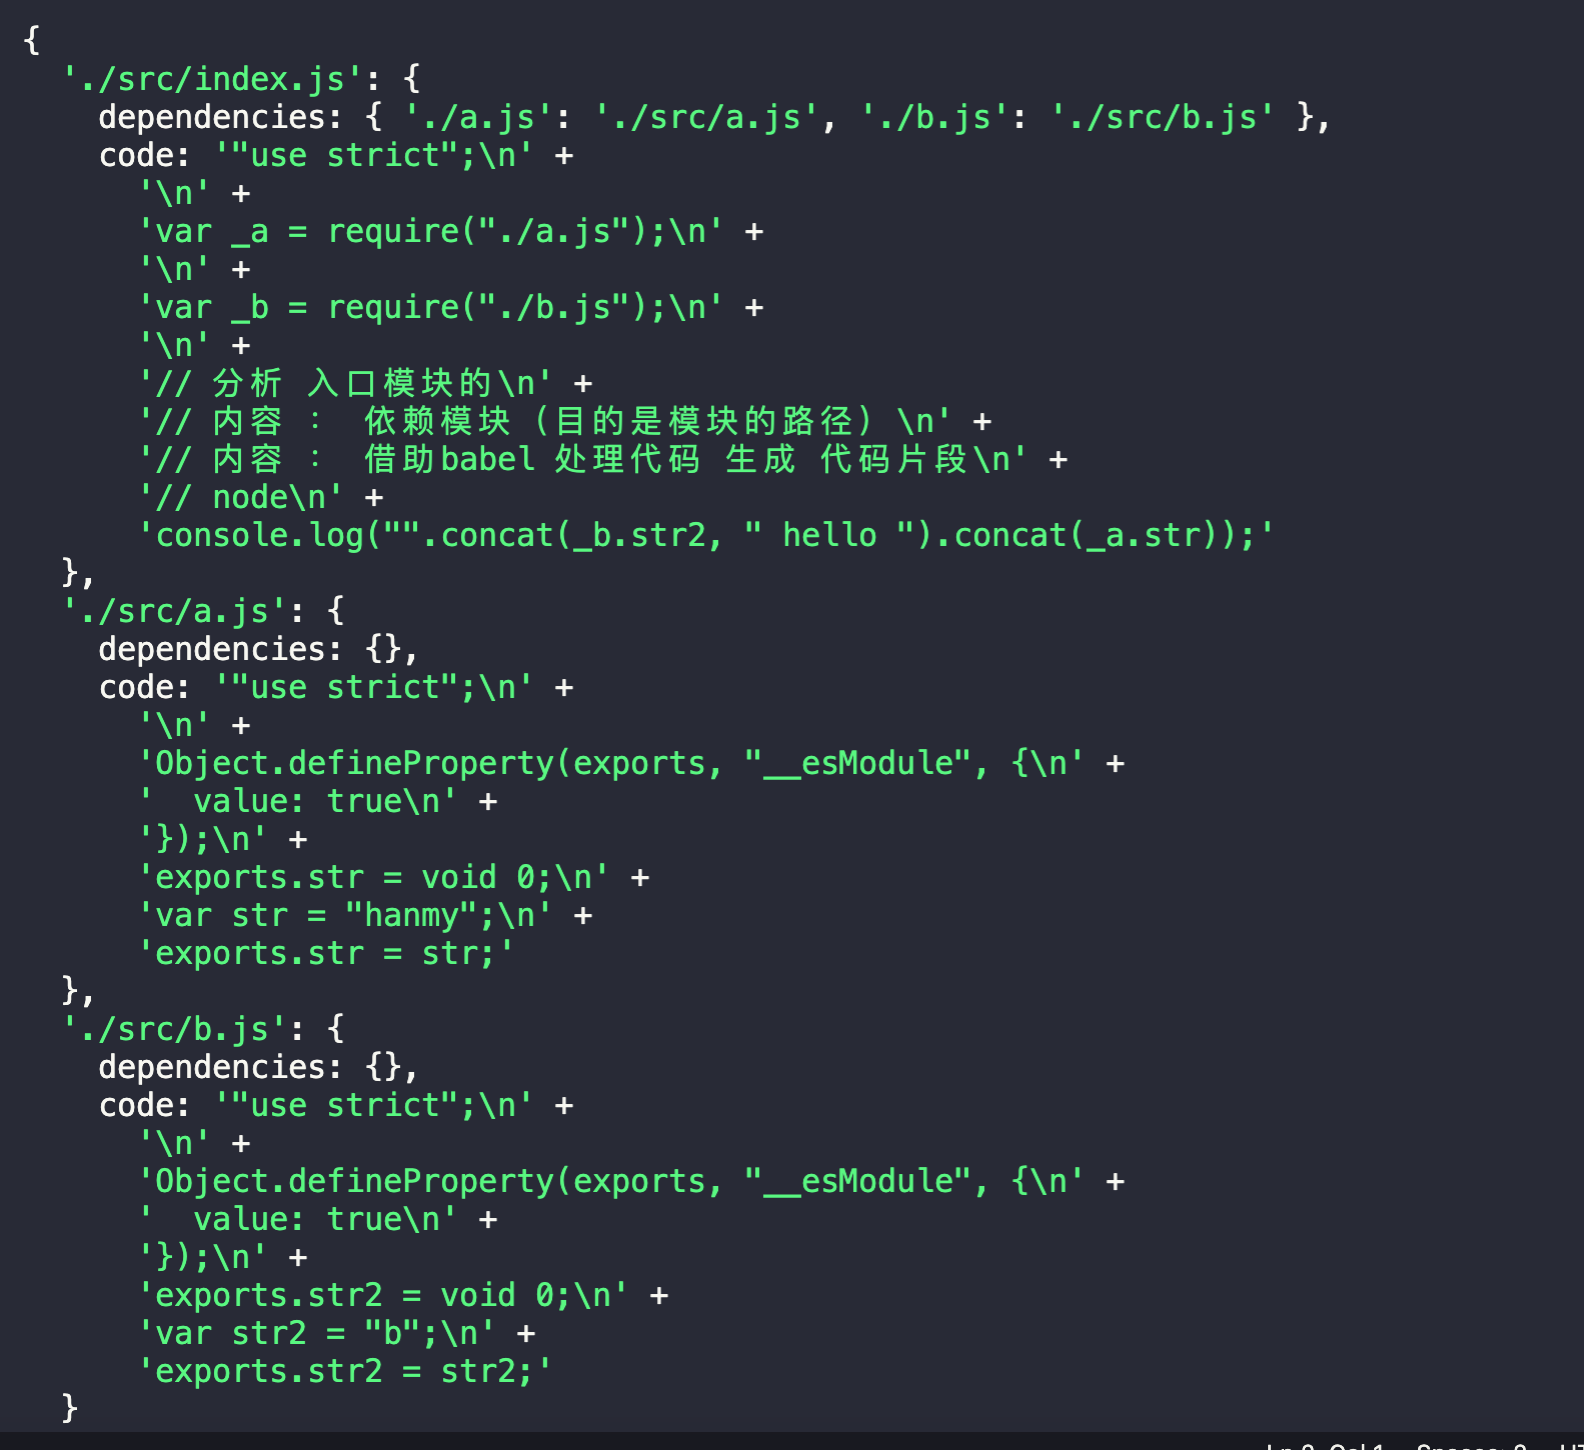
运行结果: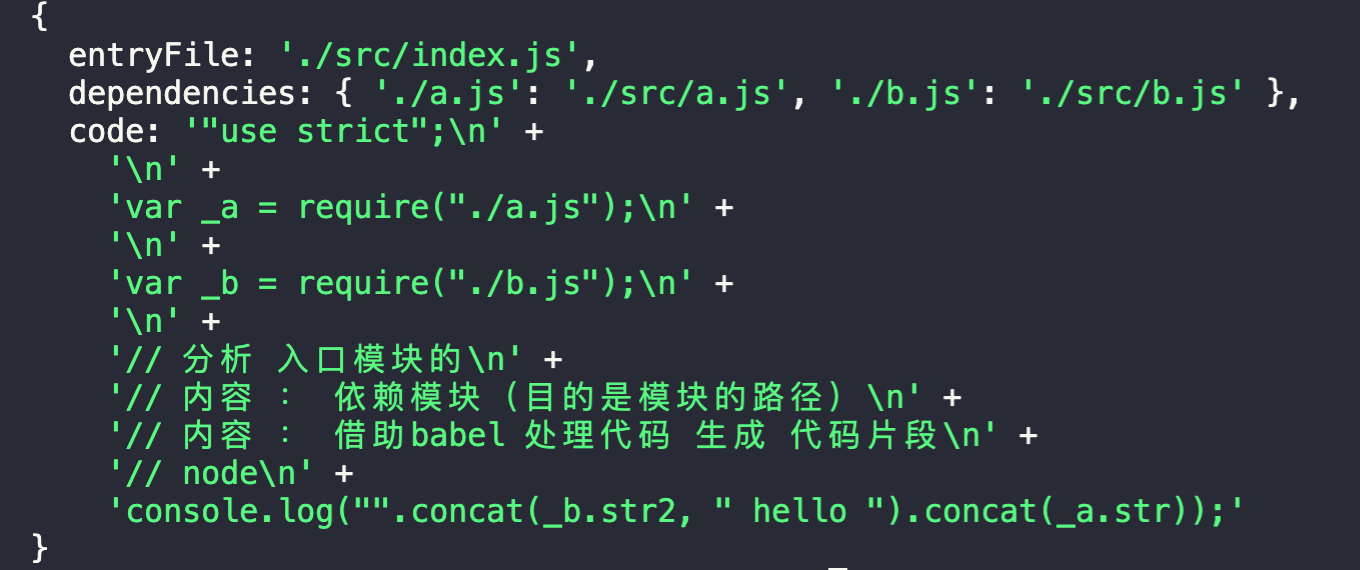
3.2.2 依赖模块收集
上一步开发的函数可以单独解析某一个模块,这一步我们需要开发一个函数从入口模块开始根据依赖关系进行递归解析。最后将依赖关系构成为依赖图(Dependency Graph)
run() {const info = this.parse(this.entry);//递归处理所有依赖this.modules.push(info);for (let i = 0; i < this.modules.length; i++) {const item = this.modules[i];const { dependencies } = item;if (dependencies) {for (let j in dependencies) {this.modules.push(this.parse(dependencies[j]));}}}// 修改数据结构 数组转对象const obj = {};this.modules.forEach((item) => {obj[item.entryFile] = {dependencies: item.dependencies,code: item.code,};});console.log(obj);}
3.2.3 生成bundle文件
我们需要将刚才编写的执行函数和依赖图合成起来输出最后的打包文件。
浏览器中没有exports对象与require方法所以直接执行一定会报错。
所以我们需要模拟一下exports和require;
从上面的运行结果图中我们知道读出来的内部代码是一个字符串,所以我们采用eval让字符串代码执行;
require函数的功能比较简单,就是根据提供的file名称加载对应的模块。
对应代码如下:
file(code) {const filePath = path.join(this.output.path, this.output.filename);const newCode = JSON.stringify(code);// 生成 bundle代码const bundle = `(function(modules){function require(module){function newRequire(relativePath){return require(modules[module].dependencies[relativePath])}// 默认exports不存在,所以这里定义一个对象var exports = {};(function(require,exports,code){eval(code)})(newRequire,exports,modules[module].code)return exports;}require('${this.entry}')})(${newCode})`;fs.writeFileSync(filePath, bundle, "utf-8");}
4、完整代码
const fs = require("fs");const path = require("path");const parser = require("@babel/parser");const traverse = require("@babel/traverse").default;const { transformFromAst } = require("@babel/core");module.exports = class webpack {constructor(options) {this.entry = options.entry;this.output = options.output;this.modules = [];}run() {const info = this.parse(this.entry);//递归处理所有依赖this.modules.push(info);for (let i = 0; i < this.modules.length; i++) {const item = this.modules[i];const { dependencies } = item;if (dependencies) {for (let j in dependencies) {this.modules.push(this.parse(dependencies[j]));}}}// 修改数据结构 数组转对象const obj = {};this.modules.forEach((item) => {obj[item.entryFile] = {dependencies: item.dependencies,code: item.code,};});console.log(obj);// 代码生成,文件生成this.file(obj);}parse(entryFile) {// 如何读取模块的内容const content = fs.readFileSync(entryFile, "utf-8");const ast = parser.parse(content, {sourceType: "module",});const dependencies = {};traverse(ast, {ImportDeclaration({ node }) {path.dirname(entryFile); //./src/index.jsconst newPathName ="./" + path.join(path.dirname(entryFile), node.source.value);dependencies[node.source.value] = newPathName;},});const { code } = transformFromAst(ast, null, {presets: ["@babel/preset-env"],});return {entryFile,dependencies,code,};}file(code) {const filePath = path.join(this.output.path, this.output.filename);const newCode = JSON.stringify(code);// 生成 bundle代码const bundle = `(function(modules){function require(module){function newRequire(relativePath){// 相对路径对应的真实路径return require(modules[module].dependencies[relativePath])}var exports = {};(function(require,exports,code){eval(code)})(newRequire,exports,modules[module].code)return exports;}require('${this.entry}')})(${newCode})`;fs.writeFileSync(filePath, bundle, "utf-8");}};
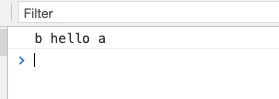
5、打包结果
运行命令node bundle.js
(function(modules){function require(module){function newRequire(relativePath){return require(modules[module].dependencies[relativePath])}var exports = {};(function(require,exports,code){eval(code)})(newRequire,exports,modules[module].code)return exports;}require('./src/index.js')})({"./src/index.js":{"dependencies":{"./a.js":"./src/a.js","./b.js":"./src/b.js"},"code":"\"use strict\";\n\nvar _a = require(\"./a.js\");\n\nvar _b = require(\"./b.js\");\n\n// 分析 入口模块的\n// 内容 : 依赖模块(目的是模块的路径)\n// 内容 : 借助babel 处理代码 生成 代码片段\n// node\nconsole.log(\"\".concat(_b.str2, \" hello \").concat(_a.str));"},"./src/a.js":{"dependencies":{},"code":"\"use strict\";\n\nObject.defineProperty(exports, \"__esModule\", {\n value: true\n});\nexports.str = void 0;\nvar str = \"a\";\nexports.str = str;"},"./src/b.js":{"dependencies":{},"code":"\"use strict\";\n\nObject.defineProperty(exports, \"__esModule\", {\n value: true\n});\nexports.str2 = void 0;\nvar str2 = \"b\";\nexports.str2 = str2;"}})
引入打包的js文件,运行一下: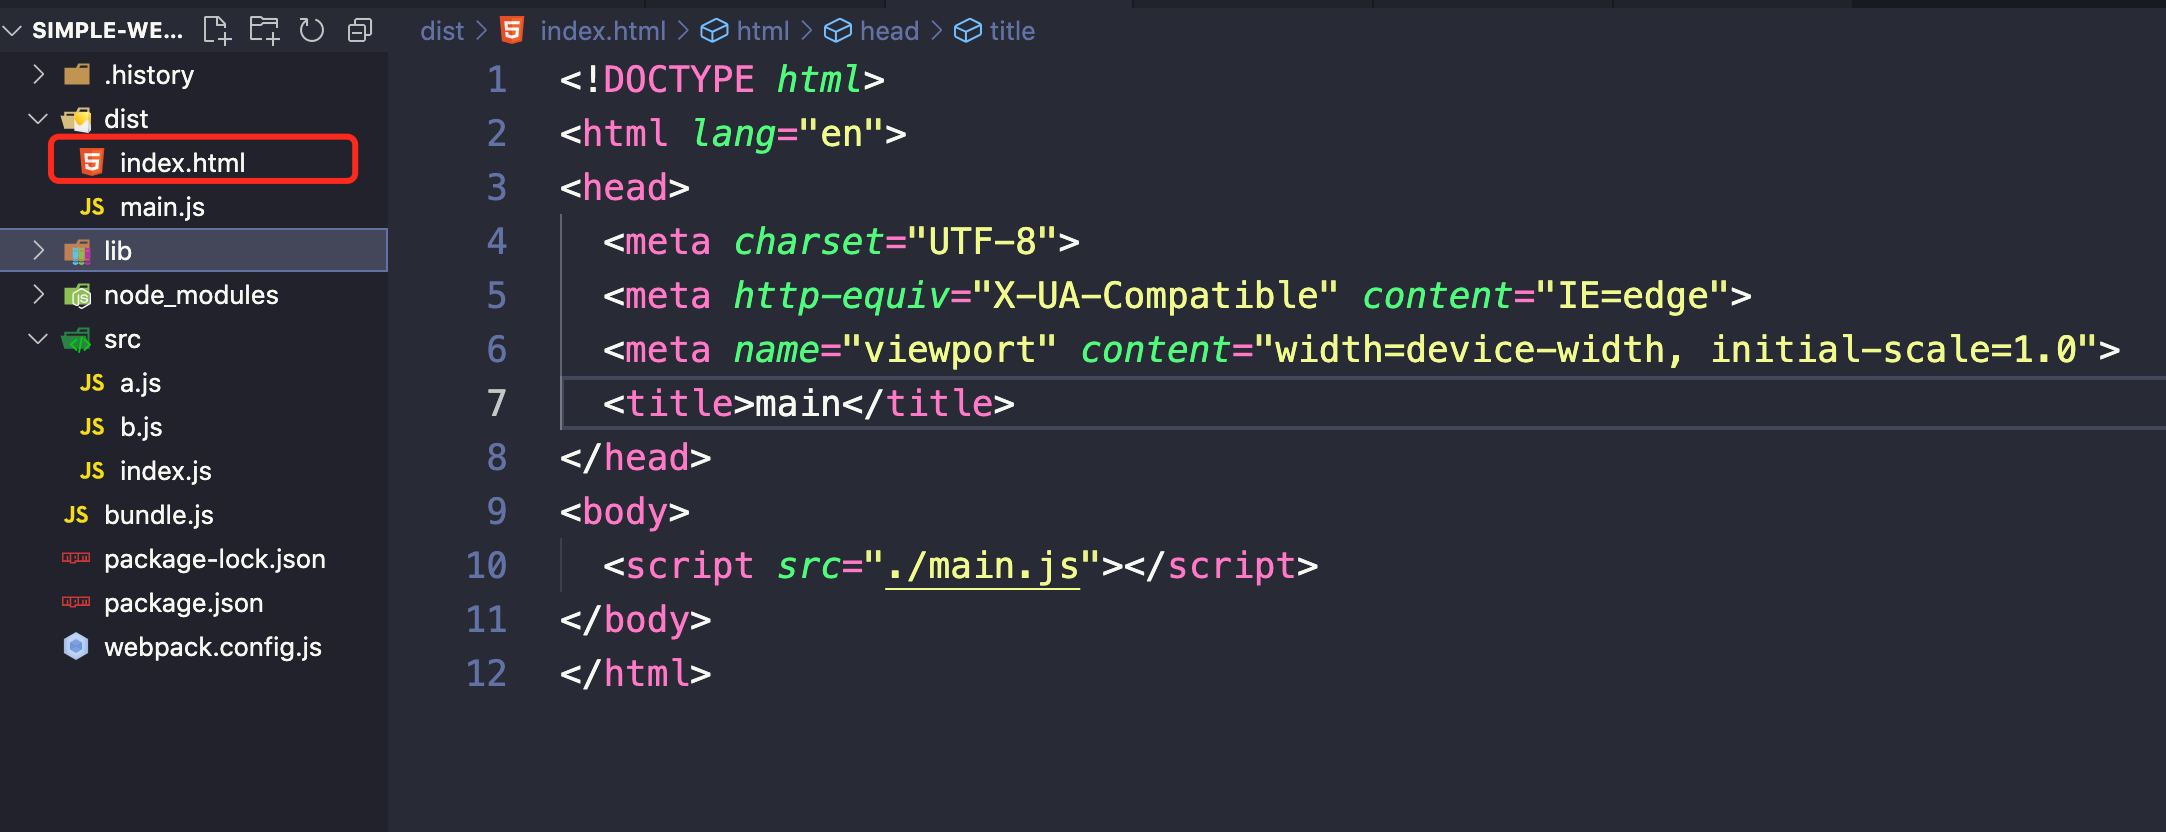

若有收获,就点个赞吧
0 人点赞
