软件版本
| 软件 | 版本 |
|---|---|
| centos | 7.6 |
| docker | 20.10.7 |
注意:确保三台机器在同一个局域网,否则会遇到网络插件安装不成功的情况
集群基本环境准备
开通云主机
配置集群ssh免密登录
centos主机配置SSH免密登录
将 SELinux 设置为 permissive 模式(相当于将其禁用)
sudo setenforce 0sudo sed -i 's/^SELINUX=enforcing$/SELINUX=permissive/' /etc/selinux/config

关闭swap
swapoff -ased -ri 's/.*swap.*/#&/' /etc/fstab

允许 iptables 检查桥接流量
cat <<EOF | sudo tee /etc/modules-load.d/k8s.confbr_netfilterEOFcat <<EOF | sudo tee /etc/sysctl.d/k8s.confnet.bridge.bridge-nf-call-ip6tables = 1net.bridge.bridge-nf-call-iptables = 1EOF
使以上配置生效
sudo sysctl --system
设置时间同步
提前拷贝rpm文件
#ntp/opt/software/ntprpm -ivh *.rpm
使用kubeadm创建集群
离线安装 kubelet、kubeadm、kubectl
以下操作在所有节点执行
官网下载 https://www.downloadkubernetes.com/
cat <<EOF | sudo tee /etc/yum.repos.d/kubernetes.repo[kubernetes]name=Kubernetesbaseurl=http://mirrors.aliyun.com/kubernetes/yum/repos/kubernetes-el7-x86_64enabled=1gpgcheck=0repo_gpgcheck=0gpgkey=http://mirrors.aliyun.com/kubernetes/yum/doc/yum-key.gpghttp://mirrors.aliyun.com/kubernetes/yum/doc/rpm-package-key.gpgexclude=kubelet kubeadm kubectlEOF
sudo yum install -y kubelet-1.20.9 kubeadm-1.20.9 kubectl-1.20.9 --disableexcludes=kubernetes
sudo systemctl enable --now kubelet
检查 kubelet 服务
systemctl status kubelet
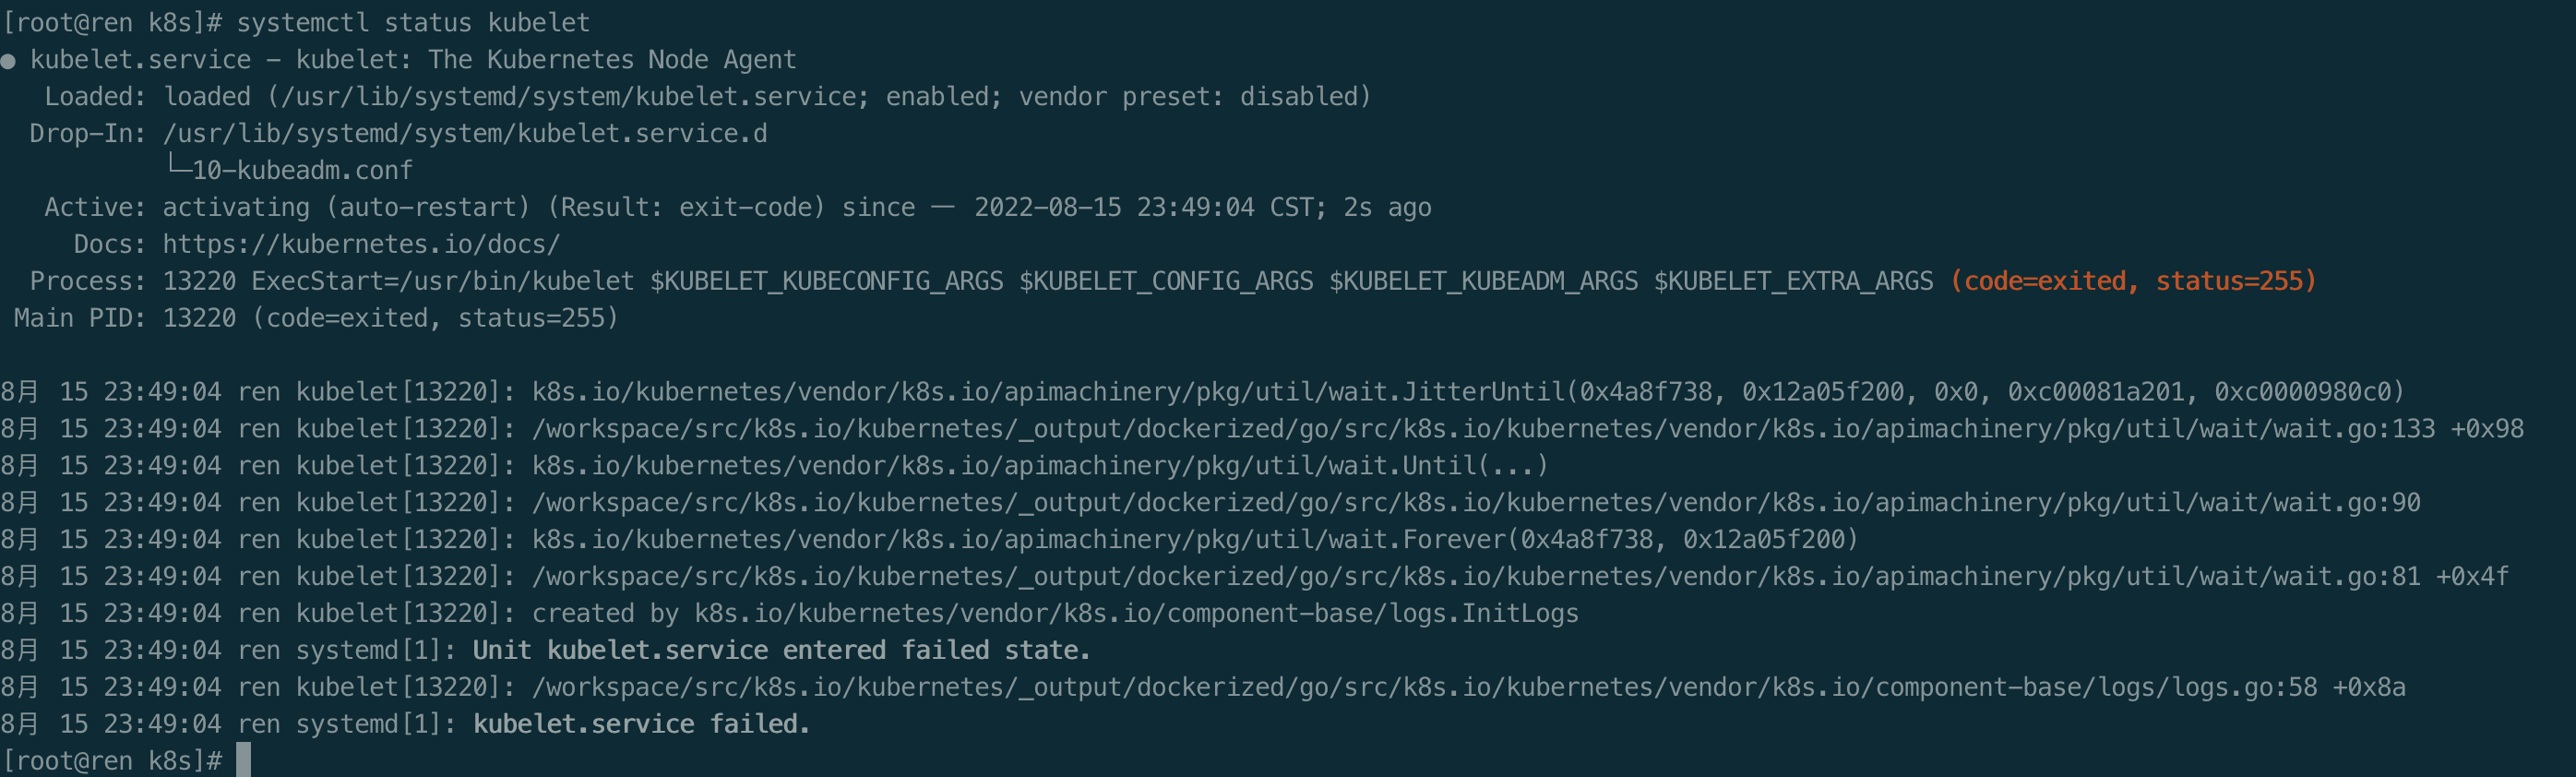
kubelet 现在每隔几秒就会重启,因为它陷入了一个等待 kubeadm 指令的死循环
使用 kubeadm 引导集群
以下操作在所有节点执行
所有节点下载镜像
sudo tee ./images.sh <<-'EOF'#!/bin/bashimages=(kube-apiserver:v1.20.9kube-proxy:v1.20.9kube-controller-manager:v1.20.9kube-scheduler:v1.20.9coredns:1.7.0etcd:3.4.13-0pause:3.2)for imageName in ${images[@]} ; dodocker pull registry.cn-hangzhou.aliyuncs.com/lfy_k8s_images/$imageNamedoneEOF
chmod +x ./images.sh && ./images.sh

初始化master节点
内网地址:10.0.4.17 ren 外网地址:1.15.230.38 ren
主节点执行
#所有机器添加master域名映射,以下需要修改为自己的echo "10.0.4.17 cluster-endpoint" >> /etc/hosts
其他节点执行
#所有机器添加master域名映射,以下需要修改为自己的echo "1.15.230.38 cluster-endpoint" >> /etc/hosts
验证ping
有问题,ping不通 解决方案:云主机开放ICMP协议
主节点执行
—apiserver-advertise-address 使用公网IP
kubeadm init \--apiserver-advertise-address=1.15.230.38 \--control-plane-endpoint=cluster-endpoint \--image-repository registry.cn-hangzhou.aliyuncs.com/lfy_k8s_images \--kubernetes-version v1.20.9 \--service-cidr=10.96.0.0/16 \--pod-network-cidr=192.168.0.0/16
报错:detected “cgroupfs” as the Docker cgroup driver. The recommended driver is “systemd”. Please follow the guide at https://kubernetes.io/docs/setup/cri/ 原因:docker默认的cgroup driver 是 cgroupfs 解决方案:调整docker的cgroup driver 为 systemd
解决方案详见
docker调整cgroup driver以适配k8s
再次执行
执行日志如下
完整执行日志
[root@ren ~]# kubeadm init \> --apiserver-advertise-address=10.0.4.17 \> --control-plane-endpoint=cluster-endpoint \> --image-repository registry.cn-hangzhou.aliyuncs.com/lfy_k8s_images \> --kubernetes-version v1.20.9 \> --service-cidr=10.96.0.0/16 \> --pod-network-cidr=192.168.0.0/16[init] Using Kubernetes version: v1.20.9[preflight] Running pre-flight checks[WARNING SystemVerification]: this Docker version is not on the list of validated versions: 20.10.7. Latest validated version: 19.03[preflight] Pulling images required for setting up a Kubernetes cluster[preflight] This might take a minute or two, depending on the speed of your internet connection[preflight] You can also perform this action in beforehand using 'kubeadm config images pull'[certs] Using certificateDir folder "/etc/kubernetes/pki"[certs] Generating "ca" certificate and key[certs] Generating "apiserver" certificate and key[certs] apiserver serving cert is signed for DNS names [cluster-endpoint kubernetes kubernetes.default kubernetes.default.svc kubernetes.default.svc.cluster.local ren] and IPs [10.96.0.1 10.0.4.17][certs] Generating "apiserver-kubelet-client" certificate and key[certs] Generating "front-proxy-ca" certificate and key[certs] Generating "front-proxy-client" certificate and key[certs] Generating "etcd/ca" certificate and key[certs] Generating "etcd/server" certificate and key[certs] etcd/server serving cert is signed for DNS names [localhost ren] and IPs [10.0.4.17 127.0.0.1 ::1][certs] Generating "etcd/peer" certificate and key[certs] etcd/peer serving cert is signed for DNS names [localhost ren] and IPs [10.0.4.17 127.0.0.1 ::1][certs] Generating "etcd/healthcheck-client" certificate and key[certs] Generating "apiserver-etcd-client" certificate and key[certs] Generating "sa" key and public key[kubeconfig] Using kubeconfig folder "/etc/kubernetes"[kubeconfig] Writing "admin.conf" kubeconfig file[kubeconfig] Writing "kubelet.conf" kubeconfig file[kubeconfig] Writing "controller-manager.conf" kubeconfig file[kubeconfig] Writing "scheduler.conf" kubeconfig file[kubelet-start] Writing kubelet environment file with flags to file "/var/lib/kubelet/kubeadm-flags.env"[kubelet-start] Writing kubelet configuration to file "/var/lib/kubelet/config.yaml"[kubelet-start] Starting the kubelet[control-plane] Using manifest folder "/etc/kubernetes/manifests"[control-plane] Creating static Pod manifest for "kube-apiserver"[control-plane] Creating static Pod manifest for "kube-controller-manager"[control-plane] Creating static Pod manifest for "kube-scheduler"[etcd] Creating static Pod manifest for local etcd in "/etc/kubernetes/manifests"[wait-control-plane] Waiting for the kubelet to boot up the control plane as static Pods from directory "/etc/kubernetes/manifests". This can take up to 4m0s[apiclient] All control plane components are healthy after 14.002908 seconds[upload-config] Storing the configuration used in ConfigMap "kubeadm-config" in the "kube-system" Namespace[kubelet] Creating a ConfigMap "kubelet-config-1.20" in namespace kube-system with the configuration for the kubelets in the cluster[upload-certs] Skipping phase. Please see --upload-certs[mark-control-plane] Marking the node ren as control-plane by adding the labels "node-role.kubernetes.io/master=''" and "node-role.kubernetes.io/control-plane='' (deprecated)"[mark-control-plane] Marking the node ren as control-plane by adding the taints [node-role.kubernetes.io/master:NoSchedule][bootstrap-token] Using token: co20qa.8557cvja5f3g0vs5[bootstrap-token] Configuring bootstrap tokens, cluster-info ConfigMap, RBAC Roles[bootstrap-token] configured RBAC rules to allow Node Bootstrap tokens to get nodes[bootstrap-token] configured RBAC rules to allow Node Bootstrap tokens to post CSRs in order for nodes to get long term certificate credentials[bootstrap-token] configured RBAC rules to allow the csrapprover controller automatically approve CSRs from a Node Bootstrap Token[bootstrap-token] configured RBAC rules to allow certificate rotation for all node client certificates in the cluster[bootstrap-token] Creating the "cluster-info" ConfigMap in the "kube-public" namespace[kubelet-finalize] Updating "/etc/kubernetes/kubelet.conf" to point to a rotatable kubelet client certificate and key[addons] Applied essential addon: CoreDNS[addons] Applied essential addon: kube-proxyYour Kubernetes control-plane has initialized successfully!To start using your cluster, you need to run the following as a regular user:mkdir -p $HOME/.kubesudo cp -i /etc/kubernetes/admin.conf $HOME/.kube/configsudo chown $(id -u):$(id -g) $HOME/.kube/configAlternatively, if you are the root user, you can run:export KUBECONFIG=/etc/kubernetes/admin.confYou should now deploy a pod network to the cluster.Run "kubectl apply -f [podnetwork].yaml" with one of the options listed at:https://kubernetes.io/docs/concepts/cluster-administration/addons/You can now join any number of control-plane nodes by copying certificate authoritiesand service account keys on each node and then running the following as root:kubeadm join cluster-endpoint:6443 --token co20qa.8557cvja5f3g0vs5 \--discovery-token-ca-cert-hash sha256:76627665f22a96c465792de8c9e4947b34a658c0d5be3fd66aef5cb375ac2937 \--control-planeThen you can join any number of worker nodes by running the following on each as root:kubeadm join cluster-endpoint:6443 --token co20qa.8557cvja5f3g0vs5 \--discovery-token-ca-cert-hash sha256:76627665f22a96c465792de8c9e4947b34a658c0d5be3fd66aef5cb375ac2937[root@ren ~]#
按提示操作
To start using your cluster, you need to run the following as a regular user:
mkdir -p $HOME/.kubesudo cp -i /etc/kubernetes/admin.conf $HOME/.kube/configsudo chown $(id -u):$(id -g) $HOME/.kube/config
Alternatively, if you are the root user, you can run:
export KUBECONFIG=/etc/kubernetes/admin.conf
验证master节点是否正常
kubectl get nodes

STATUS=NotReady 的原因是没有部署网络插件
You should now deploy a pod network to the cluster. Run “kubectl apply -f [podnetwork].yaml” with one of the options listed at: https://kubernetes.io/docs/concepts/cluster-administration/addons/
这里选择 Calico 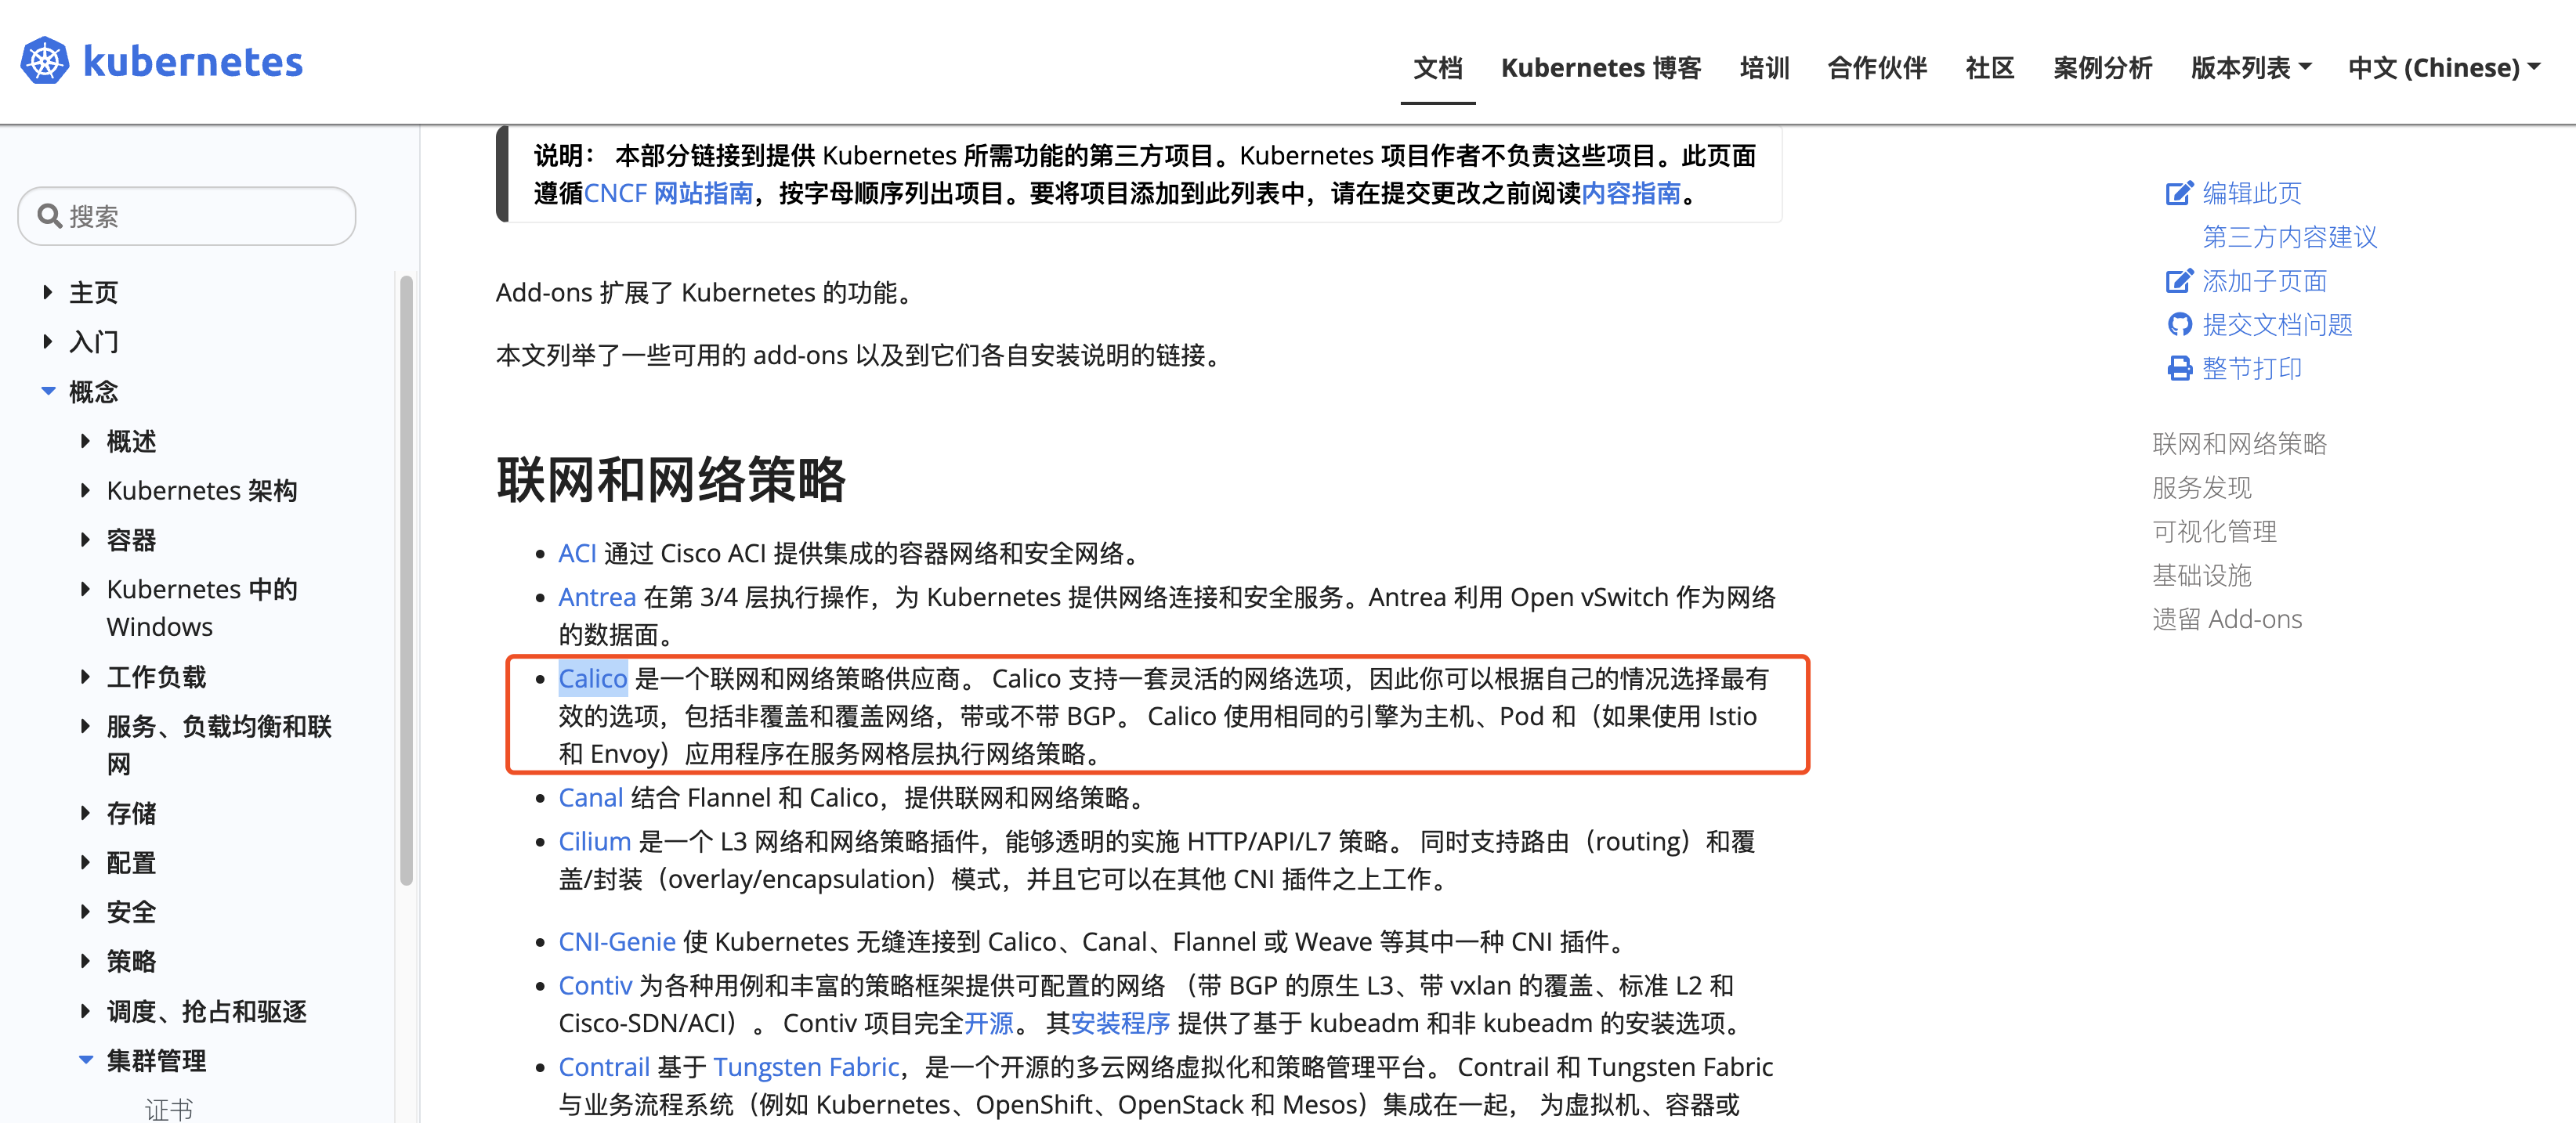
执行下载命令
curl https://docs.projectcalico.org/v3.18/manifests/calico.yaml -O
完整文件如下(离线环境,可拷贝)
应用yaml文件 calico.yaml 安装相关组件
kubectl apply -f calico.yaml

验证,查看集群中部署了哪些应用
kubectl get pods -A
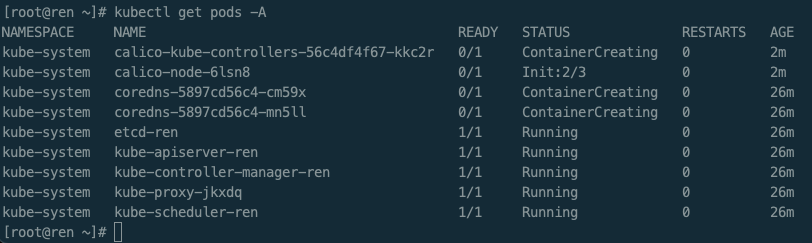
等待应用状态全部变为Running,再执行下一步
检查master节点是否就绪
kubectl get nodes

master节点就绪后加入worker节点
拷贝上述执行日志的worker节点相关命令
此命令含token,24小时内有效
以下命令在worker节点执行
kubeadm join cluster-endpoint:6443 --token co20qa.8557cvja5f3g0vs5 \--discovery-token-ca-cert-hash sha256:76627665f22a96c465792de8c9e4947b34a658c0d5be3fd66aef5cb375ac2937

验证worker节点是否加入成功
master节点执行命令
kubectl get nodes

监听进度
#监听应用启动情况kubectl get pod -A -w#或者watch -n 1 kubectl get pod -A#检查各节点连接状态kubectl get pods -o wide --all-namespaces#或者watch -n 1 kubectl get pods -o wide --all-namespaces

若安装报错,则重新安装
kubectl apply -f calico.yaml
发现报错:error: unable to recognize “calico.yaml”: no matches for kind “PodDisruptionBudget” in version “policy/v1” 原因:k8s不支持当前calico版本的原因, calico版本与k8s版本支持关系可到calico官网查看

重新下载
curl https://docs.projectcalico.org/v3.18/manifests/calico.yaml -O
重新安装
kubectl apply -f calico.yaml
不成功可能是各主机未处于同一局域网
若集群令牌过期且有新的worker节点加入,重新生成集群令牌
master节点操作 高可用部署方式,也是在这一步的时候,使用添加主节点的命令即可
kubeadm token create --print-join-command

部署dashboard
yaml安装
kubernetes官方提供的可视化界面
https://github.com/kubernetes/dashboard
kubectl apply -f https://raw.githubusercontent.com/kubernetes/dashboard/v2.3.1/aio/deploy/recommended.yaml
无法下载则离线安装
# Copyright 2017 The Kubernetes Authors.## Licensed under the Apache License, Version 2.0 (the "License");# you may not use this file except in compliance with the License.# You may obtain a copy of the License at## http://www.apache.org/licenses/LICENSE-2.0## Unless required by applicable law or agreed to in writing, software# distributed under the License is distributed on an "AS IS" BASIS,# WITHOUT WARRANTIES OR CONDITIONS OF ANY KIND, either express or implied.# See the License for the specific language governing permissions and# limitations under the License.apiVersion: v1kind: Namespacemetadata:name: kubernetes-dashboard---apiVersion: v1kind: ServiceAccountmetadata:labels:k8s-app: kubernetes-dashboardname: kubernetes-dashboardnamespace: kubernetes-dashboard---kind: ServiceapiVersion: v1metadata:labels:k8s-app: kubernetes-dashboardname: kubernetes-dashboardnamespace: kubernetes-dashboardspec:ports:- port: 443targetPort: 8443selector:k8s-app: kubernetes-dashboard---apiVersion: v1kind: Secretmetadata:labels:k8s-app: kubernetes-dashboardname: kubernetes-dashboard-certsnamespace: kubernetes-dashboardtype: Opaque---apiVersion: v1kind: Secretmetadata:labels:k8s-app: kubernetes-dashboardname: kubernetes-dashboard-csrfnamespace: kubernetes-dashboardtype: Opaquedata:csrf: ""---apiVersion: v1kind: Secretmetadata:labels:k8s-app: kubernetes-dashboardname: kubernetes-dashboard-key-holdernamespace: kubernetes-dashboardtype: Opaque---kind: ConfigMapapiVersion: v1metadata:labels:k8s-app: kubernetes-dashboardname: kubernetes-dashboard-settingsnamespace: kubernetes-dashboard---kind: RoleapiVersion: rbac.authorization.k8s.io/v1metadata:labels:k8s-app: kubernetes-dashboardname: kubernetes-dashboardnamespace: kubernetes-dashboardrules:# Allow Dashboard to get, update and delete Dashboard exclusive secrets.- apiGroups: [""]resources: ["secrets"]resourceNames: ["kubernetes-dashboard-key-holder", "kubernetes-dashboard-certs", "kubernetes-dashboard-csrf"]verbs: ["get", "update", "delete"]# Allow Dashboard to get and update 'kubernetes-dashboard-settings' config map.- apiGroups: [""]resources: ["configmaps"]resourceNames: ["kubernetes-dashboard-settings"]verbs: ["get", "update"]# Allow Dashboard to get metrics.- apiGroups: [""]resources: ["services"]resourceNames: ["heapster", "dashboard-metrics-scraper"]verbs: ["proxy"]- apiGroups: [""]resources: ["services/proxy"]resourceNames: ["heapster", "http:heapster:", "https:heapster:", "dashboard-metrics-scraper", "http:dashboard-metrics-scraper"]verbs: ["get"]---kind: ClusterRoleapiVersion: rbac.authorization.k8s.io/v1metadata:labels:k8s-app: kubernetes-dashboardname: kubernetes-dashboardrules:# Allow Metrics Scraper to get metrics from the Metrics server- apiGroups: ["metrics.k8s.io"]resources: ["pods", "nodes"]verbs: ["get", "list", "watch"]---apiVersion: rbac.authorization.k8s.io/v1kind: RoleBindingmetadata:labels:k8s-app: kubernetes-dashboardname: kubernetes-dashboardnamespace: kubernetes-dashboardroleRef:apiGroup: rbac.authorization.k8s.iokind: Rolename: kubernetes-dashboardsubjects:- kind: ServiceAccountname: kubernetes-dashboardnamespace: kubernetes-dashboard---apiVersion: rbac.authorization.k8s.io/v1kind: ClusterRoleBindingmetadata:name: kubernetes-dashboardroleRef:apiGroup: rbac.authorization.k8s.iokind: ClusterRolename: kubernetes-dashboardsubjects:- kind: ServiceAccountname: kubernetes-dashboardnamespace: kubernetes-dashboard---kind: DeploymentapiVersion: apps/v1metadata:labels:k8s-app: kubernetes-dashboardname: kubernetes-dashboardnamespace: kubernetes-dashboardspec:replicas: 1revisionHistoryLimit: 10selector:matchLabels:k8s-app: kubernetes-dashboardtemplate:metadata:labels:k8s-app: kubernetes-dashboardspec:containers:- name: kubernetes-dashboardimage: kubernetesui/dashboard:v2.3.1imagePullPolicy: Alwaysports:- containerPort: 8443protocol: TCPargs:- --auto-generate-certificates- --namespace=kubernetes-dashboard# Uncomment the following line to manually specify Kubernetes API server Host# If not specified, Dashboard will attempt to auto discover the API server and connect# to it. Uncomment only if the default does not work.# - --apiserver-host=http://my-address:portvolumeMounts:- name: kubernetes-dashboard-certsmountPath: /certs# Create on-disk volume to store exec logs- mountPath: /tmpname: tmp-volumelivenessProbe:httpGet:scheme: HTTPSpath: /port: 8443initialDelaySeconds: 30timeoutSeconds: 30securityContext:allowPrivilegeEscalation: falsereadOnlyRootFilesystem: truerunAsUser: 1001runAsGroup: 2001volumes:- name: kubernetes-dashboard-certssecret:secretName: kubernetes-dashboard-certs- name: tmp-volumeemptyDir: {}serviceAccountName: kubernetes-dashboardnodeSelector:"kubernetes.io/os": linux# Comment the following tolerations if Dashboard must not be deployed on mastertolerations:- key: node-role.kubernetes.io/mastereffect: NoSchedule---kind: ServiceapiVersion: v1metadata:labels:k8s-app: dashboard-metrics-scrapername: dashboard-metrics-scrapernamespace: kubernetes-dashboardspec:ports:- port: 8000targetPort: 8000selector:k8s-app: dashboard-metrics-scraper---kind: DeploymentapiVersion: apps/v1metadata:labels:k8s-app: dashboard-metrics-scrapername: dashboard-metrics-scrapernamespace: kubernetes-dashboardspec:replicas: 1revisionHistoryLimit: 10selector:matchLabels:k8s-app: dashboard-metrics-scrapertemplate:metadata:labels:k8s-app: dashboard-metrics-scraperannotations:seccomp.security.alpha.kubernetes.io/pod: 'runtime/default'spec:containers:- name: dashboard-metrics-scraperimage: kubernetesui/metrics-scraper:v1.0.6ports:- containerPort: 8000protocol: TCPlivenessProbe:httpGet:scheme: HTTPpath: /port: 8000initialDelaySeconds: 30timeoutSeconds: 30volumeMounts:- mountPath: /tmpname: tmp-volumesecurityContext:allowPrivilegeEscalation: falsereadOnlyRootFilesystem: truerunAsUser: 1001runAsGroup: 2001serviceAccountName: kubernetes-dashboardnodeSelector:"kubernetes.io/os": linux# Comment the following tolerations if Dashboard must not be deployed on mastertolerations:- key: node-role.kubernetes.io/mastereffect: NoSchedulevolumes:- name: tmp-volumeemptyDir: {}
执行安装命令
kubectl apply -f dashboard.yaml
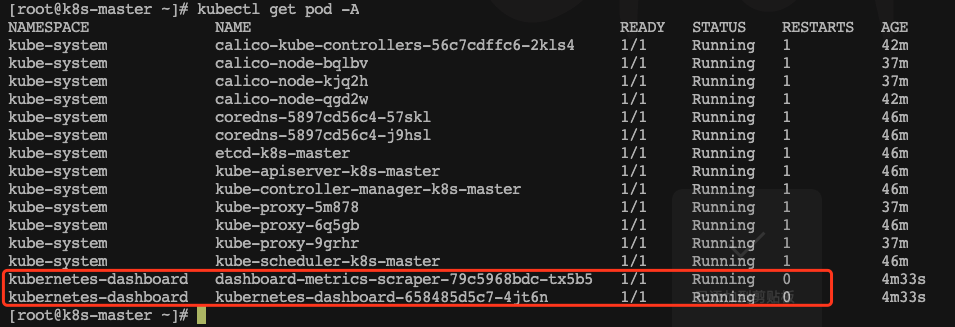
等待状态变为running
kubectl get pod -A
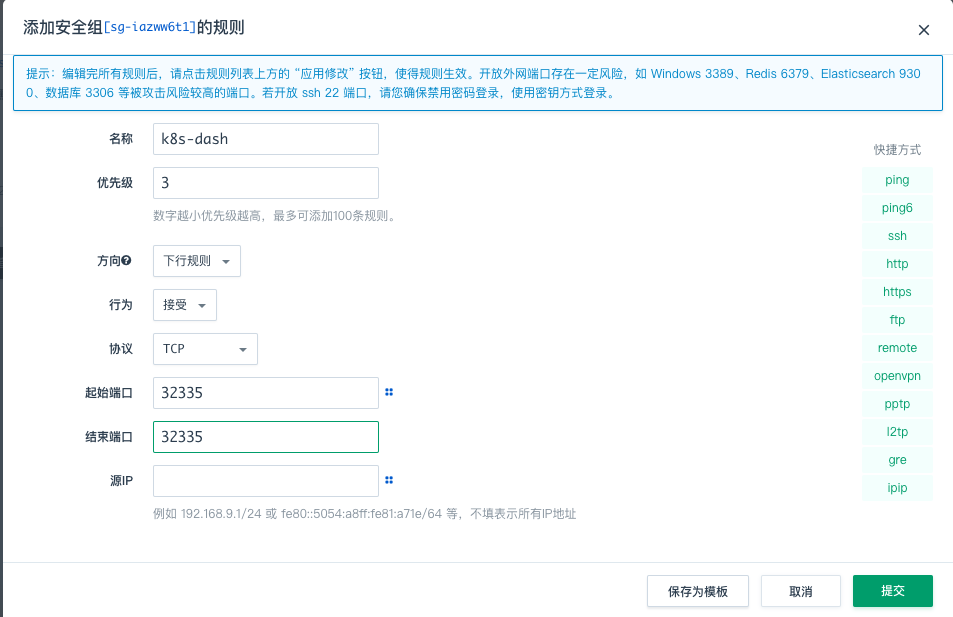
暴露端口
kubectl edit svc kubernetes-dashboard -n kubernetes-dashboard
设置type
type: ClusterIP 改为 type: NodePort

验证,确认端口映射,便于安全组放行
kubectl get svc -A |grep kubernetes-dashboard

32335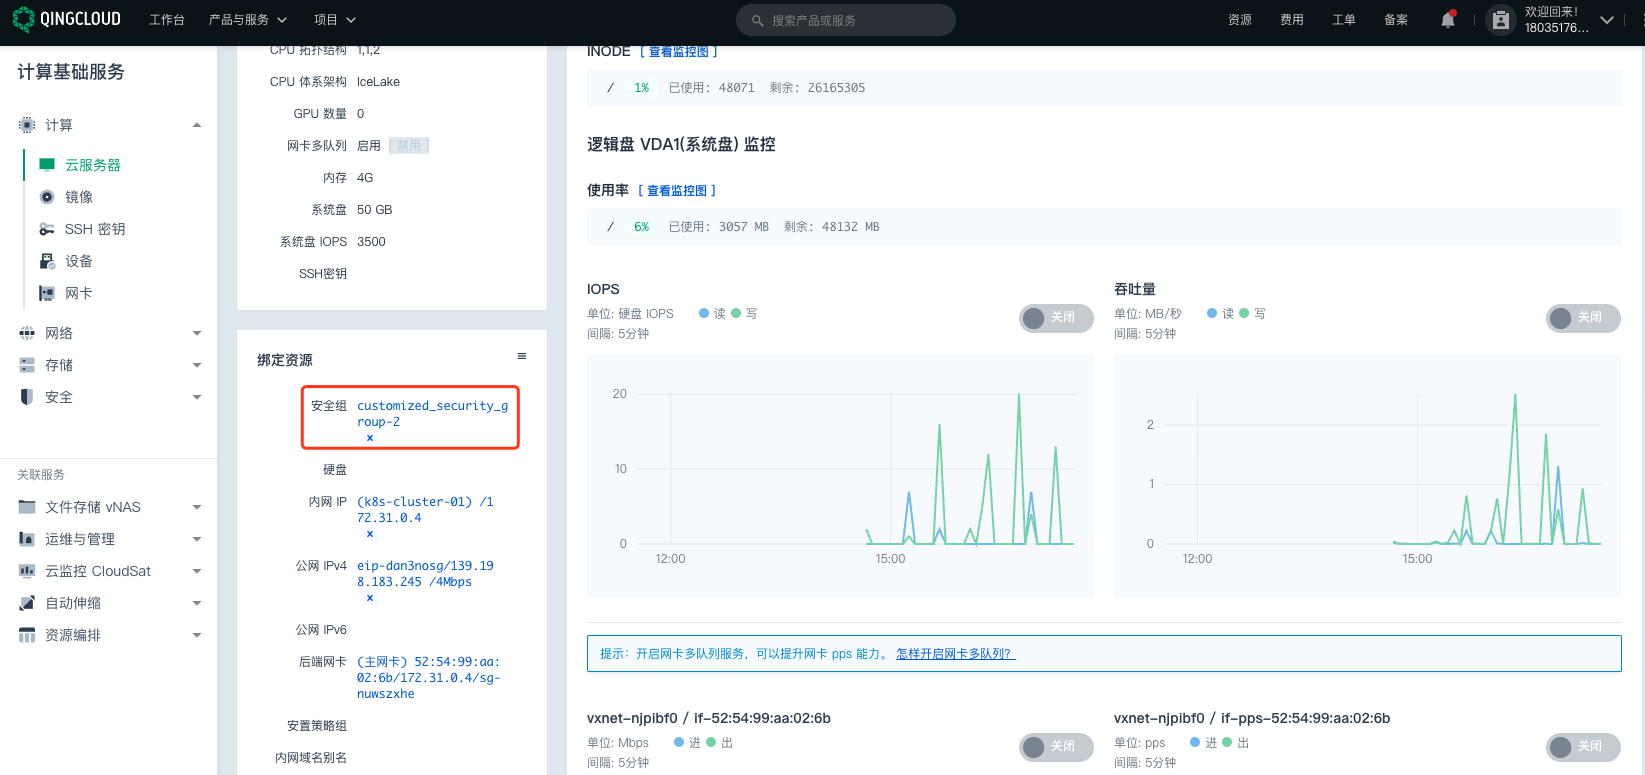
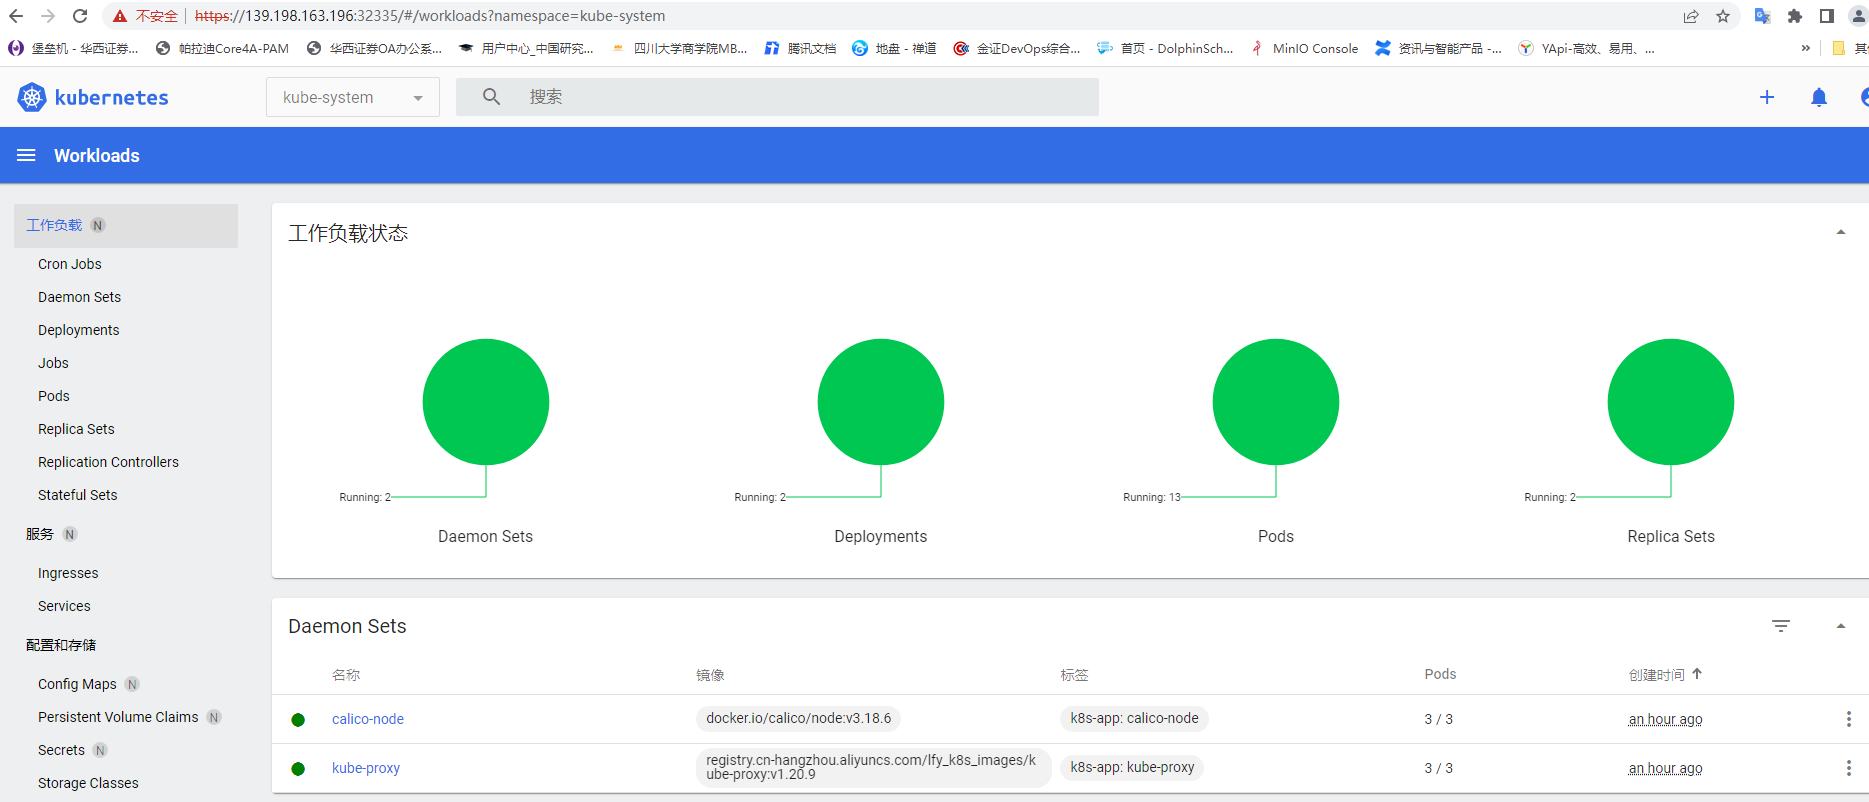
浏览器访问任意一台:
https://139.198.163.196:32335
获取 Token
创建访问者账号
#创建访问账号,准备一个yaml文件; vi dash.yamlapiVersion: v1kind: ServiceAccountmetadata:name: admin-usernamespace: kubernetes-dashboard---apiVersion: rbac.authorization.k8s.io/v1kind: ClusterRoleBindingmetadata:name: admin-userroleRef:apiGroup: rbac.authorization.k8s.iokind: ClusterRolename: cluster-adminsubjects:- kind: ServiceAccountname: admin-usernamespace: kubernetes-dashboard
安装
kubectl apply -f dash.yaml

获取令牌
#获取访问令牌kubectl -n kubernetes-dashboard get secret $(kubectl -n kubernetes-dashboard get sa/admin-user -o jsonpath="{.secrets[0].name}") -o go-template="{{.data.token | base64decode}}"

令牌内容如下
eyJhbGciOiJSUzI1NiIsImtpZCI6Ikd1bEQxbnZ1Z2JYMlZpNG1ZTUdRMUkwd29SX2xXb1ktbkRtNHh1Z2VtSVkifQ.eyJpc3MiOiJrdWJlcm5ldGVzL3NlcnZpY2VhY2NvdW50Iiwia3ViZXJuZXRlcy5pby9zZXJ2aWNlYWNjb3VudC9uYW1lc3BhY2UiOiJrdWJlcm5ldGVzLWRhc2hib2FyZCIsImt1YmVybmV0ZXMuaW8vc2VydmljZWFjY291bnQvc2VjcmV0Lm5hbWUiOiJhZG1pbi11c2VyLXRva2VuLW1sem02Iiwia3ViZXJuZXRlcy5pby9zZXJ2aWNlYWNjb3VudC9zZXJ2aWNlLWFjY291bnQubmFtZSI6ImFkbWluLXVzZXIiLCJrdWJlcm5ldGVzLmlvL3NlcnZpY2VhY2NvdW50L3NlcnZpY2UtYWNjb3VudC51aWQiOiIyYTEwOTAyMy05ZjAyLTQ3OGUtYmZlNS1jZmMwYjlhZjA1ZmEiLCJzdWIiOiJzeXN0ZW06c2VydmljZWFjY291bnQ6a3ViZXJuZXRlcy1kYXNoYm9hcmQ6YWRtaW4tdXNlciJ9.hO2xd5Mtp9CXXo8O7j9A_LCeemh6HgsypjOiS9QYItXfMd6gb33wtzS0W8rmKdGAmhN9_m1KhXimsxwyVYXcqxqYqXENEskeR2Eo7IIwS70Lv6ezEKV5y9pg9CNB2HVvNir634QCpmpbWGfF1Ry6Cb_dFx4EYxHx9jcpV2twkXG6vlBYevZf1V2q9Lszpeqj75EJxPnrqLF2xKILGO2F3seAThk7wXJBzEamtZBss4v2LR_d7LliHx0pzqNV4FEbQO4OXyQp0bayagkhhDtQGC3pnvS5FeJs0cvXgqvK_VYa6qATsLht0doRQQUjbWTH4x4rWXrzFdeVU2VeXAAMtw


完成

若有收获,就点个赞吧
0 人点赞
