引入 React(纯配置)
前面这几章讲的都是纯函数的测试,相对比较简单。而我们平常面对更多的是 React 和 Vue 的业务代码,对于这样的代码又该如何做测试呢?
下面以 React 为例,继续我们的测试之旅。
::: tip
如果你的技术栈是 Vue 也没关系,本教程更多的是想分享 “测试思路”,无论你是用 Vue 还是 React,都能在后面的章节里学到一样的知识。
:::
::: warning
这一章主要是配置 React 开发环境,不涉及测试内容,所以跟着我的代码复制即可。
:::
配置 Webpack
可以不使用我下面的版本,不过最好保证 React 是 17 的,小于 17 太老,大于 17 又不太稳定。
# Webpack 依赖npm i -D webpack@5.72.0 webpack-cli@4.9.2 webpack-dev-server@4.8.1 html-webpack-plugin@5.5.0# Loadernpm i -D less@4.1.2 less-loader@10.2.0 style-loader@3.3.1 css-loader@6.7.1 ts-loader@9.2.8# React 以及业务npm i react@17.0.2 react-dom@17.0.2 axios@0.26.1 antd@4.19.5 classnames@2.3.1npm i -D @types/react@17.0.2 @types/react-dom@17.0.2
在根目录添加 Webpack 配置文件 webpack.config.js:
const path = require('path');const HtmlWebpackPlugin = require('html-webpack-plugin');module.exports = {mode: 'development',entry: {index: './src/index.tsx'},module: {rules: [// 解析 TypeScript{test: /\.(tsx?|jsx?)$/,use: 'ts-loader',exclude: /(node_modules|tests)/},// 解析 CSS{test: /\.css$/i,use: [{ loader: 'style-loader' },{ loader: 'css-loader' },]},// 解析 Less{test: /\.less$/i,use: [{ loader: "style-loader" },{loader: "css-loader",options: {modules: {mode: (resourcePath) => {if (/pure.css$/i.test(resourcePath)) {return "pure";}if (/global.css$/i.test(resourcePath)) {return "global";}return "local";},}}},{ loader: "less-loader" },],},],},resolve: {extensions: ['.tsx', '.ts', '.js', '.less', 'css'],// 设置别名alias: {utils: path.join(__dirname, 'src/utils/'),components: path.join(__dirname, 'src/components/'),apis: path.join(__dirname, 'src/apis/'),hooks: path.join(__dirname, 'src/hooks/'),store: path.join(__dirname, 'src/store/'),}},devtool: 'inline-source-map',// 3000 端口打开网页devServer: {static: './dist',port: 3000,hot: true,},// 默认输出output: {filename: 'index.js',path: path.resolve(__dirname, 'dist'),clean: true,},// 指定模板 htmlplugins: [new HtmlWebpackPlugin({template: './public/index.html',}),],};
在 public/index.html 添加模板 HTML 文件:
<!DOCTYPE html><html lang="en"><head><meta charset="UTF-8"><title>React App</title></head><body><div id="root"></div></body></html>
在 package.json 添加启动命令:
{"scripts": {"start": "webpack serve","test": "jest"}}
添加入口
现在来实现我们的 React App。在 src/index.tsx 添加入口:
import React from "react";import ReactDOM from "react-dom";import App from "./App";import "antd/dist/antd.css";ReactDOM.render(<App />, document.querySelector("#root"));
添加 src/App.tsx 根组件:
import React from 'react';import { Button } from 'antd';const App = () => {return (<div><h1>Hello</h1><Button>点我</Button></div>)}export default App;
到这里我们的业务就完事了,接下来再配置一下 tsconfig.json,所需要用的路径都做一下映射:
{"compilerOptions": {"jsx": "react","baseUrl": "./","paths": {"utils/*": ["src/utils/*"],"components/*": ["src/components/*"],"apis/*": ["src/apis/*"],"hooks/*": ["src/hooks/*"],"store/*": ["src/store/*"]}}}
启动应用
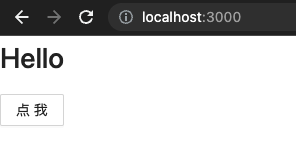
现在执行 npm run start,进入 localhost:3000 就能看到我们的页面了:

若有收获,就点个赞吧
0 人点赞
