上一篇介绍了Flutter 安装配置 相关内容,接下来这一篇先新来一个示例介绍一下Flutter项目的基本结构。
新建项目
- 打开编辑器(这里以IntelliJ IDEA为例,Android Studio基本一致)
- File>New>Project,选择Flutter 项目

Next 填写项目相关内容,Organization 这里通常建议是域倒写.
填写完毕点击FINISH,将会自动生成一个示例项目。
- 打开模拟器:点击上方菜单栏,选择模拟器(这里选择iOS 模拟器)
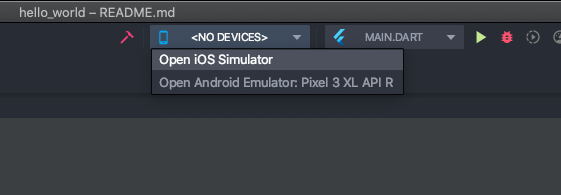
点击后,iOS模拟器会启动,但是还需要再选择设备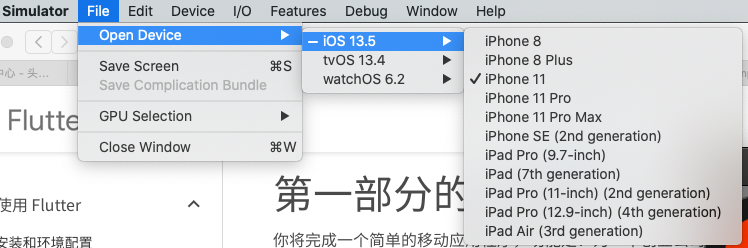
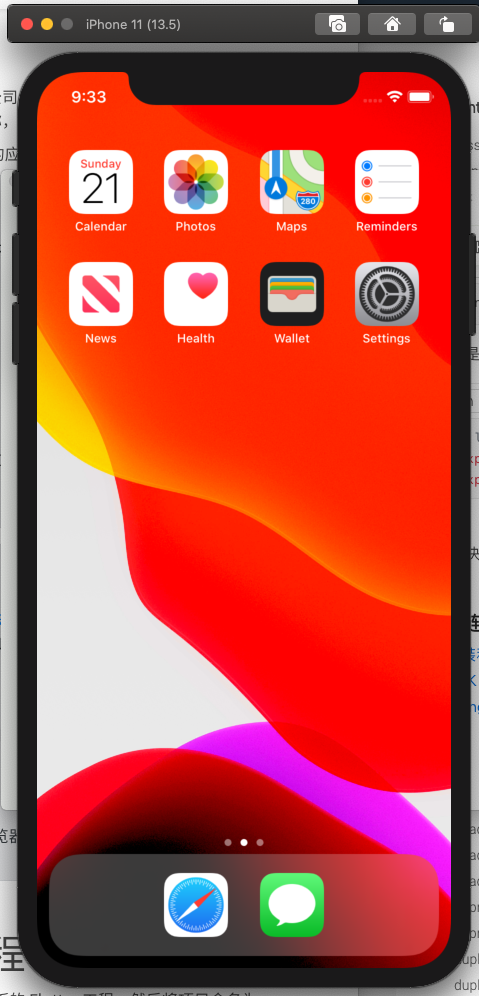
启动后界面如下:
现在可以点击菜单栏上方运行项目,输出结果如下
Launching lib/main.dart on iPhone 11 in debug mode...Running Xcode build...Xcode build done. 46.6sDebug service listening on ws://127.0.0.1:61858/TQG1yn-Cjq0=/wsSyncing files to device iPhone 11...
现在一个简单的项目就运行完毕。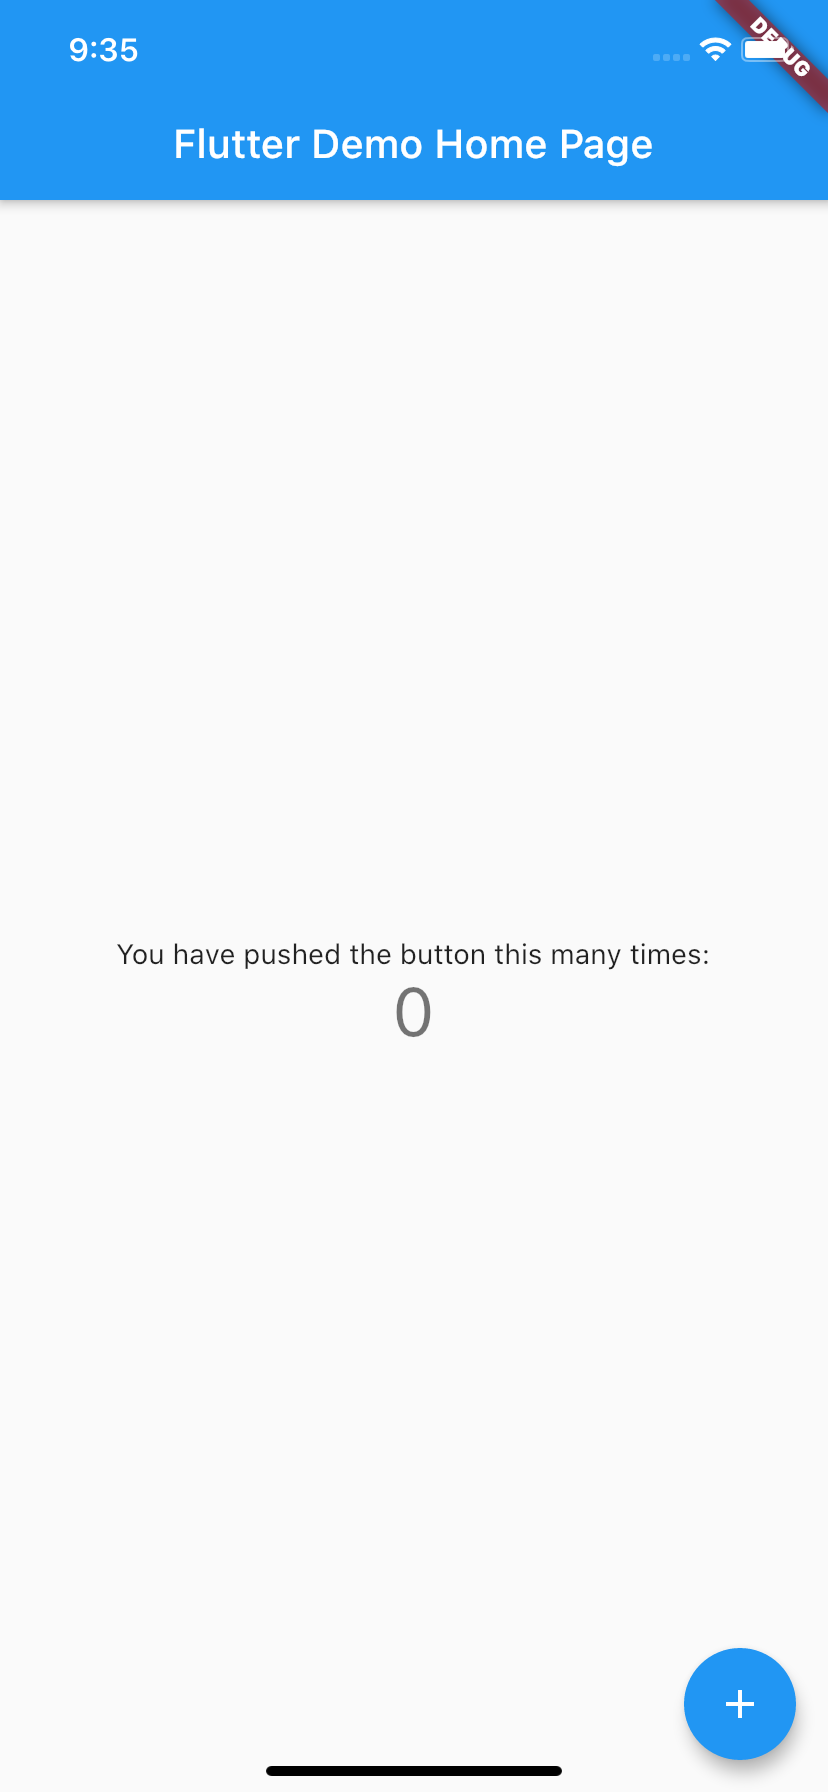
第一次真机运行的时候可能会需要更多的等待时间,但是接下来你就可以使用热重载(hot reload)功能,热重载可以在运行时更新预览。
项目目录
├── README.md├── android├── build├── hello_world.iml├── ios├── lib├── pubspec.lock├── pubspec.yaml└── test
主要关注以下几个文件/目录:
| 文件/目录 | 描述 |
|---|---|
| android | android 平台相关代码 |
| ios | iOS平台相关代码 |
| lib | flutter 应用代码,编写的代码在此目录 |
| test | 测试相关代码 |
| pubspec.yaml | 管理 Flutter 应用程序的 assets(资源,如图片、package等) |
代码介绍
import 'package:flutter/material.dart';void main() => runApp(MyApp());// MyApp 不需要做状态管处理,此组件继承StatelessWidget 即可class MyApp extends StatelessWidget {// This widget is the root of your application.@overrideWidget build(BuildContext context) {return MaterialApp(title: 'Flutter Demo',theme: ThemeData(primarySwatch: Colors.blue,visualDensity: VisualDensity.adaptivePlatformDensity,),home: MyHomePage(title: 'Flutter Demo Home Page'),);}}class MyHomePage extends StatefulWidget {MyHomePage({Key key, this.title}) : super(key: key);final String title;@override_MyHomePageState createState() => _MyHomePageState(); // 重写}// 状态类必须继承自 State类class _MyHomePageState extends State<MyHomePage> {int _counter = 0; // 定义一个变量 _counter 作为计数器变量,调用 setState 方法来控制这个变量的值变化void _incrementCounter() {setState(() {_counter++;});}@overrideWidget build(BuildContext context) {return Scaffold(appBar: AppBar(// Here we take the value from the MyHomePage object that was created by// the App.build method, and use it to set our appbar title.title: Text(widget.title),),body: Center(// Center is a layout widget. It takes a single child and positions it// in the middle of the parent.child: Column(mainAxisAlignment: MainAxisAlignment.center,children: <Widget>[Text('You have clicked the button this many times:',),Text('$_counter',style: Theme.of(context).textTheme.headline4,),],),),floatingActionButton: FloatingActionButton(onPressed: _incrementCounter,tooltip: 'Increment',child: Icon(Icons.add),), // This trailing comma makes auto-formatting nicer for build methods.);}}
- 代码第一行引入了 material.dart 包,使用此包,模板代码创建了一个具有 Material Design 风格的应用( Material 是一种移动端和网页端通用的视觉设计语言, Flutter 提供了丰富的 Material 风格的 widgets。
void main() => runApp(MyApp());主函数(main)使用了 (=>) 符号,这是 Dart 中单行函数或方法的简写,等同于下属代码
flutter 项目都需要在开始的时候执行main 函数,使用runApp() 函数可以讲给定的根组件填满整个屏幕。(如果不调用runApp() 函数,项目也可以正常运行,但是屏幕上什么都不会显示。void main() {runApp(MyApp());}
状态管理
- 该应用程序继承了
StatelessWidget,这将会使应用本身也成为一个 widget。在 Flutter 中,几乎所有都是 widget,包括对齐 (alignment)、填充 (padding) 和布局 (layout)。 - Stateless widgets 是不可变的,这意味着它们的属性不能改变 —— 所有的值都是 final。
- Stateful widgets 持有的状态可能在 widget 生命周期中发生变化,实现一个 stateful widget 至少需要两个类:
- 1)一个 StatefulWidget 类,本身是不可变的
- 2)一个 State 类,但是 State 类在 widget 生命周期中始终存在。
- MyHomePage 类是一个Stateful widgets(有状态的 widget)
- 必须继承自StatefulWidget
- 它创建自己的状态类 —— _MyHomePageState,并将 MyHomePage 内嵌到已有的无状态的
MyAppwidget。 - 需要重写createState 方法,代码如下:
@override_MyHomePageState createState() => _MyHomePageState();
Scaffold是 Material 库中提供的一个 widget,它提供了默认的导航栏、标题和包含主屏幕 widget 树的 body 属性。- 现在在Scaffold 中添加 backgroundColor: Colors.amber
保存代码后,页面应该会自动刷新,结果如下:Widget build(BuildContext context) {return Scaffold(...backgroundColor: Colors.amber,...);}
- 现在在Scaffold 中添加 backgroundColor: Colors.amber
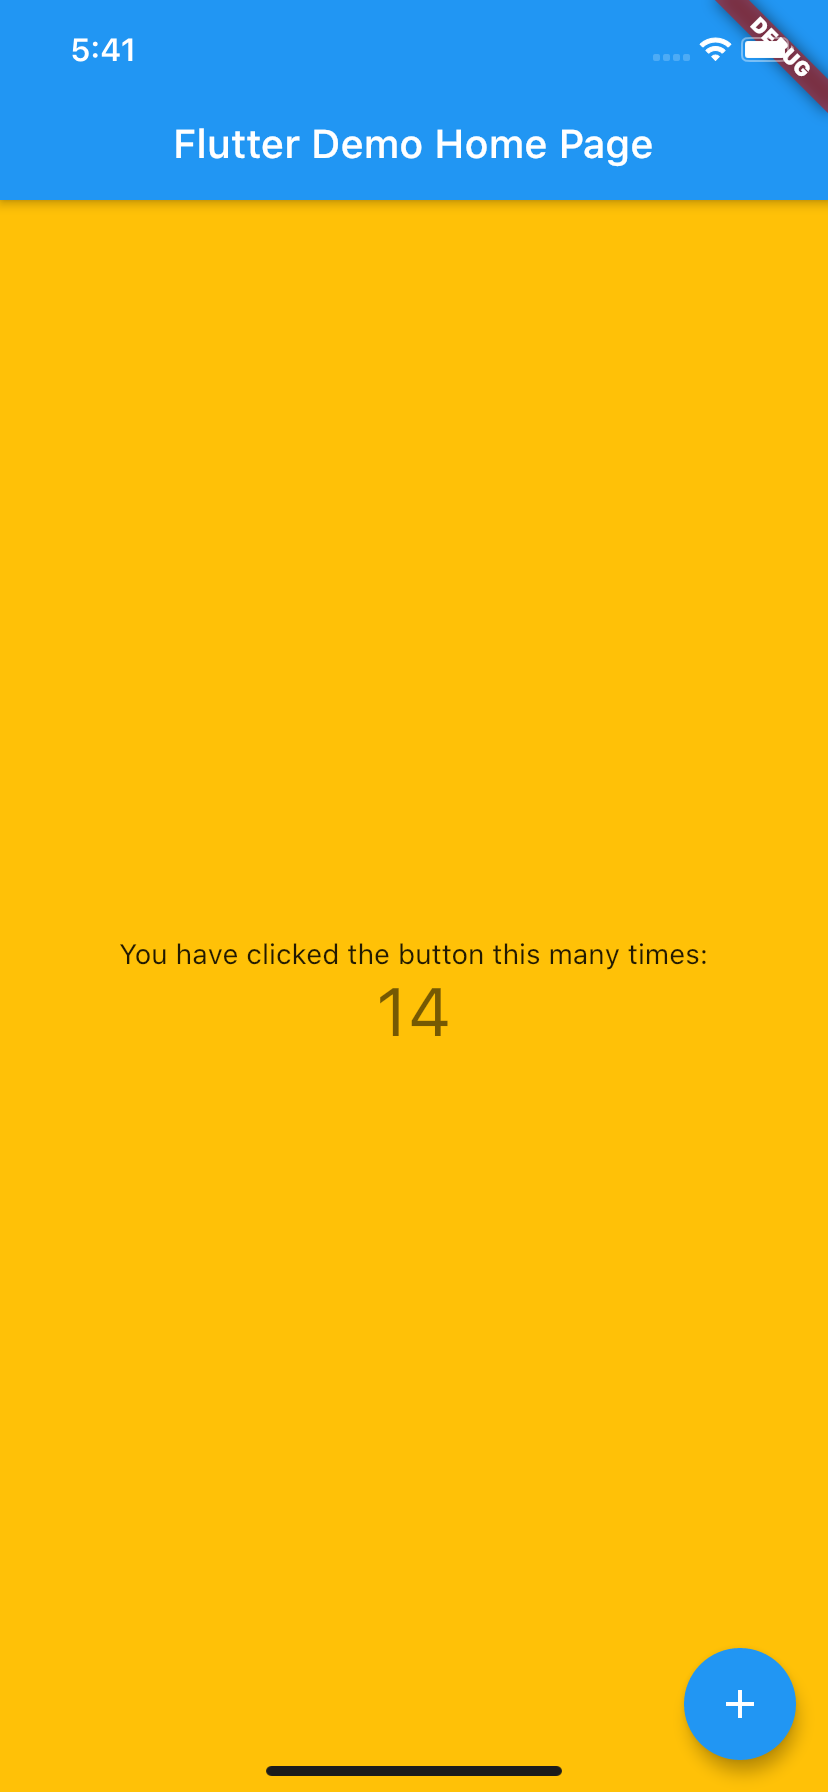
如果自动保存后页面没有自动重载,可以点击下图红圈中按钮查看更新后结果。
- 一个 widget 的主要工作是提供一个
build()方法来描述如何根据其他较低级别的 widgets 来显示自己。 - 本示例中的 body 的 widget 树中包含了一个
Centerwidget, Center widget 又包含一个Text子 widget, Center widget 可以将其子 widget 树对齐到屏幕中心。
使用第三方包
现在这个模板代码比较简单,接下来我们扩展一下,在pubspec.yaml 中,将 english_words(3.1.5 或更高版本)添加到依赖项列表,如下所示:
在 编辑器视图中查看 pubspec.yaml 文件时,点击 Pub get 会将依赖包安装到你的项目。你应该会在控制台中看到以下内容:
Running "flutter pub get" in hello_world... 0.6sProcess finished with exit code 0
在执行 Pub get 命令时会自动生成一个名为 pubspec.lock 文件,这里包含了你依赖 packages 的名称和版本。
然后在lib/main.dart 代码第二行加入 import ‘package:english_words/english_words.dart’;
如果你尝试热重载,则可能会看到一条警告,考虑重新启动当前应用:
Reloading…Some program elements were changed during reload but did not run when the view was reassembled;you might need to restart the app (by pressing “R”) for the changes to have an effect.
因为重启应用之后就可以生效,故这可能是误报。现在只需点击build 按钮重新build。
修改后的代码如下:
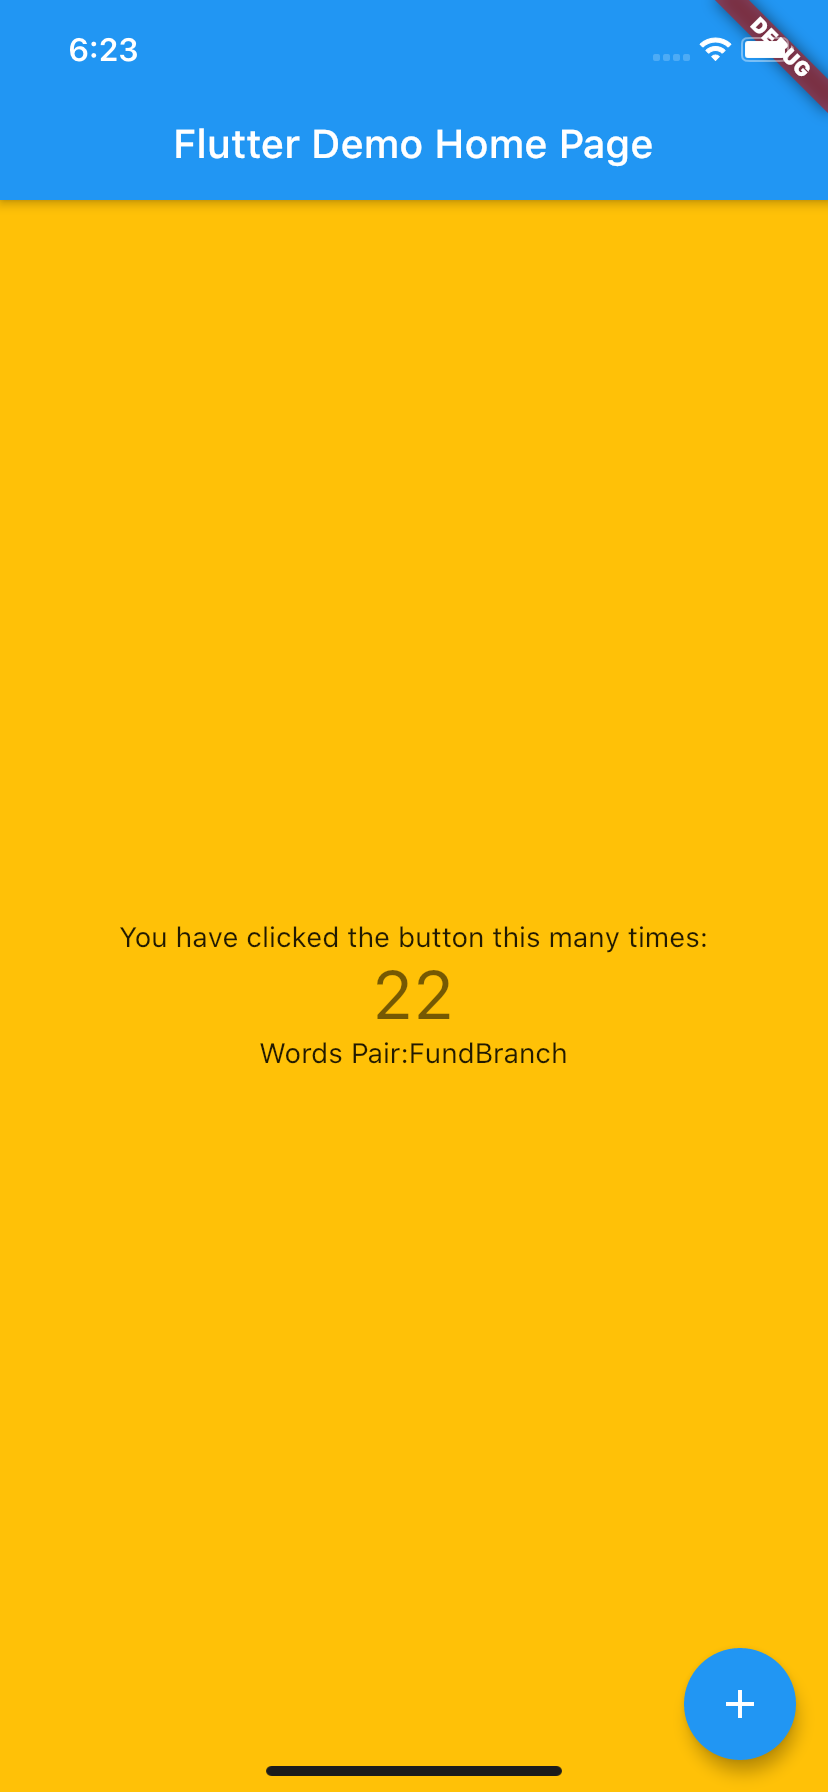
class _MyHomePageState extends State<MyHomePage> {int _counter = 0;void _incrementCounter() {setState(() {_counter++;});}@overrideWidget build(BuildContext context) {final wordPair = WordPair.random();return Scaffold(...body: Center(// Center is a layout widget. It takes a single child and positions it// in the middle of the parent.child: Column(mainAxisAlignment: MainAxisAlignment.center,children: <Widget>[Text('You have clicked the button this many times:',),Text('$_counter',style: Theme.of(context).textTheme.headline4,),Text('Words Pair:' + wordPair.asPascalCase,),],),),...}}
此时点击右下角的按钮,数字会增加,单词对也会更新。
参考链接

若有收获,就点个赞吧
0 人点赞
