- Flask-RESTPlus 中文文档(Flask-RESTPlus Chinese document)
- 相关信息
- 鸣谢
- 开源许可
- 目录
- 安装
- 快速开始
- 响应编组
- 请求解析
- 基础参数
- 必要参数
- 多个数值和列表
- 其他源(other destinations)
- 参数位置
- 多位置参数
- 高级类型处理
- 解析器继承
- 文件上传
- 错误处理
- 错误消息
- 字段掩码(Fields masks)
- Swagger文档
- 异常处理
- Postman
- 项目扩展
- 完整实例
Flask-RESTPlus 中文文档(Flask-RESTPlus Chinese document)
本文档是Flask-RESTPlus的文档中文翻译版,英文原版地址:https://flask-restplus.readthedocs.io/en/stable/
相关信息
- 文档对应版本:0.13.0 stable
- 本文档是个人翻译版本,非官方翻译版,一切内容以官方英文原版为准。
- 本文档与Flask-RESTPlus开发组无任何关系,提交bug等开发问题请移步项目所在地:https://github.com/noirbizarre/flask-restplus
- 部分翻译内容可能并不准确,没把握的地方我都标记了原文
- 文档采用Typora编写,推荐使用Typora进行查看
鸣谢
开源许可
目录
提示:
部分无法跳转的目录是由于未完成翻译,如果目录有误请另开issue反馈。
提示:
目录是为了方便Github在线观看使用,部分目录在Typora中是不可用的,下载用户请使用Typora自带的大纲功能。
安装
使用 pip安装Flask-RESTPlus:
pip install flask-restplus
开发版可以从 Github 上下载:
git clone https://github.com/noirbizarre/flask-restplus.gitcd flask-restpluspip install -e .[dev,test]
Flask-RESTPlus需要python 2.7, 3.3, 3.4 或 3.5支持。当然PyPy和PyPy3同样适用。
快速开始
本文档需要你对 Flask 的工作机制有所了解,同时请确保你已完成了Flask与Flask-RESTPlus的安装工作。如果没有完成安装,请参阅 安装。
初始化
和其他Flask扩展一样,你可以用 applicaiton 对象初始化它:
from flask import Flaskfrom flask_restplus import Apiapp = Flask(__name__)api = Api(app)
或者使用懒加载模式:
from flask import Flaskfrom flask_restplus import Apiapi = Api()app = Flask(__name__)api.init_app(app)
一个最小API
一个最小的Flask-RESTPlus API 应该如下所示:
from flask import Flaskfrom flask_restplus import Resource, Apiapp = Flask(__name__)api = Api(app)@api.route('/hello')class HelloWorld(Resource):def get(self):return {'hello': 'world'}if __name__ == '__main__':app.run(debug=True)
将上述代码保存为 api.py并使用Python解释器运行。值得注意的是我们已经打开了Flask的调试模式(Flask debugging)这将为我们提供代码热重载和更好的报错信息。
$ python api.py* Running on http://127.0.0.1:5000/* Restarting with reloader
警告:
调试模式不能用于任何生产环境下!
现在打开一个新窗口测试一下你的API:
$ curl http://127.0.0.1:5000/hello{"hello": "world"}
你同时可以将自动文档作为你的API根目录(默认是开启的)。在本例子中,根目录为:http://127.0.0.1:5000/ 。查看 Swagger UI 章节获取完整信息。
面向资源(Resource)的路由
Flask-RESTPlus所能提供的主要组件由资源类(Resource)实现。资源类是在 Flask可扩展视图(Flask pluggable views) 的基础上实现的,提供了添加指定函数就能实现多种http访问方法的功能。一个实现代办事项(todo)应用程序的基础CURD(译者:就是增删改查的意思)资源类如下所示:
from flask import Flask, requestfrom flask_restplus import Resource, Apiapp = Flask(__name__)api = Api(app)todos = {}@api.route('/<string:todo_id>')class TodoSimple(Resource):def get(self, todo_id):return {todo_id: todos[todo_id]}def put(self, todo_id):todos[todo_id] = request.form['data']return {todo_id: todos[todo_id]}if __name__ == '__main__':app.run(debug=True)
测试一下:
$ curl http://localhost:5000/todo1 -d "data=Remember the milk" -X PUT{"todo1": "Remember the milk"}$ curl http://localhost:5000/todo1{"todo1": "Remember the milk"}$ curl http://localhost:5000/todo2 -d "data=Change my brakepads" -X PUT{"todo2": "Change my brakepads"}$ curl http://localhost:5000/todo2{"todo2": "Change my brakepads"}
如果你的python安装了 python-requests 你也可以用python进行测试:
>>> from requests import put, get>>> put('http://localhost:5000/todo1', data={'data': 'Remember the milk'}).json(){u'todo1': u'Remember the milk'}>>> get('http://localhost:5000/todo1').json(){u'todo1': u'Remember the milk'}>>> put('http://localhost:5000/todo2', data={'data': 'Change my brakepads'}).json(){u'todo2': u'Change my brakepads'}>>> get('http://localhost:5000/todo2').json(){u'todo2': u'Change my brakepads'}
Flask-RESTPlus支持多种函数返回值。和 Flask 类似,你可以返回任意可迭代的对象(iterable)包括原生 Flask 响应对象(raw Flask response objects)而它们会被转化成响应(response)。Flask-RESTPlus同样支持使用多个返回值自定义状态码(response code)和响应头(response headers),示例如下:
class Todo1(Resource):def get(self):# Default to 200 OKreturn {'task': 'Hello world'}class Todo2(Resource):def get(self):# Set the response code to 201return {'task': 'Hello world'}, 201class Todo3(Resource):def get(self):# Set the response code to 201 and return custom headersreturn {'task': 'Hello world'}, 201, {'Etag': 'some-opaque-string'}
端点(Endpoint)
在很多情况下,一个API中,你的一个资源类可能需要对应多个url地址。你可以传入多个url地址到 add_resource() 函数中或者使用 route() 装饰器,这两个方法都由Api对象提供。其中这的任意一个方法都能实现多url路由到你的资源类上:
api.add_resource(HelloWorld, '/hello', '/world')# or@api.route('/hello', '/world')class HelloWorld(Resource):pass
同时你也可以将一部分匹配路径作为变量传入你的资源类函数中:
api.add_resource(Todo, '/todo/<int:todo_id>', endpoint='todo_ep')# or@api.route('/todo/<int:todo_id>', endpoint='todo_ep')class HelloWorld(Resource):pass
提示:
如果请求无法匹配应用程序中的任何端点,Flask-RESTPlus 会返回404错误信息并附带最接近请求的端点猜测。你可以在配置文件中将
ERROR_404_HELP改为False来禁用这个功能。
参数解析
虽然 Flask 提供了很方便的途径访问请求数据(如:请求参数(querystring)或 POST表单数据(POST form encoded data)),但是验证表单数据依然很麻烦。Flask-RESTPlus提供了内置的表单验证功能,具体由一个类似于 argparse 的库完成。
from flask_restplus import reqparseparser = reqparse.RequestParser()parser.add_argument('rate', type=int, help='Rate to charge for this resource')args = parser.parse_args()
提示:
和 argparse 不同的是,
parse_args()返回的是一个Python字典对象,而不是一个自定义的数据结构
使用 RequestParser类同时也可以自动给你提供清晰的错误信息。如果一个参数在验证过程中出现问题,Flask-RESTPlus 将返回一个400错误并高亮错误。
$ curl -d 'rate=foo' http://127.0.0.1:5000/todos{'status': 400, 'message': 'foo cannot be converted to int'}
input模块提供了大量转化函数,如 date() 和 url() 。
调用 parse_args() 时附带参数 stict=True,程序将在表单中出现解析器(parser)未定义的参数时抛出异常。
args = parser.parse_args(strict=True)
数据格式化
在默认情况下,你返回的所有可迭代对象将会被按照原样呈现。在针对Python原生数据结构时这种策略能够很好的完成任务,但是在处理对象时效果令人沮丧。为了解决这个问题,Flask-RESTPlus 提供了 字段(Field)模块和 marshal_with()装饰器。和 Django ORM 与 WTForm 类似,你可以使用 字段(fields)模块来定义你的响应数据结构。
from collections import OrderedDictfrom flask import Flaskfrom flask_restplus import fields, Api, Resourceapp = Flask(__name__)api = Api(app)model = api.model('Model', {'task': fields.String,'uri': fields.Url('todo_ep')})class TodoDao(object):def __init__(self, todo_id, task):self.todo_id = todo_idself.task = task# This field will not be sent in the responseself.status = 'active'@api.route('/todo')class Todo(Resource):@api.marshal_with(model)def get(self, **kwargs):return TodoDao(todo_id='my_todo', task='Remember the milk')
上面的例子我们拿了一个Python对象并准备将其序列化。 marlshal_with() 装饰器将会将其通过 model进行转化。 fields.Url 字段是个很特别的字段,他将选取一个端点在响应中生成带该端点的URL。使用 marlshal_with() 同时也会为文档添加Swagger格式的文档内容。大部分字段类型已经预定义过。查看 字段(fields)导航获取完整列表。
指令保存
在默认情况下,字段指令(fields order)并不会被保存,因为这将影响性能。如果你任然希望字段指令被保存,你可以通过添加参数 ordered=True在某些类或者函数上进行强制保存:
在Api上全局设置:
api = Api(ordered=True)在 命名空间(Namespace) 上全局设置:
ns = Namespace(ordered=True)使用 marshal() 局部设置:return marshal(data, fields, ordered=True)
响应编组
Flask-RESTPlus提供了一种很简单的方法去控制你响应的渲染内容或控制实际输入与期望输入相同(expect as in input payload)。通过 字段(fields) 模块,你可以在你的资源类中使用任何的对象(ORM 模型、自定义的类……)。 字段(fields) 同时能帮助你格式化和过滤请求,因此你将不需要担心会暴露内部的数据结构。
同时这也将提高代码的可读性,你可以轻易的看出哪些数据会被渲染哪些数据会被格式化输出。
基础用法
你可以定义一个字典(dict)或有序字典(OrderedDict)来存放其键的属性名称或要渲染的对象上的键的字段,并且其值是将格式化并返回该字段的值的类。下面的例子有三个字段:2个是 String ,1个是 DateTime , DateTime 将被格式化为ISO 8601日期时间字符串(ISO 8601 datetime string)(当然RFC 822也是支持的):
from flask_restplus import Resource, fieldsmodel = api.model('Model', {'name': fields.String,'address': fields.String,'date_updated': fields.DateTime(dt_format='rfc822'),})@api.route('/todo')class Todo(Resource):@api.marshal_with(model, envelope='resource')def get(self, **kwargs):return db_get_todo() # Some function that queries the db
在这个例子里面你有一个自定义的数据库对象(todo),它拥有 name 、 address 和 date_updated 属性。整个对象的其他附加属性都将是私有的并且不会在输出中渲染。指定了一个可选的 envelope 关键字参数来包装结果输出。
marlshal_with() 修饰器实际上将你的对象做了字段过滤。编组(marlshaling)可以用于单个对象、字典、由对象组成的列表。
提示:
marlshal_with()是一个很方便的修饰器,它在功能上和下面的代码等同:
class Todo(Resource):def get(self, **kwargs):return marshal(db_get_todo(), model), 200
@api.marlshal_with()添加了Swagger文档的功能。
这种显示的声明可以用于在正常响应时返回一个大于200的HTTP状态码(查看 abort() 获取异常相关信息)。(译者:API并没有翻译,这里是原版的API文档)
重命名属性
很多时候内部字段名和外部的字段名是不一样的。你可以使用 attribute 关键字来配置这种映射关系。
model = {'name': fields.String(attribute='private_name'),'address': fields.String,}
attribute 关键字也支持lambda表达式或任何可调用对象。
model = {'name': fields.String(attribute=lambda x: x._private_name),'address': fields.String,}
嵌套属性(Nested properties)也可以通过 attribute 进行访问。
model = {'name': fields.String(attribute='people_list.0.person_dictionary.name'),'address': fields.String,}
默认值
如果你的数据对象里没有字段列表中对应的属性,你可以指定一个默认值而不是返回一个 None。
model = {'name': fields.String(default='Anonymous User'),'address': fields.String,}
自定义字段(Custom Fields)& 多个数值
有时候你有自定义格式的需求。你需要继承父类 fields.Raw 并实现 format() 函数。当存储多种信息的时候,这种方法很有用。例如:一个比特类型的字段,其各个位代表不同的值。您可以使用字段将单个属性多路复用到多个输出值。
在这个例子中,flag 属性的第一位代表“正常”或“急迫”,第二位代表“已读”或”未读“。这些东西可以很容易的存入一个比特字段中,但是为了方便人类阅读将其转化成字符串字段是更好的选择。
class UrgentItem(fields.Raw):def format(self, value):return "Urgent" if value & 0x01 else "Normal"class UnreadItem(fields.Raw):def format(self, value):return "Unread" if value & 0x02 else "Read"model = {'name': fields.String,'priority': UrgentItem(attribute='flags'),'status': UnreadItem(attribute='flags'),}
Url & 其他预定义字段(Other Concrete Fields)
Flask-RESTPlus包含一个特殊字段, fields.Url , 它可以为需求的资源类合成一个URL。这也是一个向响应中添加数据的好例子,而这些数据实际上并不存在于数据对象中。
class RandomNumber(fields.Raw):def output(self, key, obj):return random.random()model = {'name': fields.String,# todo_resource is the endpoint name when you called api.route()'uri': fields.Url('todo_resource'),'random': RandomNumber,}
默认情况下,fields.Url 返回的是相对路径。为了生成带有协议(scheme)、主机名和端口的绝对路径,你可以在字段声明时添加 absolute=True 关键字。使用 scheme 关键字来覆盖原本的协议类型。
model = {'uri': fields.Url('todo_resource', absolute=True)'https_uri': fields.Url('todo_resource', absolute=True, scheme='https')}
复杂结构
你可以通过 marshal() 函数将平面的数据结构转化成嵌套的数据结构:
>>> from flask_restplus import fields, marshal>>> import json>>>>>> resource_fields = {'name': fields.String}>>> resource_fields['address'] = {}>>> resource_fields['address']['line 1'] = fields.String(attribute='addr1')>>> resource_fields['address']['line 2'] = fields.String(attribute='addr2')>>> resource_fields['address']['city'] = fields.String>>> resource_fields['address']['state'] = fields.String>>> resource_fields['address']['zip'] = fields.String>>> data = {'name': 'bob', 'addr1': '123 fake street', 'addr2': '', 'city': 'New York', 'state': 'NY', 'zip': '10468'}>>> json.dumps(marshal(data, resource_fields))'{"name": "bob", "address": {"line 1": "123 fake street", "line 2": "", "state": "NY", "zip": "10468", "city": "New York"}}'
提示:
地址字段实际上并不存在于数据对象上,但是任何子字段都可以直接从对象访问属性,就好像它们没有嵌套一样。
字段列表
你也可以将字段解组成列表。
>>> from flask_restplus import fields, marshal>>> import json>>>>>> resource_fields = {'name': fields.String, 'first_names': fields.List(fields.String)}>>> data = {'name': 'Bougnazal', 'first_names' : ['Emile', 'Raoul']}>>> json.dumps(marshal(data, resource_fields))>>> '{"first_names": ["Emile", "Raoul"], "name": "Bougnazal"}'
通配符字段
如果你不知道你要解组的字段名称,你可以使用 通配符(Wildcard) 。
>>> from flask_restplus import fields, marshal>>> import json>>>>>> wild = fields.Wildcard(fields.String)>>> wildcard_fields = {'*': wild}>>> data = {'John': 12, 'bob': 42, 'Jane': '68'}>>> json.dumps(marshal(data, wildcard_fields))>>> '{"Jane": "68", "bob": "42", "John": "12"}'
通配符 的名称将作为匹配的依据,如下所示
>>> from flask_restplus import fields, marshal>>> import json>>>>>> wild = fields.Wildcard(fields.String)>>> wildcard_fields = {'j*': wild}>>> data = {'John': 12, 'bob': 42, 'Jane': '68'}>>> json.dumps(marshal(data, wildcard_fields))>>> '{"Jane": "68", "John": "12"}'
提示:
值得注意的是,你需要把 通配符 定义在你的模型外面(也就是说你 不能 这么写:
res_fields = {'*': fields.Wildcard(fields.String)}),因为它必须要保存字段是否已经被处理的状态。提示:
通配符并不是正则表达式,它只能接受通配符‘*’和‘?’。
为了避免意料之外的情况,在混合 通配符 字段和其他字段使用的时候,请使用 有序字典(OrderedDict) 并且将 通配符 字段放在最后面。
>>> from flask_restplus import fields, marshal>>> from collections import OrderedDict>>> import json>>>>>> wild = fields.Wildcard(fields.Integer)>>> mod = OrderedDict()>>> mod['zoro'] = fields.String>>> mod['*'] = wild>>> # you can use it in api.model like this:>>> # some_fields = api.model('MyModel', mod)>>>>>> data = {'John': 12, 'bob': 42, 'Jane': '68', 'zoro': 72}>>> json.dumps(marshal(data, mod))>>> '{"zoro": "72", "Jane": 68, "bob": 42, "John": 12}'
嵌套字段
虽然你可以通过嵌套字段将平面数据转换成多层结构的响应,但是你也可以通过 Nested 将多层结构的数据转换成适当的形式。
>>> from flask_restplus import fields, marshal>>> import json>>>>>> address_fields = {}>>> address_fields['line 1'] = fields.String(attribute='addr1')>>> address_fields['line 2'] = fields.String(attribute='addr2')>>> address_fields['city'] = fields.String(attribute='city')>>> address_fields['state'] = fields.String(attribute='state')>>> address_fields['zip'] = fields.String(attribute='zip')>>>>>> resource_fields = {}>>> resource_fields['name'] = fields.String>>> resource_fields['billing_address'] = fields.Nested(address_fields)>>> resource_fields['shipping_address'] = fields.Nested(address_fields)>>> address1 = {'addr1': '123 fake street', 'city': 'New York', 'state': 'NY', 'zip': '10468'}>>> address2 = {'addr1': '555 nowhere', 'city': 'New York', 'state': 'NY', 'zip': '10468'}>>> data = {'name': 'bob', 'billing_address': address1, 'shipping_address': address2}>>>>>> json.dumps(marshal(data, resource_fields))'{"billing_address": {"line 1": "123 fake street", "line 2": null, "state": "NY", "zip": "10468", "city": "New York"}, "name": "bob", "shipping_address": {"line 1": "555 nowhere", "line 2": null, "state": "NY", "zip": "10468", "city": "New York"}}'
这个例子使用了两个 嵌套字段(Nested fields) 。嵌套字段 的构造函数需要一个字段字典作为子字段的输入。一个 嵌套字段(Nested) 构造器和之前嵌套字典(之前的例子)的区别是:属性的上下文。在这个例子中,billing_address 是一个拥有子字段的复杂对象并且传递给嵌套字段的上下文是子对象,而不是原始 data 对象。换句话说: data.billing_address.addr1 作用域在这,而之前例子中 data.addr1 是本地(localtion)属性。请记住:嵌套字段(Nested) 和 列表字段(List) 会为属性创建新的作用域。
在默认情况下,子字段的默认值是 None ,将生成具有嵌套字段的默认值的对象,而不是null。.这可以通过传递 allow_null 参数进行修改,请参阅 嵌套字段(Nested) 构造函数了解更多详细信息。
使用 嵌套字段 和 列表字段 来编组拥有复杂结构的列表对象:
user_fields = api.model('User', {'id': fields.Integer,'name': fields.String,})user_list_fields = api.model('UserList', {'users': fields.List(fields.Nested(user_fields)),})
api.model() 函数(api.model() factory)
model() 函数允许你将你的模型实例化并注册到你的 API 或者 命名空间(Namespace) 中。
my_fields = api.model('MyModel', {'name': fields.String,'age': fields.Integer(min=0)})# Equivalent tomy_fields = Model('MyModel', {'name': fields.String,'age': fields.Integer(min=0)})api.models[my_fields.name] = my_fields
使用 clone进行复制
Model.clone() 函数允许你复制一个已存在的模型,并对其进行扩展。这节省了你复制所有字段的时间。
parent = Model('Parent', {'name': fields.String})child = parent.clone('Child', {'age': fields.Integer})
Api/Namespace.clone 同时也将其注册到了API中。
parent = api.model('Parent', {'name': fields.String})child = api.clone('Child', parent, {'age': fields.Integer})
通过api.inherit 实现多态
Model.inherit() 函数允许你通过”Swagger特色的方法(Swagger way)“扩展你的模型并着手于多态的处理。
parent = api.model('Parent', {'name': fields.String,'class': fields.String(discriminator=True)})child = api.inherit('Child', parent, {'extra': fields.String})
Api/Namespace.clone 会同时注册父模型和子模型到Swagger模型定义中。
parent = Model('Parent', {'name': fields.String,'class': fields.String(discriminator=True)})child = parent.inherit('Child', {'extra': fields.String})
只有在序列化对象中不存在属性时,才会使用序列化模型名填充本例中的 class 字段。
Polymorph 字段允许您指定Python类和字段规范(fields specifications)之间的映射。
mapping = {Child1: child1_fields,Child2: child2_fields,}fields = api.model('Thing', {owner: fields.Polymorph(mapping)})
自定义字段
自定义字段使你可以自定义格式化你的输出而不需要修改你的内部对象。你需要做到只是继承父类 Raw 并实现 format() 函数:
class AllCapsString(fields.Raw):def format(self, value):return value.upper()# example usagefields = {'name': fields.String,'all_caps_name': AllCapsString(attribute='name'),}
你可以修改 __ schemaformat\_ 、__schematype\_ 和 __schemaexample\_ 来指定字段输出类型和示例:
class MyIntField(fields.Integer):__schema_format__ = 'int64'class MySpecialField(fields.Raw):__schema_type__ = 'some-type'__schema_format__ = 'some-format'class MyVerySpecialField(fields.Raw):__schema_example__ = 'hello, world'
跳过None字段(Skip fields which value is None)
你可以跳过哪些值为 None 的字段而不是将他们渲染成Json格式的 null 。在你有很多字段值可能为空的时候这是一种很有效降低响应包体积的方法,但是哪个字段是 None 是不可预测的。
让我们看看下面的示例,skip_none 这个关键字被设置为 True 。
>>> from flask_restplus import Model, fields, marshal_with>>> import json>>> model = Model('Model', {... 'name': fields.String,... 'address_1': fields.String,... 'address_2': fields.String... })>>> @marshal_with(model, skip_none=True)... def get():... return {'name': 'John', 'address_1': None}...>>> get()OrderedDict([('name', 'John')])
你可以看到 address_1 和 address_2 被 marlshal_with() 跳过了。address_1 被跳过是由于它的值是 None 。address_2 被跳过是由于 get() 返回的字典中不含有键 address_2。
在嵌套字段中跳过None
如果你的模块中使用了 fields.Nested ,你需要将 skip_none=True 关键字传给 fields.Nested 。
>>> from flask_restplus import Model, fields, marshal_with>>> import json>>> model = Model('Model', {... 'name': fields.String,... 'location': fields.Nested(location_model, skip_none=True)... })
使用Json格式定义模型
你也可以使用 Json格式 (Draft v4)来定义模型。
address = api.schema_model('Address', {'properties': {'road': {'type': 'string'},},'type': 'object'})person = address = api.schema_model('Person', {'required': ['address'],'properties': {'name': {'type': 'string'},'age': {'type': 'integer'},'birthdate': {'type': 'string','format': 'date-time'},'address': {'$ref': '#/definitions/Address',}},'type': 'object'})
请求解析
警告:
Flask-RESTful的整个请求解析器部分将被移除,取而代之的是关于如何与其他更好地完成输入/输出的包(如marshmallow)集成的文档。这意味着它将一直保持到2.0,但是认为它已经过时了。不要担心,如果您的代码现在正在使用它,并且您希望继续这样做,那么它不会很快消失。
基于Flask-RESTful的请求解析接口reqparse是在argparse接口之后建模的。它的设计提供了简单和统一的访问flask.request对象上的任何变量。
基础参数
下面是请求解析器的一个简单示例。它在flask.Request.values字典中查找两个参数:一个整数和一个字符串
from flask_restplus import reqparseparser = reqparse.RequestParser()parser.add_argument('rate', type=int, help='Rate cannot be converted')parser.add_argument('name')args = parser.parse_args()
提示:
默认的参数类型是unicode字符串。这在python3中是str,在python2中是unicode。
如果您指定了help值,那么在解析类型错误时,它将被呈现为错误消息。如果没有指定帮助消息,则默认行为是从类型错误本身返回消息。有关详细信息,请参见错误消息。
提示:
默认情况下, 不需要 参数。另外,请求中提供的不属于
RequestParser的参数将被忽略。在请求解析器中声明但未在请求本身中设置的参数默认为None。
必要参数
要为参数传递值,只需将required=True添加到add_argument()调用即可。
parser.add_argument('name', required=True, help="Name cannot be blank!")
多个数值和列表
如果您希望一个键能以列表的形式接收多个值,可以像下面这样传递参数action='append'
parser.add_argument('name', action='append')
这会让您的请求变得像下面这样
curl http://api.example.com -d "name=bob" -d "name=sue" -d "name=joe"
并且您的变量看上去会像下面这样
args = parser.parse_args()args['name'] # ['bob', 'sue', 'joe']
如果您希望用逗号分隔的字符串能被分割成列表,并作为一个键的值,可以像下面这样传递参数action='split'
parser.add_argument('fruits', action='split')
这会让您的请求变得像下面这样
curl http://api.example.com -d "fruits=apple,lemon,cherry"
并且您的变量看上去会像下面这样
args = parser.parse_args()args['fruits'] # ['apple', 'lemon', 'cherry']
其他源(other destinations)
如果出于某种原因,希望在解析后将参数存储在不同的名称下,那么可以使用dest关键字参数。
parser.add_argument('name', dest='public_name')args = parser.parse_args()args['public_name']
参数位置
默认情况下,RequestParser尝试解析来自flask.Request.values和flask.Request.json的值。
使用add_argument()的location参数来指定从哪些位置获取值。flask.Request上的任何变量都可以使用。例如
# Look only in the POST bodyparser.add_argument('name', type=int, location='form')# Look only in the querystringparser.add_argument('PageSize', type=int, location='args')# From the request headersparser.add_argument('User-Agent', location='headers')# From http cookiesparser.add_argument('session_id', location='cookies')# From file uploadsparser.add_argument('picture', type=werkzeug.datastructures.FileStorage, location='files')
提示:
只有在location=’json’时才使用type=list。有关更多细节,请参见这个issue
使用location=’form’是验证表单数据和记录表单字段的方法。
多位置参数
可以通过将列表传递给location来指定多个参数位置
parser.add_argument('text', location=['headers', 'values'])
当指定多个位置时,来自指定的所有位置的参数将合并为单个MultiDict。最后列出的位置优先于结果集。
如果参数位置列表包含headers,则参数名将不再不区分大小写,必须与标题大小写名称匹配(参见str.title())。指定location='headers'(不作为列表)将保留大小写不敏感。
高级类型处理
有时,您需要比基本数据类型更多的类型来处理输入验证。input模块提供一些常见的类型处理
- 用于更加广泛布尔处理的
boolean() - 用于IP地址的
ipv4()和ipv6() - 用于ISO8601日期和数据处理的
date_from_iso8601()和datetime_from_iso8601()
你只需要把它们用在 type 参数上
parser.add_argument('flag', type=inputs.boolean)
有关可用 input 的完整列表,请参阅 input文档。
您也可以像下面这样编写自己的数据类型
def my_type(value):'''Parse my type'''if not condition:raise ValueError('This is not my type')return parse(value)# Swagger documntationmy_type.__schema__ = {'type': 'string', 'format': 'my-custom-format'}
解析器继承
通常地,您会为您写的每一份资源配置不同的解析器。这样做的问题是解析器是否具有公共的参数。不同于重新写参数,您可以编写一个包含所有公共的参数的父解析器,然后用 copy()函数继承这个解析器。您也可以用 replace_argument()来重写父解析器里的任何参数,或者干脆用 remove_argument() 完全移除它。下面是例子
from flask_restplus import reqparseparser = reqparse.RequestParser()parser.add_argument('foo', type=int)parser_copy = parser.copy()parser_copy.add_argument('bar', type=int)# parser_copy has both 'foo' and 'bar'parser_copy.replace_argument('foo', required=True, location='json')# 'foo' is now a required str located in json, not an int as defined# by original parserparser_copy.remove_argument('foo')# parser_copy no longer has 'foo' argument
文件上传
要使用 RequestParser 处理文件上传,您需要使用 files 位置并将 type设置为FileStorage。
下面是例子
from werkzeug.datastructures import FileStorageupload_parser = api.parser()upload_parser.add_argument('file', location='files',type=FileStorage, required=True)@api.route('/upload/')@api.expect(upload_parser)class Upload(Resource):def post(self):uploaded_file = args['file'] # This is FileStorage instanceurl = do_something_with_file(uploaded_file)return {'url': url}, 201
请参阅专用的Flask文档部分。
错误处理
RequestParser 处理错误的默认方式是在第一个错误出现的时候终止。当您可能需要一些时间来处理某些参数的时候,这将是很有好处的。然而,将错误捆绑一起并且一次性发送回客户端通常是较好的处理。这种方式可以在Flask应用程序级别(Flask application level)或在特定的 RequestParser实例上被指定。为了在调用 RequestParser的时候使用捆绑错误的选项,需要传递 bundle_errors参数。下面是例子
from flask_restplus import reqparseparser = reqparse.RequestParser(bundle_errors=True)parser.add_argument('foo', type=int, required=True)parser.add_argument('bar', type=int, required=True)# If a request comes in not containing both 'foo' and 'bar', the error that# will come back will look something like this.{"message": {"foo": "foo error message","bar": "bar error message"}}# The default behavior would only return the first errorparser = RequestParser()parser.add_argument('foo', type=int, required=True)parser.add_argument('bar', type=int, required=True){"message": {"foo": "foo error message"}}
程序的配置键是 “BUNDLE_ERRORS”,下面是例子
from flask import Flaskapp = Flask(__name__)app.config['BUNDLE_ERRORS'] = True
警告:
BUNDLE_ERRORS是一个重载了每个RequestParser实例里的bundle_errors选项的全局设定
错误消息
每个域的错误消息可以通过 help 参数来进行定制(也是在 RequestParser.add_argument当中)。
如果不提供 help 参数,那么这个域的错误消息会是错误类型本身的字符串表示。否则,错误消息就是 help 参数的值
help 参数可能包含一个插值标记( interpolation token),就像 {error_msg} 这样,这个标记将会被错误类型的字符串表示替换。这允许您在保留原本的错误消息的同时定制消息,就像下面的例子这样
from flask_restplus import reqparseparser = reqparse.RequestParser()parser.add_argument('foo',choices=('one', 'two'),help='Bad choice: {error_msg}')# If a request comes in with a value of "three" for `foo`:{"message": {"foo": "Bad choice: three is not a valid choice",}}
字段掩码(Fields masks)
Flask-RESTPlus通过一个自定义请求头支持部分对象获取(partial object fetching)也就是字段掩码(fields mask)。
默认情况下头名为 X-Fields ,但是它可以被 RESTPLUS_MASK_HEADER 参数修改。
语法
语法非常简单。你只要提供一个包含字段名并用逗号分隔的列表,可以选择性的用括号包裹。
# These two mask are equivalentsmask = '{name,age}'# ormask = 'name,age'data = requests.get('/some/url/', headers={'X-Fields': mask})assert len(data) == 2assert 'name' in dataassert 'age' in data
实现嵌套字段只需要将内容用大括号包裹即可。
mask = '{name, age, pet{name}}'
嵌套规范适用于嵌套对象或对象列表:
# Will apply the mask {name} to each pet# in the pets list.mask = '{name, age, pets{name}}'
特殊字符米字星(*)代表“所有剩余字段(all remaining fields)”。它仅允许指定嵌套过滤:
# Will apply the mask {name} to each pet# in the pets list and take all other root fields# without filtering.mask = '{pets{name},*}'# Will not filter anythingmask = '*'
使用方法
默认情况下,每次使用 api.marshal 或 @api.marshal_with 时,如果存在标头,掩码将自动应用。
当你每次使用 @api.marshal_with 修饰器时,标头将作为Swagger参数展示。
由于Swagger并不允许展示全局标头,这将会使你的Swagger文档更加冗长。你可以修改 RESTPLUS_MASK_SWAGGER 为 False 来禁用这个功能。
您也可以指定默认的掩码,如果找不到掩码,则将应用默认掩码。
class MyResource(Resource):@api.marshal_with(my_model, mask='name,age')def get(self):pass
默认掩码也可以在模型级别处理:
model = api.model('Person', {'name': fields.String,'age': fields.Integer,'boolean': fields.Boolean,}, mask='{name,age}')
它将被导出到 x-mask 字段:
{"definitions": {"Test": {"properties": {"age": {"type": "integer"},"boolean": {"type": "boolean"},"name": {"type": "string"}},"x-mask": "{name,age}"}}}
要覆盖默认掩码,您需要提供另一个掩码或将*用作掩码。
Swagger文档
Swagger API文档是自动生成的,可从您API的根目录访问。你可以使用 @api.doc() 修饰器配置你的文档。
使用@api.doc()装饰器进行文档编辑
@api.doc() 修饰器使你可以为文档添加额外信息。
你可以为一个类或者函数添加文档:
@api.route('/my-resource/<id>', endpoint='my-resource')@api.doc(params={'id': 'An ID'})class MyResource(Resource):def get(self, id):return {}@api.doc(responses={403: 'Not Authorized'})def post(self, id):api.abort(403)
模型自动记录
所有由 model() 、 clone() 和 inherit() 实例化的模型(model)都会被自动记录到Swagger文档中。
inherit() 函数会将父类和子类都注册到Swagger的模型(model)定义中:
parent = api.model('Parent', {'name': fields.String,'class': fields.String(discriminator=True)})child = api.inherit('Child', parent, {'extra': fields.String})
上面的代码会生成下面的Swagger定义:
{"Parent": {"properties": {"name": {"type": "string"},"class": {"type": "string"}},"discriminator": "class","required": ["class"]},"Child": {"allOf": [{"$ref": "#/definitions/Parent"}, {"properties": {"extra": {"type": "string"}}}]}}
@api.marshal_with()装饰器
这个装饰器和原生的 marshal_with() 装饰器几乎完全一致,除了这个装饰器会记录函数文档。可选参数代码允许您指定期望的HTTP状态码(默认为200)。可选参数 as_list 允许您指定是否将对象作为列表返回。
resource_fields = api.model('Resource', {'name': fields.String,})@api.route('/my-resource/<id>', endpoint='my-resource')class MyResource(Resource):@api.marshal_with(resource_fields, as_list=True)def get(self):return get_objects()@api.marshal_with(resource_fields, code=201)def post(self):return create_object(), 201
Api.marshal_list_with() 装饰器严格等同于 Api.marshal_with(fields,** **as_list=True)()。
resource_fields = api.model('Resource', {'name': fields.String,})@api.route('/my-resource/<id>', endpoint='my-resource')class MyResource(Resource):@api.marshal_list_with(resource_fields)def get(self):return get_objects()@api.marshal_with(resource_fields)def post(self):return create_object()
@api.expect()装饰器
@api.expect() 装饰器允许你指定所需的输入字段。它接受一个可选的布尔参数 validate ,指示负载(payload)是否需要被验证。
可以通过将 RESTPLUS_VALIDATE 配置设置为 True 或将 validate = True 传递给API构造函数来全局设置验证功能。
以下示例是等效的:
使用
@api.expect()装饰器:resource_fields = api.model('Resource', {'name': fields.String,})@api.route('/my-resource/<id>')class MyResource(Resource):@api.expect(resource_fields)def get(self):pass
使用
@api.doc()装饰器:resource_fields = api.model('Resource', {'name': fields.String,})@api.route('/my-resource/<id>')class MyResource(Resource):@api.doc(body=resource_fields)def get(self):pass
您可以将列表指定为预期输入:
resource_fields = api.model('Resource', {'name': fields.String,})@api.route('/my-resource/<id>')class MyResource(Resource):@api.expect([resource_fields])def get(self):pass
您可以使用 RequestParser 定义期望的输入:
parser = api.parser()parser.add_argument('param', type=int, help='Some param', location='form')parser.add_argument('in_files', type=FileStorage, location='files')@api.route('/with-parser/', endpoint='with-parser')class WithParserResource(restplus.Resource):@api.expect(parser)def get(self):return {}
可以在特定端点上启用或禁用验证:
resource_fields = api.model('Resource', {'name': fields.String,})@api.route('/my-resource/<id>')class MyResource(Resource):# Payload validation disabled@api.expect(resource_fields)def post(self):pass# Payload validation enabled@api.expect(resource_fields, validate=True)def post(self):pass
通过config进行应用程序范围验证设置的示例:
app.config['RESTPLUS_VALIDATE'] = Trueapi = Api(app)resource_fields = api.model('Resource', {'name': fields.String,})@api.route('/my-resource/<id>')class MyResource(Resource):# Payload validation enabled@api.expect(resource_fields)def post(self):pass# Payload validation disabled@api.expect(resource_fields, validate=False)def post(self):pass
通过构造函数进行应用程序范围验证设置的示例:
api = Api(app, validate=True)resource_fields = api.model('Resource', {'name': fields.String,})@api.route('/my-resource/<id>')class MyResource(Resource):# Payload validation enabled@api.expect(resource_fields)def post(self):pass# Payload validation disabled@api.expect(resource_fields, validate=False)def post(self):pass
使用@api.response装饰器进行文档编辑
@api.response 装饰器允许您记录已知的响应,并且他是 @api.doc(responses='...') 的简化写法。
以下两种定义是等效的:
@api.route('/my-resource/')class MyResource(Resource):@api.response(200, 'Success')@api.response(400, 'Validation Error')def get(self):pass@api.route('/my-resource/')class MyResource(Resource):@api.doc(responses={200: 'Success',400: 'Validation Error'})def get(self):pass
您可以选择将响应模型指定为第三个参数:
model = api.model('Model', {'name': fields.String,})@api.route('/my-resource/')class MyResource(Resource):@api.response(200, 'Success', model)def get(self):pass
@api.marshal_with() 修饰器会自动记录响应:
model = api.model('Model', {'name': fields.String,})@api.route('/my-resource/')class MyResource(Resource):@api.response(400, 'Validation error')@api.marshal_with(model, code=201, description='Object created')def post(self):pass
如果你不知道状态码的时候,你可以指定一个默认响应。
@api.route('/my-resource/')class MyResource(Resource):@api.response('default', 'Error')def get(self):pass
@api.route()装饰器
你可以指定一个类范围的文档通过 Api.route() 的 doc 参数。这个参数可以接受和 @api.doc() 装饰器相同的参数。
例如,这两种定义是等效的:
使用
@api.doc():@api.route('/my-resource/<id>', endpoint='my-resource')@api.doc(params={'id': 'An ID'})class MyResource(Resource):def get(self, id):return {}
使用
@api.route():@api.route('/my-resource/<id>', endpoint='my-resource', doc={'params':{'id': 'An ID'}})class MyResource(Resource):def get(self, id):return {}
单资源类多路由(Multiple Routes per Resource)
多个 Api.route() 修饰器可以为单个 资源类(Resource) 添加多个路由。 doc 参数可以为每条路由配置文档。
例如,下面的 描述(description) 只适用于路由 /also-my-resource/<id> :
@api.route("/my-resource/<id>")@api.route("/also-my-resource/<id>",doc={"description": "Alias for /my-resource/<id>"},)class MyResource(Resource):def get(self, id):return {}
这里,路由 /also-my-resource/<id> 则标记为已弃用:
@api.route("/my-resource/<id>")@api.route("/also-my-resource/<id>",doc={"description": "Alias for /my-resource/<id>, this route is being phased out in V2","deprecated": True,},)class MyResource(Resource):def get(self, id):return {}
除非明确覆盖,否则由 Api.doc() 给 资源类(Resource) 绑定的文档将在各路由间共享:
@api.route("/my-resource/<id>")@api.route("/also-my-resource/<id>",doc={"description": "Alias for /my-resource/<id>"},)@api.doc(params={"id": "An ID", description="My resource"})class MyResource(Resource):def get(self, id):return {}
这里, 来自 Api.doc() 的 id 文档同时存在于两条路由上, /my-resource/<id> 继承了 My resource 由 Api.doc() 记录的描述,而 /also-my-resource/<id> 用 Alias for /my-resource/<id> 覆盖了描述。
用 doc 标记的路由将获得一个 唯一 的Swagger operationId 。没有 doc 参数的路由将拥有相同的 operationId ,它们会被视为相同的操作。
对字段进行文档编写
每个Flask-RESTPlus字段都可以可选的接受以下几个用于文档的参数:
required:一个布朗值标识这个字段是否是必要的(默认:False)description:一些字段的详细描述(默认:None)example:展示时显示的示例(默认:None)
这里还有一些特定字段的属性:
String字段可以接受以下参数:enum:一个限制授权值的数组。min_length:字符串的最小长度。max_length:字符串的最大长度。pattern:一个正则表达式用于验证。
Integer、Float和Arbitrary字段可以接受以下参数:min:可以接受的最小值。max:可以接受的最大值。ExclusiveMin:如果为True,则区间不包含最小值。exclusiveMax:如果为True,则区间不包含最大值。multiple:限制输入的数字是这个数的倍数。
DateTime字段可以接受min、max、exclusiveMin和exclusiveMax参数。这些参数必须是 dates 或 datetimes (不是ISO字符串就是原生对象)。
my_fields = api.model('MyModel', {'name': fields.String(description='The name', required=True),'type': fields.String(description='The object type', enum=['A', 'B']),'age': fields.Integer(min=0),})
对函数进行文档编写
每一个资源类都会被记录为一个Swagger路径。
每一个资源类的函数(get , post, put , delete , path , options , head)都会被记录为一个Swagger操作。
您可以使用 id 关键字参数指定唯一的Swagger operationId :
@api.route('/my-resource/')class MyResource(Resource):@api.doc(id='get_something')def get(self):return {}
设置第一个参数也可以达到相同的目的:
@api.route('/my-resource/')class MyResource(Resource):@api.doc('get_something')def get(self):return {}
如果没有特别指定,默认将以下面的格式设定 operationId:
{{verb}}_{{resource class name | camelCase2dashes }}
前面的例子中,默认的 operationId 将会是 get_my_resource 。
你可以通过给 default_id 传入一个回调函数来覆盖默认的 operationId 生成器。这个回调函数接受下面两个参数:
- 资源类的类名
- 小写的HTTP方法
def default_id(resource, method):return ''.join((method, resource))api = Api(app, default_id=default_id)
前面的例子中,生成的 operationId 将会是 getMyResource 。
每个操作都会自动纳入其命名空间的标签下。如果资源类是直接归属于根目录,则自动纳入默认标签中。
函数参数
来自url地址的参数会自动被记录。你可以通过 api.doc() 修饰器的 params 参数添加额外的内容:
@api.route('/my-resource/<id>', endpoint='my-resource')@api.doc(params={'id': 'An ID'})class MyResource(Resource):pass
或者使用 api.params 修饰器:
@api.route('/my-resource/<id>', endpoint='my-resource')@api.param('id', 'An ID')class MyResource(Resource):pass
输入和输出模型
你可以通过 api.doc() 修饰器的 model 关键字指定序列化输出模型。
对于 PUT 和 POST 方法,使用 body 关键字指定输入模型。
fields = api.model('MyModel', {'name': fields.String(description='The name', required=True),'type': fields.String(description='The object type', enum=['A', 'B']),'age': fields.Integer(min=0),})@api.model(fields={'name': fields.String, 'age': fields.Integer})class Person(fields.Raw):def format(self, value):return {'name': value.name, 'age': value.age}@api.route('/my-resource/<id>', endpoint='my-resource')@api.doc(params={'id': 'An ID'})class MyResource(Resource):@api.doc(model=fields)def get(self, id):return {}@api.doc(model='MyModel', body=Person)def post(self, id):return {}
如果 body 和 formData 同时使用,将会造成 SpecsError 异常。
模型同时也可以被 RequestParser 指定。
parser = api.parser()parser.add_argument('param', type=int, help='Some param', location='form')parser.add_argument('in_files', type=FileStorage, location='files')@api.route('/with-parser/', endpoint='with-parser')class WithParserResource(restplus.Resource):@api.expect(parser)def get(self):return {}
提示:
解码后的有效载荷(decoded payload)将以字典的形式作为 有效载荷(payload)的属性存在在请求上下文中(request context)。
@api.route('/my-resource/')class MyResource(Resource):def get(self):data = api.payload提示:
更推荐使用 RequestParser 而不是
api.param()修饰器对表单进行记录,因为前者同时支持表单验证。
头(headers)
你可以使用 api.header() 修饰器快捷记录响应头内容。
@api.route('/with-headers/')@api.header('X-Header', 'Some class header')class WithHeaderResource(restplus.Resource):@api.header('X-Collection', type=[str], collectionType='csv')def get(self):pass
如果你要指定一个只出现在响应中的标头,只需要使用 @api.response 的 headers 关键字即可。
@api.route('/response-headers/')class WithHeaderResource(restplus.Resource):@api.response(200, 'Success', headers={'X-Header': 'Some header'})def get(self):pass
记录 期望或者需求(expected/request) 的标头请使用 @api.expect 修饰符。
parser = api.parser()parser.add_argument('Some-Header', location='headers')@api.route('/expect-headers/')@api.expect(parser)class ExpectHeaderResource(restplus.Resource):def get(self):pass
级联(Cascading)
函数的文档优先级高于类的文档,继承的文档高于其父类的文档。
例如,这两个声明是等效的:
函数文档继承类文档内容:
@api.route('/my-resource/<id>', endpoint='my-resource')@api.params('id', 'An ID')class MyResource(Resource):def get(self, id):return {}
函数文档覆盖类文档内容:
@api.route('/my-resource/<id>', endpoint='my-resource')@api.param('id', 'Class-wide description')class MyResource(Resource):@api.param('id', 'An ID')def get(self, id):return {}
你也可以用类装饰器指定函数的文档。以下示例将产生与前两个示例相同的文档:
@api.route('/my-resource/<id>', endpoint='my-resource')@api.params('id', 'Class-wide description')@api.doc(get={'params': {'id': 'An ID'}})class MyResource(Resource):def get(self, id):return {}
已弃用标记
你可以通过 @api.deprecated 修饰器将资源类或函数标记为已弃用:
# Deprecate the full resource@api.deprecated@api.route('/resource1/')class Resource1(Resource):def get(self):return {}# Deprecate methods@api.route('/resource4/')class Resource4(Resource):def get(self):return {}@api.deprecateddef post(self):return {}def put(self):return {}
隐藏文档
用下面的方法你可以将一些资源类或函数从文档种隐藏:
# Hide the full resource@api.route('/resource1/', doc=False)class Resource1(Resource):def get(self):return {}@api.route('/resource2/')@api.doc(False)class Resource2(Resource):def get(self):return {}@api.route('/resource3/')@api.hideclass Resource3(Resource):def get(self):return {}# Hide methods@api.route('/resource4/')@api.doc(delete=False)class Resource4(Resource):def get(self):return {}@api.doc(False)def post(self):return {}@api.hidedef put(self):return {}def delete(self):return {}
提示:
没有附加的资源类的命名空间会自动的在文档中隐藏。
文档授权(Documenting authorizations)
你可以通过 authorizations 关键字修改文档授权信息。查看 Swagger授权文档(Swagger Authentication documentation) 了解详细配置方法。
authorizations是以Python字典的形式表现SwaggersecurityDefinitions的配置信息。authorizations = {'apikey': {'type': 'apiKey','in': 'header','name': 'X-API-KEY'}}api = Api(app, authorizations=authorizations)
配置授权之后每个资源类和方法的解释器均需配置授权:
@api.route('/resource/')class Resource1(Resource):@api.doc(security='apikey')def get(self):pass@api.doc(security='apikey')def post(self):pass
你可以通过 security 关键字在 Api 的构造函数中全局的应用这个配置:
authorizations = {'apikey': {'type': 'apiKey','in': 'header','name': 'X-API-KEY'}}api = Api(app, authorizations=authorizations, security='apikey')
你也可以设置多种授权机制:
authorizations = {'apikey': {'type': 'apiKey','in': 'header','name': 'X-API'},'oauth2': {'type': 'oauth2','flow': 'accessCode','tokenUrl': 'https://somewhere.com/token','authorizationUrl': 'https://somewhere.com/auth','scopes': {'read': 'Grant read-only access','write': 'Grant read-write access',}}}api = Api(self.app, security=['apikey', {'oauth2': 'read'}], authorizations=authorizations)
安全机制也可以通过特定的函数覆盖:
@api.route('/authorizations/')class Authorized(Resource):@api.doc(security=[{'oauth2': ['read', 'write']}])def get(self):return {}
你可以通过给 security 关键字传入 None 或一个空列表禁用某个资源类或方法的安全机制:
@api.route('/without-authorization/')class WithoutAuthorization(Resource):@api.doc(security=[])def get(self):return {}@api.doc(security=None)def post(self):return {}
展示支持信息(Expose vendor Extensions)
Swagger允许你自定义 支持信息(vendor extensions ) ,而Flask-RESTPlus可以通过 @api.vendor 修饰器对其进行设置。
它同时支持 dict 或 kwargs 扩展,并自动执行 x-prefix :
@api.route('/vendor/')@api.vendor(extension1='any authorized value')class Vendor(Resource):@api.vendor({'extension-1': {'works': 'with complex values'},'x-extension-3': 'x- prefix is optionnal',})def get(self):return {}
导出Swagger格式
你可以将你的API导出为Swagger格式:
from flask import jsonfrom myapp import apiprint(json.dumps(api.__schema__))
Swagger UI
在默认情况下,Flask-RESTPlus 在API的根目录提供 Swagger UI 文档服务。
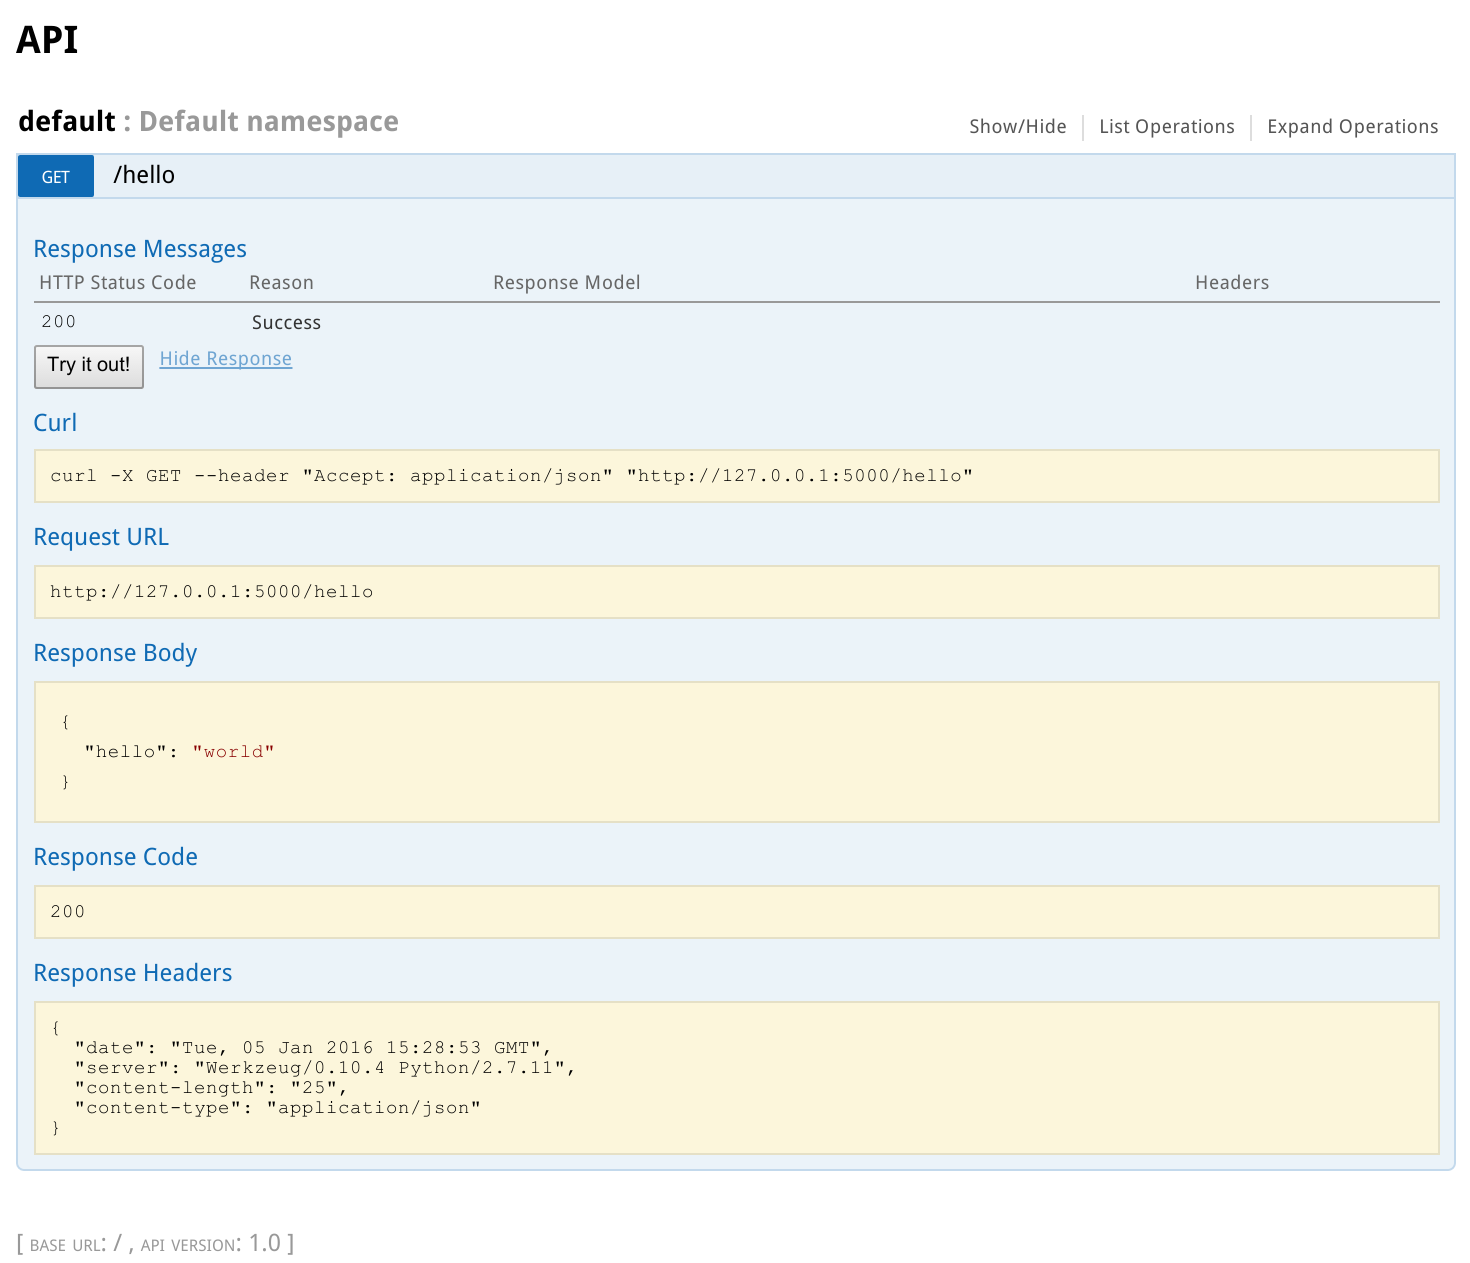
from flask import Flaskfrom flask_restplus import Api, Resource, fieldsapp = Flask(__name__)api = Api(app, version='1.0', title='Sample API',description='A sample API',)@api.route('/my-resource/<id>')@api.doc(params={'id': 'An ID'})class MyResource(Resource):def get(self, id):return {}@api.response(403, 'Not Authorized')def post(self, id):api.abort(403)if __name__ == '__main__':app.run(debug=True)
运行上面的代码并访问API的根目录(http://localhost:5000),你就能看到自动生成的Swagger UI文档。
个性化
你可以通过 doc 关键字配置 Swagger UI 的路径(默认为根目录):
from flask import Flask, Blueprintfrom flask_restplus import Apiapp = Flask(__name__)blueprint = Blueprint('api', __name__, url_prefix='/api')api = Api(blueprint, doc='/doc/')app.register_blueprint(blueprint)assert url_for('api.doc') == '/api/doc/'
你可以通过设定 config.SWAGGER_VALIDATOR_URL 来指定一个自定义的验证器地址(validator URL):
from flask import Flaskfrom flask_restplus import Apiapp = Flask(__name__)app.config.SWAGGER_VALIDATOR_URL = 'http://domain.com/validator'api = Api(app)
您可以启用 OAuth2隐式流程(OAuth2 Implicit Flow) ,以获取用于在Swagger UI中交互测试api端点的授权令牌。 config.SWAGGER_UI_OAUTH_CLIENT_ID 、 authorizationUrl 和 scopes 将用于指定你的OAuth2 IDP配置。 域字符串(realm string) 将会作为查询参数(query parameter) 添加到 授权地址(authorizationUrl) 和 凭证地址(tokenUrl)。这些值都是公开信息。此处未指定 客户端密钥(client secret)。使用PKCE代替隐式流取决于https://github.com/swagger-api/swagger-ui/issues/5348
from flask import Flaskapp = Flask(__name__)app.config.SWAGGER_UI_OAUTH_CLIENT_ID = 'MyClientId'app.config.SWAGGER_UI_OAUTH_REALM = '-'app.config.SWAGGER_UI_OAUTH_APP_NAME = 'Demo'api = Api(app,title=app.config.SWAGGER_UI_OAUTH_APP_NAME,security={'OAuth2': ['read', 'write']},authorizations={'OAuth2': {'type': 'oauth2','flow': 'implicit','authorizationUrl': 'https://idp.example.com/authorize?audience=https://app.example.com','clientId': app.config.SWAGGER_UI_OAUTH_CLIENT_ID,'scopes': {'openid': 'Get ID token','profile': 'Get identity',}}})
你也可以通过修改 config.SWAGGER_UI_DOC_EXPANSION ('none', 'list' 或 'full') 来指定初期标签展开状态(the initial expansion state)。
from flask_restplus import Apiapp = Flask(__name__)app.config.SWAGGER_UI_DOC_EXPANSION = 'list'api = Api(app)
默认情况下, 操作ID(operation ID) 和 请求区间(request duration) 是影藏的,可以通过下面的方法分别启用它们:
from flask import Flaskfrom flask_restplus import Apiapp = Flask(__name__)app.config.SWAGGER_UI_OPERATION_ID = Trueapp.config.SWAGGER_UI_REQUEST_DURATION = Trueapi = Api(app)
如果你需要自定义UI,你可以通过 documentation() 修饰器来注册自定义视图:
from flask import Flaskfrom flask_restplus import Api, apidocapp = Flask(__name__)api = Api(app)@api.documentationdef custom_ui():return apidoc.ui_for(api)
配置“试一试(Try it Out)”
默认情况下,所有的路径和方法都有一个“试一试(Try it Out)”按钮用于在浏览器中测试API。你可以通过修改 SWAGGER_SUPPORTED_SUBMIT_METHODS 的配置禁用任意一种Http方法,该参数支持符合 Swagger UI 参数(Swagger UI parameter) 的 supportedSubmitMethods 参数的所有值。
from flask import Flaskfrom flask_restplus import Apiapp = Flask(__name__)# disable Try it Out for all methodsapp.config.SWAGGER_SUPPORTED_SUBMIT_METHODS = []# enable Try it Out for specific methodsapp.config.SWAGGER_SUPPORTED_SUBMIT_METHODS = ["get", "post"]api = Api(app)
禁用文档
设置 doc=False 可以完全禁用文档。
from flask import Flaskfrom flask_restplus import Apiapp = Flask(__name__)api = Api(app, doc=False)
异常处理
Http异常处理
Werkzeug HTTP异常(Werkzeug HTTPException)将适当的自动重写描述(description)属性。
from werkzeug.exceptions import BadRequestraise BadRequest()
上述代码将会返回一个400状态码和输出:
{"message": "The browser (or proxy) sent a request that this server could not understand."}
而这段代码:
from werkzeug.exceptions import BadRequestraise BadRequest('My custom message')
将会输出:
{"message": "My custom message"}
你可以通过修改data属性值添加额外的参数到你的异常中:
from werkzeug.exceptions import BadRequeste = BadRequest('My custom message')e.data = {'custom': 'value'}raise e
这将输出:
{"message": "My custom message","custom": "value"}
Flask终止助手
终止助手(abort helper) 适当的将错误封装成了一个 Http异常( HTTPException ) ,因此它们表现几乎相同。
from flask import abortabort(400)
上述代码将会返回一个400状态码和输出:
{"message": "The browser (or proxy) sent a request that this server could not understand."}
而这段代码:
from flask import abortabort(400, 'My custom message')
将会输出:
{"message": "My custom message"}
Flask-RESTPlus终止助手
errors.abort() 与 Namespace.abort() 终止助手与原生Flask Flask.abort() 原理相似,但将会把关键字参数(keyword arguments)打包进响应中。
from flask_restplus import abortabort(400, custom='value')
上述代码将会返回一个400状态码和输出:
{"message": "The browser (or proxy) sent a request that this server could not understand.","custom": "value"}
而这段代码:
from flask import abortabort(400, 'My custom message', custom='value')
将会输出:
{"message": "My custom message","custom": "value"}
@api.errorhandler 装饰器
@api.errorhandler装饰器将为指定的异常(或继承于这个异常的任何异常)注册一个特别的处理机(handler),你也可以用同样的方法使用 Flask/Blueprint 的 @errorhandler装饰器。
@api.errorhandler(RootException)def handle_root_exception(error):'''Return a custom message and 400 status code'''return {'message': 'What you want'}, 400@api.errorhandler(CustomException)def handle_custom_exception(error):'''Return a custom message and 400 status code'''return {'message': 'What you want'}, 400@api.errorhandler(AnotherException)def handle_another_exception(error):'''Return a custom message and 500 status code'''return {'message': error.specific}@api.errorhandler(FakeException)def handle_fake_exception_with_header(error):'''Return a custom message and 400 status code'''return {'message': error.message}, 400, {'My-Header': 'Value'}@api.errorhandler(NoResultFound)def handle_no_result_exception(error):'''Return a custom not found error message and 404 status code'''return {'message': error.specific}, 404
提示:
一个带有描述的“未找到结果(NoResultFound)”异常是 OpenAPI 2.0规范所规定的。处理机种的文档字符串(docstring)(译者:就是那坨三引号)将会被输出到swagger.json中作为描述。
你也可以专门为异常编写文档:
@api.errorhandler(FakeException)@api.marshal_with(error_fields, code=400)@api.header('My-Header', 'Some description')def handle_fake_exception_with_header(error):'''This is a custom error'''return {'message': error.message}, 400, {'My-Header': 'Value'}@api.route('/test/')class TestResource(Resource):def get(self):'''Do something:raises CustomException: In case of something'''pass
在这个例子里,:raises:字符串将会被自动提取并填充至文档400错误处。
你只需要在使用时忽略参数,就可以重写默认的 errorhandler:
@api.errorhandlerdef default_error_handler(error):'''Default error handler'''return {'message': str(error)}, getattr(error, 'code', 500)
提示:
Flask-RESTPlus 默认会返回一个带消息的错误信息。如果你在自定义一个错误响应并且不需要消息字段的话,你可以在配置文件中将
ERROR_INCLUDE_MESSAGE改为False以禁用消息字段。
errorhandler也可以在命名空间中注册。在命名空间中注册的处理机将会覆盖在 Api 中注册的处理机。
ns = Namespace('cats', description='Cats related operations')@ns.errorhandlerdef specific_namespace_error_handler(error):'''Namespace error handler'''return {'message': str(error)}, getattr(error, 'code', 500)
Postman
为了方便你测试,你可以将你的API导出为一个 Postman 集合(Postman collection)。
from flask import jsonfrom myapp import apiurlvars = False # Build query strings in URLsswagger = True # Export Swagger specificationsdata = api.as_postman(urlvars=urlvars, swagger=swagger)print(json.dumps(data))
项目扩展
本章涵盖构建稍微复杂一些的Flask-RESTPlus应用程序,该程序将为在实际部署一个基于Flask-RESTPlus的应用程序前提供一些最佳的实践。快速开始 章节更加适合第一次接触Flask-RESTPlus的人,所以如果你是Flask-RESTPlus的初学者请先查看快速开始章节。
多命名空间
这里有很多种方法组织你的Flask-RESTPlus应用程序代码,而下面我们将介绍一种在大型应用程序种保持良好的组织性和优秀的可扩展性的一种方法。
Flask-RESTPlus 提供了一种几乎与 Flask蓝图(Flask’s blueprint)相同的功能。它的主要思路是将应用程序分割为多个可重用的 命名空间(Namespace)。
下面是一个目录结构的例子:
project/├── app.py├── core│ ├── __init__.py│ ├── utils.py│ └── ...└── apis├── __init__.py├── namespace1.py├── namespace2.py├── ...└── namespaceX.py
app 模块将作为一个遵循经典的Flask模式之一(详见 Larger Applications and Application Factories)的主程序入口(entry point)。
core 模块包含了事务逻辑。实际上你爱叫啥叫啥,甚至可以是很多个包。
apis 模块将作为你的API的主入口,你需要在这里导入并注册你的应用程序,而命名空间模块就按照你平时写Flask蓝图的时候写就行。
一个命名空间的模块要包含模型和资源类的声明。举个例子:
from flask_restplus import Namespace, Resource, fieldsapi = Namespace('cats', description='Cats related operations')cat = api.model('Cat', {'id': fields.String(required=True, description='The cat identifier'),'name': fields.String(required=True, description='The cat name'),})CATS = [{'id': 'felix', 'name': 'Felix'},]@api.route('/')class CatList(Resource):@api.doc('list_cats')@api.marshal_list_with(cat)def get(self):'''List all cats'''return CATS@api.route('/<id>')@api.param('id', 'The cat identifier')@api.response(404, 'Cat not found')class Cat(Resource):@api.doc('get_cat')@api.marshal_with(cat)def get(self, id):'''Fetch a cat given its identifier'''for cat in CATS:if cat['id'] == id:return catapi.abort(404)
apis.__init__ 模块应该用于整合他们:
from flask_restplus import Apifrom .namespace1 import api as ns1from .namespace2 import api as ns2# ...from .namespaceX import api as nsXapi = Api(title='My Title',version='1.0',description='A description',# All API metadatas)api.add_namespace(ns1)api.add_namespace(ns2)# ...api.add_namespace(nsX)
你可以在注册API的时候为你的命名空间添加 网址前缀(url-prefixes) 。你不需要在定义命名空间对象的时候指定 网址前缀(url-prefixes) 。
from flask_restplus import Apifrom .namespace1 import api as ns1from .namespace2 import api as ns2# ...from .namespaceX import api as nsXapi = Api(title='My Title',version='1.0',description='A description',# All API metadatas)api.add_namespace(ns1, path='/prefix/of/ns1')api.add_namespace(ns2, path='/prefix/of/ns2')# ...api.add_namespace(nsX, path='/prefix/of/nsX')
用这种模式,你只需要在 app.py 中这样注册你的API即可:
from flask import Flaskfrom apis import apiapp = Flask(__name__)api.init_app(app)app.run(debug=True)
使用蓝图
查看Flask文档中的 “使用蓝图进行模块化编程( Modular Applications with Blueprints)” 以了解什么是蓝图和为什么使用蓝图。以下是一个将 Api 链接到 蓝图(Blueprint) 上的例子:
from flask import Blueprintfrom flask_restplus import Apiblueprint = Blueprint('api', __name__)api = Api(blueprint)# ...
使用蓝图将使你可以将你的API挂载到任何网址前缀(url-prefixes)下,如/或你的应用程序的子域名:
from flask import Flaskfrom apis import blueprint as apiapp = Flask(__name__)app.register_blueprint(api, url_prefix='/api/1')app.run(debug=True)
提示:
由于在注册蓝图的时候会处理应用程序的路由设置,所以不需要调用 Api.init_app() 。
提示:
在使用蓝图时,请记住调用 url_for() 时加上蓝图名:
# without blueprinturl_for('my_api_endpoint')# with blueprinturl_for('api.my_api_endpoint')
具有可重用名称空间的多个API(Multiple APIs with reusable namespaces)
有时候你可能需要维护一个API的多个版本。如果你使用的时命名空间来搭建你的API,那么将其扩展成多个API是个很简单的事情。
根据先前的布局,我们可以将其迁移到以下目录结构:
project/├── app.py├── apiv1.py├── apiv2.py└── apis├── __init__.py├── namespace1.py├── namespace2.py├── ...└── namespaceX.py
每个 apivX.py 都拥有如下的结构:
from flask import Blueprintfrom flask_restplus import Apiapi = Api(blueprint)from .apis.namespace1 import api as ns1from .apis.namespace2 import api as ns2# ...from .apis.namespaceX import api as nsXblueprint = Blueprint('api', __name__, url_prefix='/api/1')api = Api(blueprinttitle='My Title',version='1.0',description='A description',# All API metadatas)api.add_namespace(ns1)api.add_namespace(ns2)# ...api.add_namespace(nsX)
而 app 将这样挂载它们:
from flask import Flaskfrom api1 import blueprint as api1from apiX import blueprint as apiXapp = Flask(__name__)app.register_blueprint(api1)app.register_blueprint(apiX)app.run(debug=True)
这些只是建议,你可以根据你的需求随意修改。查看 github repository examples folder 获取更多完整实例。
完整实例
下面是 TodoMVC 的完整API实例:
from flask import Flaskfrom flask_restplus import Api, Resource, fieldsfrom werkzeug.contrib.fixers import ProxyFixapp = Flask(__name__)app.wsgi_app = ProxyFix(app.wsgi_app)api = Api(app, version='1.0', title='TodoMVC API',description='A simple TodoMVC API',)ns = api.namespace('todos', description='TODO operations')todo = api.model('Todo', {'id': fields.Integer(readonly=True, description='The task unique identifier'),'task': fields.String(required=True, description='The task details')})class TodoDAO(object):def __init__(self):self.counter = 0self.todos = []def get(self, id):for todo in self.todos:if todo['id'] == id:return todoapi.abort(404, "Todo {} doesn't exist".format(id))def create(self, data):todo = datatodo['id'] = self.counter = self.counter + 1self.todos.append(todo)return tododef update(self, id, data):todo = self.get(id)todo.update(data)return tododef delete(self, id):todo = self.get(id)self.todos.remove(todo)DAO = TodoDAO()DAO.create({'task': 'Build an API'})DAO.create({'task': '?????'})DAO.create({'task': 'profit!'})@ns.route('/')class TodoList(Resource):'''Shows a list of all todos, and lets you POST to add new tasks'''@ns.doc('list_todos')@ns.marshal_list_with(todo)def get(self):'''List all tasks'''return DAO.todos@ns.doc('create_todo')@ns.expect(todo)@ns.marshal_with(todo, code=201)def post(self):'''Create a new task'''return DAO.create(api.payload), 201@ns.route('/<int:id>')@ns.response(404, 'Todo not found')@ns.param('id', 'The task identifier')class Todo(Resource):'''Show a single todo item and lets you delete them'''@ns.doc('get_todo')@ns.marshal_with(todo)def get(self, id):'''Fetch a given resource'''return DAO.get(id)@ns.doc('delete_todo')@ns.response(204, 'Todo deleted')def delete(self, id):'''Delete a task given its identifier'''DAO.delete(id)return '', 204@ns.expect(todo)@ns.marshal_with(todo)def put(self, id):'''Update a task given its identifier'''return DAO.update(id, api.payload)if __name__ == '__main__':app.run(debug=True)
你可以在 github repository examples folder 获取更多完整实例。

若有收获,就点个赞吧
0 人点赞


