2.1 MyBatis框架简介
JDBC是Java程序实现数据访问的基础,它提供了一套数据库操作API。JDBC连接数据库比较繁琐,并且需要编写大量Java程序代码操作数据库。
- 频繁地创建、释放数据库连接会造成系统资源浪费,从而影响系统性能。
- 代码中的SQL语句写在Java代码中(硬编码),而SQL变化可能性比较大,会造成代码频繁修改,不易于维护。
1、什么是Mybatis框架
MyBatis 是支持定制化 SQL、存储过程以及高级映射(ORM)的优秀的持久层框架。MyBatis 避免了几乎所有的 JDBC 代码和手动设置参数以及获取结果集。MyBatis 可以对配置和原生SQL使用简单的 XML 配置或注解,将接口和 Java 的 POJOs(Plain Old Java Objects,普通的 Java对象)映射成数据库中的记录。
2、MyBatis的优缺点
(1)优点
- 简单易学:本身就很小且简单。没有任何第三方依赖,最简单安装只要2个jar文件+配置几个sql映射文件,易于使用,通过文档和源代码,可以比较完全的掌握它的设计思路和实现。
- 灵活:MyBatis不会对应用程序或者数据库的现有设计强加任何影响。 sql写在xml里,便于统一管理和优化。通过sql基本上可以实现我们不使用数据访问框架可以实现的所有功能,或许更多。
- 解除sql与程序代码的耦合:将业务逻辑和数据访问逻辑分离,使系统的设计更清晰,更易维护,更易单元测试。sql和代码的分离,提高了可维护性。
- 提供映射标签,支持对象与数据库的orm字段关系映射,支持对象关系的维护。
- 支持编写动态sql。
(2)缺点
- 编写SQL语句时工作量很大,尤其是字段多、关联表多时,更是如此。
- SQL语句依赖于数据库,导致数据库移植性差,不能更换数据库。
2.2 Spring Boot整合MyBatis环境搭建
在开发中,Spring Boot在简化项目开发和实现自动化配置的基础上,对数据库的访问操作提供了非常好的整合支持。2.2.1 引入依赖启动器
<dependency><groupId>org.mybatis.spring.boot</groupId><artifactId>mybatis-spring-boot-starter</artifactId><version>2.2.2</version></dependency><dependency><groupId>mysql</groupId><artifactId>mysql-connector-java</artifactId><scope>runtime</scope></dependency><dependency><groupId>com.alibaba</groupId><artifactId>druid-spring-boot-starter</artifactId><version>1.1.10</version></dependency><dependency><groupId>org.projectlombok</groupId><artifactId>lombok</artifactId><optional>true</optional></dependency>
2.2.2核心配置
映射文件:MyBatis消除了JDBC代码,用XML标签来配置SQL,即SQL语句配置在XML文件中,也就是映射文件。MyBatis需要加载这些映射文件,所以指定映射文件的保存位置 ,否则会报异常(方法绑定声明无效)。spring:datasource:type: com.alibaba.druid.pool.DruidDataSourceusername: rootpassword: 123456url: jdbc:mysql://localhost:3306/hcy?useUnicode=true&characterEncoding=UTF-8&serverTimezone=Asia/Shanghaimvc:pathmatch:matching-strategy: ant_path_matcherserver:port: 8080compression:enabled: truemybatis:configuration:log-impl: org.apache.ibatis.logging.stdout.StdOutImpl#标注待解析的mapper的xml文件位置mapper-locations: classpath:mapper/*.xml#配置映射类所在的包名type-aliases-package: com.example.demo.entity
本项目映射文件保存在src/resources/mapper目录下。
2.2.3 创建Mapper接口并扫描Mapper接口
1.MyBatis中的mapper接口相当于以前的dao。但是区别在于,mapper仅仅是接口,我们不需要提供实现类public interface EmployeeMapper {List<Employee> selectAll();}
- MyBatis消除了JDBC代码,SQL语句写在映射文件中,即Dao层接口不用写实现类,可以
- 在接口类上添加了@Mapper,在编译之后会生成相应的接口实现类。这样每一个Dao层接口都要加上@Mapper注解。
- 在SpringBoot启动类中加 @MapperScan(“dao包名”) 注解,这样会比较方便,不需要对每个Mapper都添加@Mapper注解。
建议使用第2种方法:
@SpringBootApplication@MapperScan(basePackages = "com.example.demo.mapper")public class DemoApplication {public static void main(String[] args) {SpringApplication.run(DemoApplication.class, args);}}
2.2.4 MyBatis映射文件
MyBatis真正强大之处在于可以配置SQL映射语句。相比于JDBC,MyBatis专注于SQL语句。
- 映射文件的命名规则
- 表所对应的实体类的类名+Mapper.xml
- 例如:表t_user,映射的实体类为User,所对应的映射文件为UserMapper.xml
- 因此一个映射文件对应一个实体类,对应一张表的操作
- MyBatis映射文件用于编写SQL,访问以及操作表中的数据
- MyBatis映射文件存放的位置是src/main/resources/mappers目录下
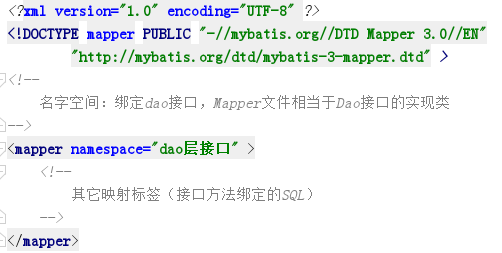
- MyBatis中可以面向接口操作数据,要保证两个一致
- mapper接口的全类名和映射文件的命名空间(namespace)保持一致
- mapper接口中方法的方法名和映射文件中编写SQL的标签的id属性保持一致
2.2.5 CRUD
查询
<?xml version="1.0" encoding="UTF-8" ?><!DOCTYPE mapper PUBLIC "-//mybatis.org//DTD Mapper 3.0//EN" "http://mybatis.org/dtd/mybatis-3-mapper.dtd" ><mapper namespace="com.example.demo.mapper.EmployeeMapper" ><select id="selectAll" resultType="com.example.demo.entity.Employee" >selectname,gender,birthday,idCardfrom employee</select></mapper>
插入
<insert id="insertEmp" parameterType="com.example.demo.entity.Employee">insert into employee (name,gender,birthday,idCard)values (#{name},#{gender},#{birthday},#{idCard})</insert>
```java /**
- 添加 */ @Test void add() { Employee e = new Employee(); e.setName(“111”); e.setGender(“男”); e.setBirthday(new Date()); e.setIdCard(“1111111”); employeeMapper.insertEmp(e); } ```
更新
<update id="updateEmpByPrimaryKey" parameterType="com.example.demo.entity.Employee">update employeeset name = #{name}where id = #{id}</update>
/*** 更新*/@Testvoid update() {Employee e = new Employee();e.setId(1942);e.setName("11111");employeeMapper.updateEmpByPrimaryKey(e);}
删除
<delete id="delEmp" parameterType="java.lang.Integer">delete from employee where id = #{id}</delete>
```java /**
- 删除
*/
@Test
void delete() {
employeeMapper.delEmp(1942);
}
<a name="ZxeCy"></a>## 2.2.6 高级(动态查询,动态插入,批量插入,动态更新,批量删除,模糊查询)**1.动态查询**```xml<select id="getTotal" resultType="java.lang.Long">select count(*) from employee e<where><if test="emp!=null"><if test="emp.name !=null and emp.name!=''">and e.name like concat('%',#{emp.name},'%')</if><if test="emp.departmentId !=null">and e.departmentId =#{emp.departmentId}</if></if><if test="beginDateScope !=null">and e.beginDate between #{beginDateScope[0]} and #{beginDateScope[1]}</if></where></select>
Long getTotal(@Param("emp") Employee employee, @Param("beginDateScope") String[] beginDateScope);
/*** 动态查询*/@Testvoid selectby() {Employee e = new Employee();e.setName("存亮");e.setDepartmentId(92);String[] s = {"2018-01-01","2018-02-01"};System.out.println(employeeMapper.getTotal(e,s));}
动态插入
<insert id="insertCardWithId" parameterType="com.example.demo.entity.Employee">insert into employee<trim prefix="(" suffix=")" suffixOverrides=",">name,gender,<if test="null != birthday and ''!= birthday">birthday,</if>idCard</trim>VALUES<trim prefix="(" suffix=")" suffixOverrides=",">#{name},#{gender},<if test="null != birthday and ''!=birthday">#{birthday},</if>#{idCard}</trim></insert>
int insertCardWithId(Employee e);
```xml /**
动态插入 */ @Test void insertCardWithId() { Employee e = new Employee(); e.setName(“111”); e.setGender(“男”); // e.setBirthday(new Date()); e.setIdCard(“1111111”);
employeeMapper.insertCardWithId(e); }
3. **批量插入**```java<insert id="insertBatch" parameterType="java.util.List">INSERT INTO employee(name, gender,birthday,idCard)VALUES<foreach collection ="empList" item="emp" separator =",">(#{emp.name}, #{emp.gender}, #{emp.birthday},#{emp.idCard})</foreach ></insert>
int insertBatch(@Param("empList") List<Employee> empList);
/*** 批量插入*/@Testvoid insertBatchTest() {Employee e = new Employee();e.setName("111");e.setGender("男");e.setBirthday(new Date());e.setIdCard("1111111");Employee e1 = new Employee();e1.setName("111");e1.setGender("男");e1.setBirthday(new Date());e1.setIdCard("1111111");List<Employee> emplist = new ArrayList<>();emplist.add(e);emplist.add(e1);employeeMapper.insertBatch(emplist);}
4.动态更新
<update id="updateByPrimaryKeySelective" parameterType="com.example.demo.entity.Employee">update employee<set><if test="name != null">name = #{name,jdbcType=VARCHAR},</if><if test="gender != null">gender = #{gender,jdbcType=CHAR},</if><if test="birthday != null">birthday = #{birthday,jdbcType=DATE},</if><if test="idCard != null">idCard = #{idCard,jdbcType=CHAR}</if></set>where id = #{id,jdbcType=INTEGER}</update>
int updateByPrimaryKeySelective(Employee e);
/*** 动态插入*/@Testvoid updateByPrimaryKeySelective() {Employee e = new Employee();e.setId(1946);e.setName("111");e.setGender("女");e.setBirthday(new Date());e.setIdCard("1111111");employeeMapper.updateByPrimaryKeySelective(e);}
批量删除
<delete id="deleteByIds">DELETE FROM employee WHERE id IN (<foreach collection="array" item="id" separator=",">#{id}</foreach>)</delete>
int deleteByIds(int[] ids);
/*** 批量删除*/@Testvoid deleteByIds() {int[] ids = {1946,1947};employeeMapper.deleteByIds(ids);}
2.2.7 关联查询
查询部门名称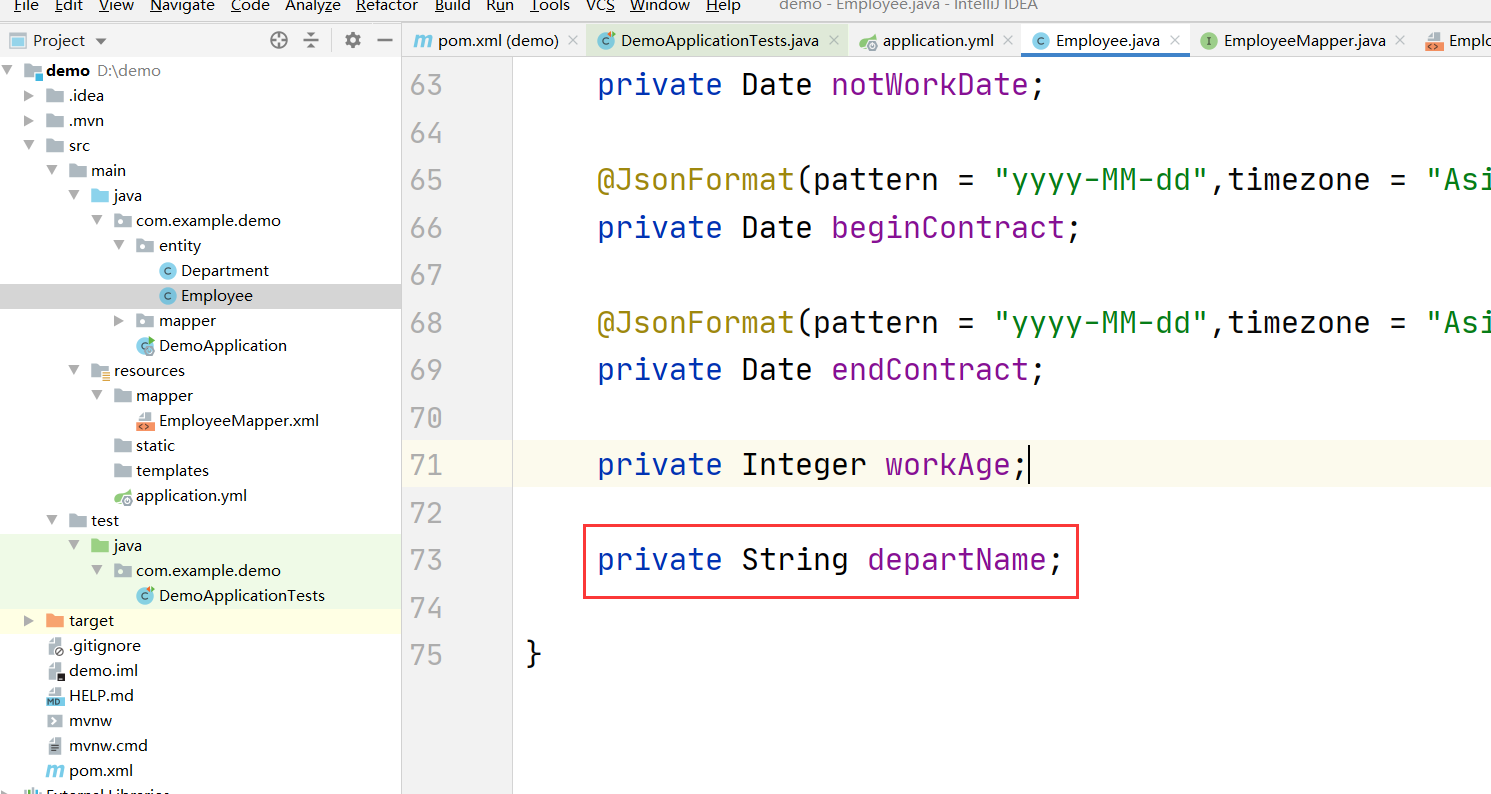
<select id="selectDeptName" resultType="com.example.demo.entity.Employee">selecte.name,e.gender,e.birthday,e.idCard,d.name as departNamefrom employee e left join department d on e.departmentId = d.id limit 10</select>
List<Employee> selectDeptName();
/*** 关联查询*/@Testvoid selectDeptName() {List<Employee> emplist = employeeMapper.selectDeptName();for(Employee e : emplist){System.out.println(e.getDepartName());}}
2.2.7 分页查询
PageHelper
pom.xml
<dependency><groupId>com.github.pagehelper</groupId><artifactId>pagehelper-spring-boot-starter</artifactId><version>1.4.1</version></dependency>
- 测试 ```java /**
- 分页查询
*/
@Test
void selectPage() {
// 开启分页插件,放在查询语句上面 帮助生成分页语句(核心程序)
int pageNum = 1;
int pageSize = 20;
PageHelper.startPage(pageNum, pageSize); //底层实现原理采用改写语句 将下面的方法中的sql语句获取到然后做个拼接 limit
List
empList = employeeMapper.selectAll(); // 封装分页之后的数据 返回给客户端展示 PageInfo做了一些封装 作为一个类 PageInfo pageInfo = new PageInfo (empList); //所有分页属性都可以冲pageInfo拿到; pageInfo.getList().forEach(System.out::println); } ```

若有收获,就点个赞吧
0 人点赞
