上传
使用 fetch 进行上传
利用一个 input 标签外加 fetch 函数就可以实现最简单的文件上传。代码如下所示:
var formData = new FormData();var fileField = document.querySelector("input[type='file']");formData.append('username', 'abc123');formData.append('avatar', fileField.files[0]);fetch('https://example.com/profile/avatar', {method: 'PUT',body: formData}).then(response => response.json()).catch(error => console.error('Error:', error)).then(response => console.log('Success:', response));
代码参考:https://developer.mozilla.org/en-US/docs/Web/API/Fetch_API/Using_Fetch#Uploading_a_file
使用 antd 的 Upload 组件进行上传
比起直接手写上传代码,更加推荐使用 antd 的 Upload 组件:封装度高,同时具备丰富的交互效果。
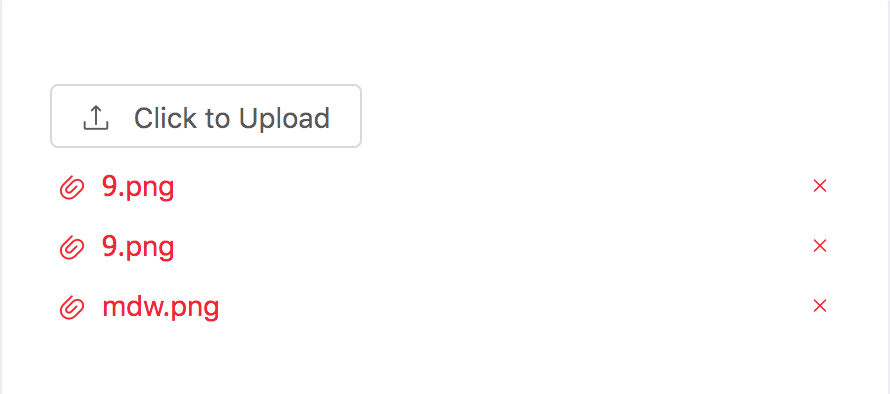
一个最简单的 Upload 代码示例如下:
import { Upload, message, Button, Icon } from 'antd';const props = {name: 'file',action: '//jsonplaceholder.typicode.com/posts/',onChange(info) {if (info.file.status !== 'uploading') {console.log(info.file, info.fileList);}if (info.file.status === 'done') {message.success(`${info.file.name} file uploaded successfully`);} else if (info.file.status === 'error') {message.error(`${info.file.name} file upload failed.`);}},};ReactDOM.render(<Upload {...props}><Button><Icon type="upload" /> Click to Upload</Button></Upload>,mountNode);
Upload 组件内置了自己的 HTTP 请求类库,你也可以使用 customRequest 属性自定义上传过程。
下载
使用 a 标签实现文件下载
是的,你没看错,只要一个 a 标签,就可以实现文件下载了!代码示例如下:
<a href="http://somehost/somefile.zip" download="filename.zip">Download file</a>
- href: 下载地址
- download: 文件名
使用 fetch 实现文件下载
这个过程其实就是使用 fetch 去模拟 a 标签的下载过程,代码示例如下:
fetch('http://somehost/somefile.zip').then(res => res.blob()).then(blob => {var a = document.createElement('a');var url = window.URL.createObjectURL(blob);var filename = 'myfile.zip';a.href = url;a.download = filename;a.click();window.URL.revokeObjectURL(url);}))
- 第一步,fetch 一个接口获取其内容并转成 blob 对象。
- 第二步,将 blob 对象使用 createObjectURL 方法转化成 ObjectURL,等同于一个下载地址链接。
- 第三步,创建一个 a 标签,并赋予 ObjectURL 且执行一次 click。
- 第四步,通过 revokeObjectURL 回收 ObjectURL。
参考并鸣谢:如何用 JavaScript 下载文件 ❤️

若有收获,就点个赞吧
0 人点赞
